VIVA ECR POS - Full User Documentation
This guide is written for staff and daily users. It explains how the app works in simple, practical language and keeps the focus on everyday use.
Table of Contents
- VIVA ECR POS - Full User Documentation
Project Overview
VIVA ECR POS is a point-of-sale system designed to support the daily operations of retail stores, restaurants, and service businesses.
🔹 What the system does
- Manage sales and payments
- Handle tables and dine-in service
- Organize products and categories
- Manage users and staff
- Generate reports and analytics
- Configure devices and system settings
🔹 Designed for daily use
- Enables staff to:
- Create orders quickly
- Process payments efficiently
- Handle refunds بسهولة
- Review transaction history
- Manage table service smoothly
- Allows supervisors to:
- Control system settings
- Manage users and permissions
- Monitor reports and performance
- Handle synchronization and tax setup
🔹 Flexible and responsive
- Works on both:
- ECR devices
- POS terminals
- Adapts layout based on screen size and hardware
- Provides a consistent and smooth user experience
🔹 System modes
-
Station
- Main device controlling the system
- Handles data and operations
-
Terminal
- Secondary device (e.g., waiter tablet)
- Sends orders to the Station via local network
-
All-In-One Mode
- Runs بالكامل على جهاز واحد
- No internet or external server required
🔹 Overall goal
-
Deliver a complete workflow:
- From login and setup
- To sales and payments
- To management and reporting
-
Focus on:
- Simplicity
- Speed
- Practical daily usage


1. First Step
The first step prepares the app for the correct device, region, and user access.
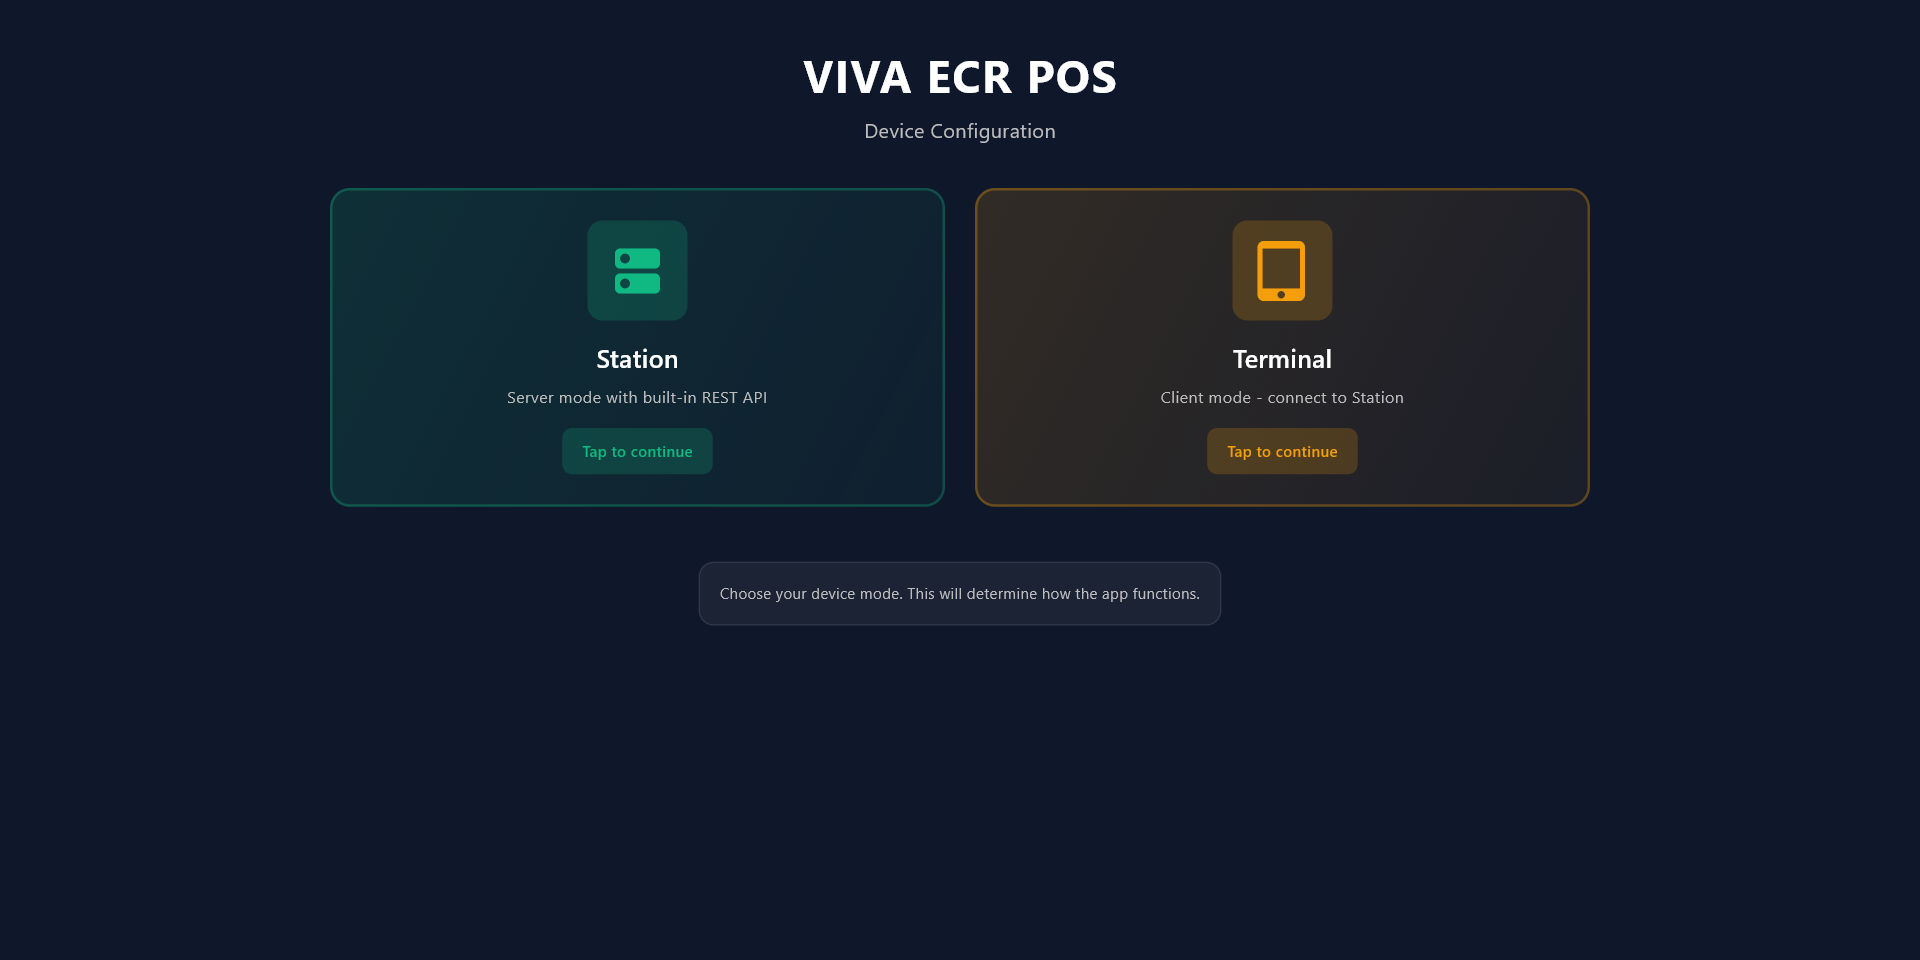
1.1 Device Selection Screen
Choose how this device will be used before entering the app.
- Station is the main device used at the counter or back office.
- Terminal is the secondary device used by waiter staff.
How to use:
- Open the app.
- Select Station or Terminal.
- Tap to continue.
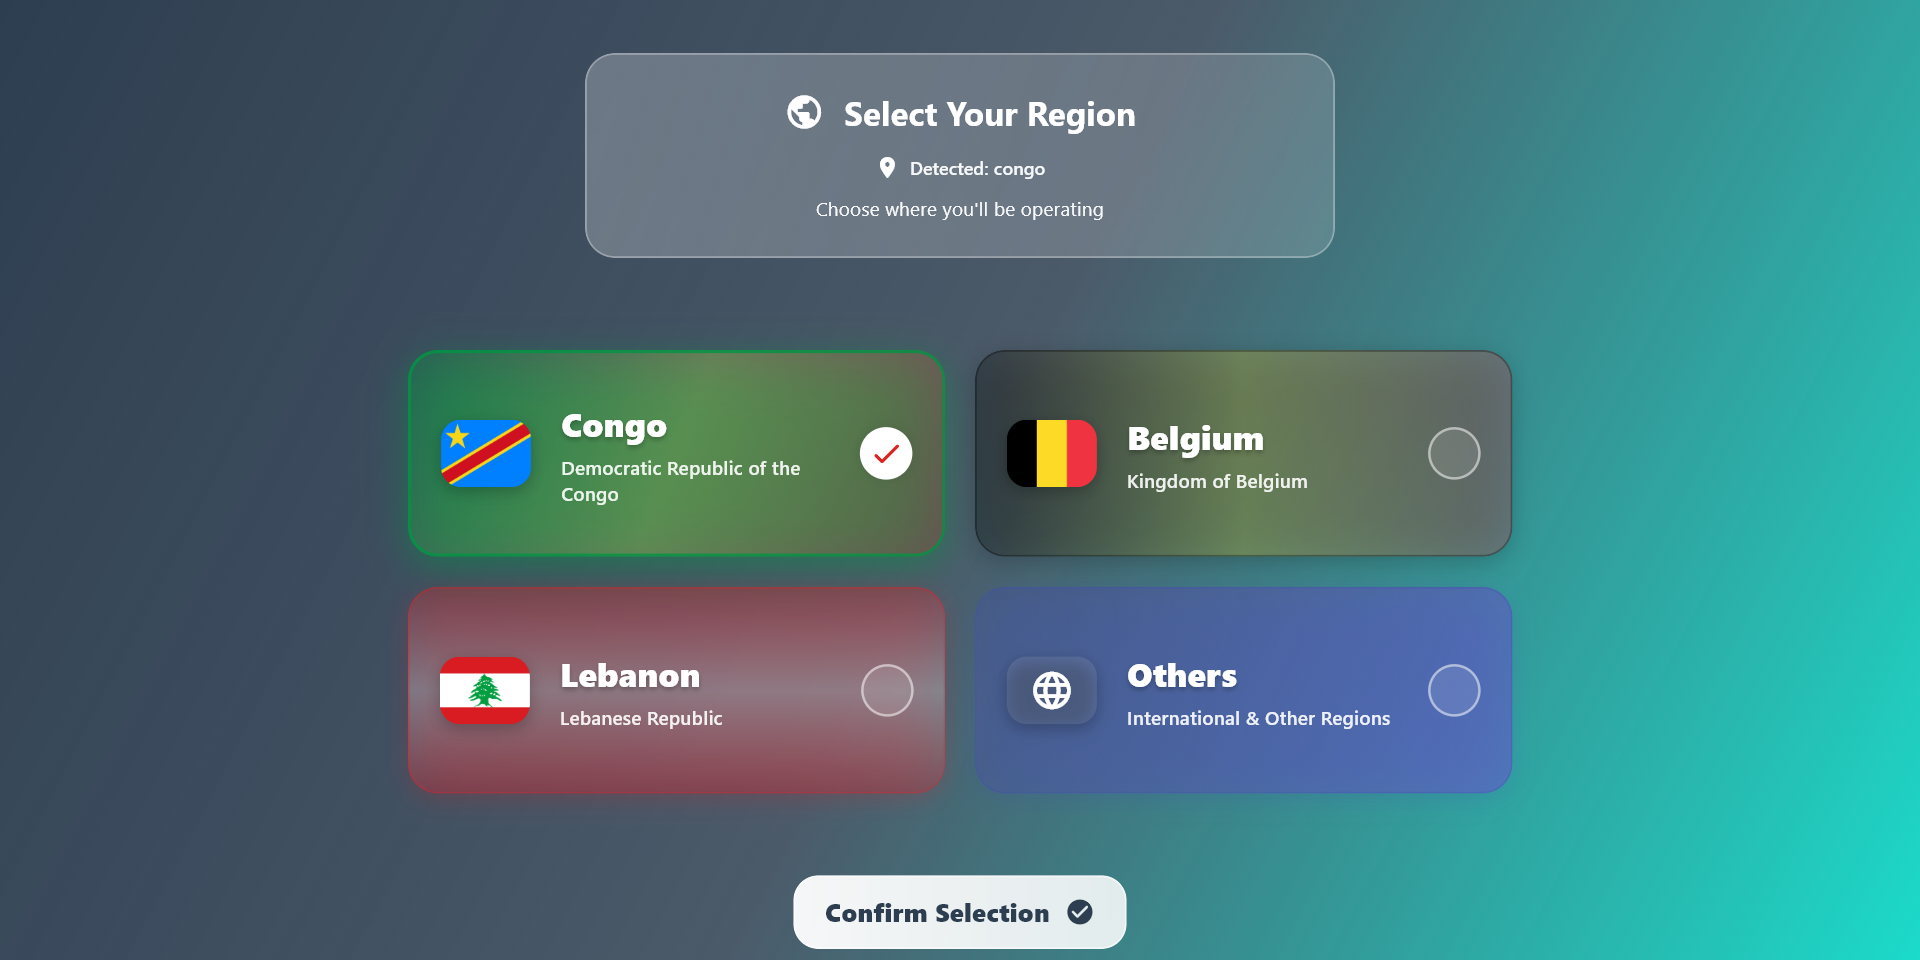
1.2 Region Selection
Pick the region where your business operates so the app can follow the right sales flow.
- Congo
- Belgium
- Lebanon
- Others
How to use:
- Select one region.
- Review the detected region if it appears.
- Tap Confirm Selection.
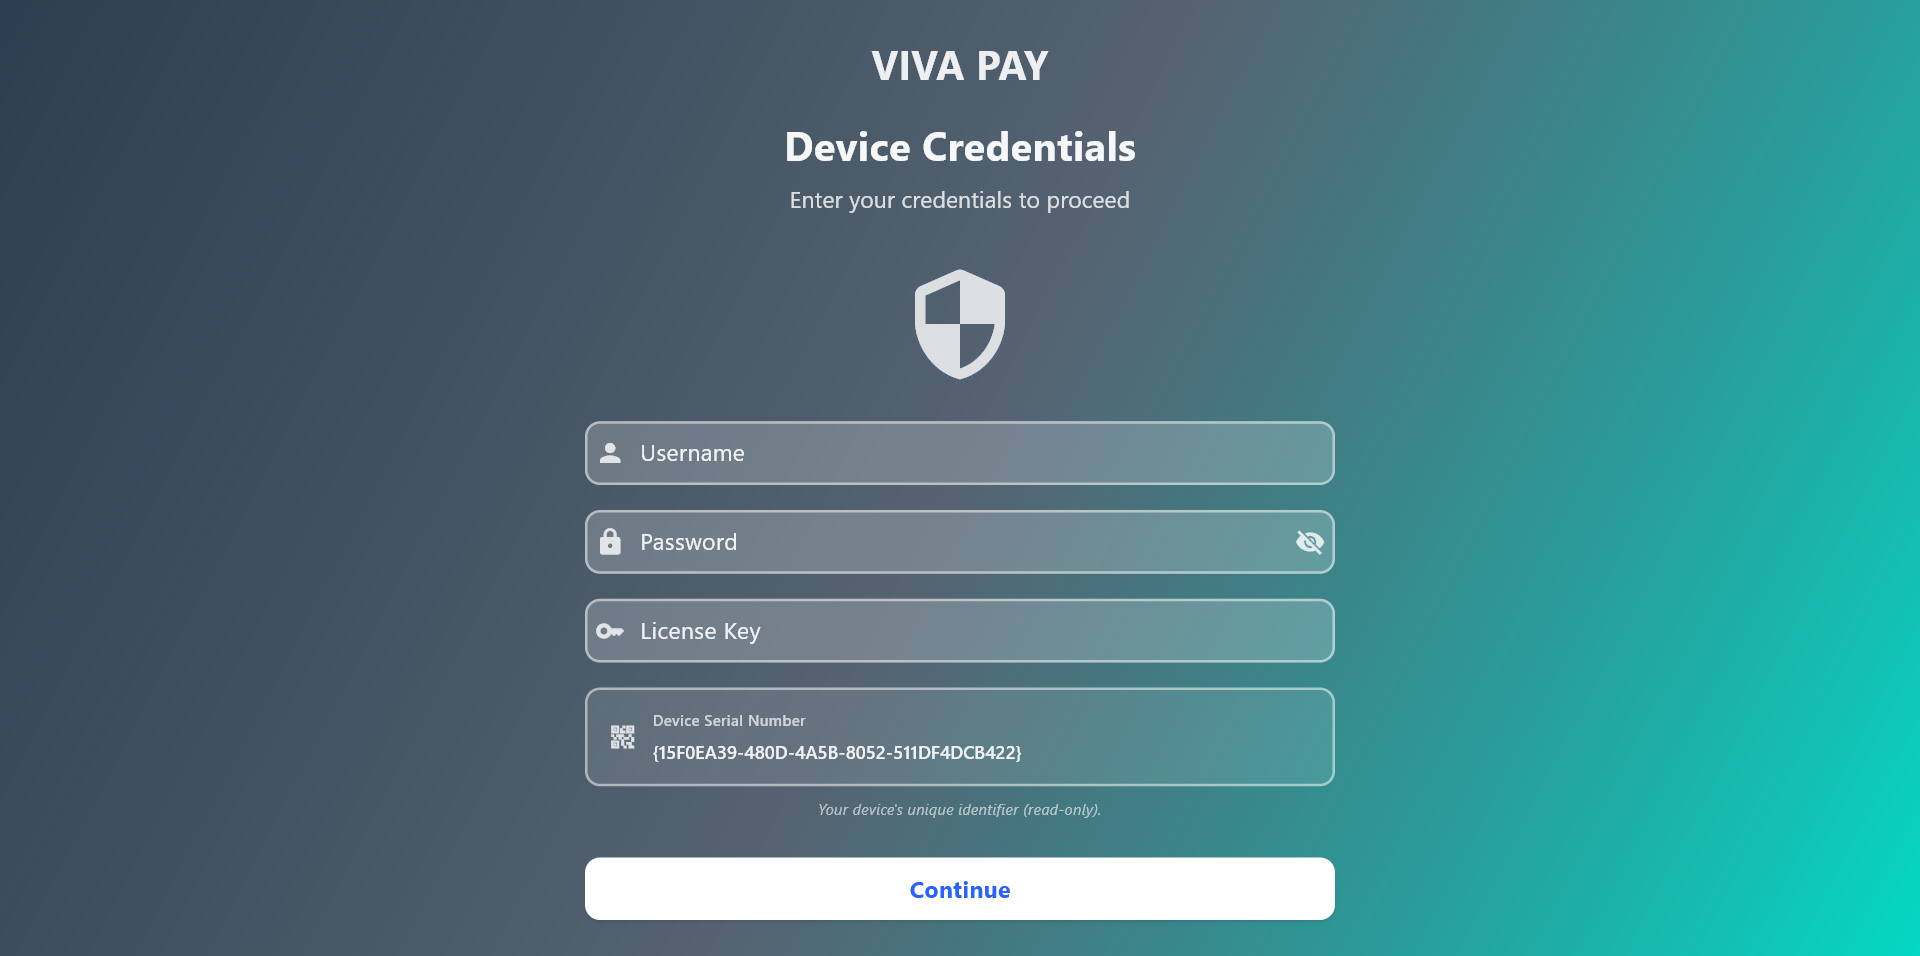
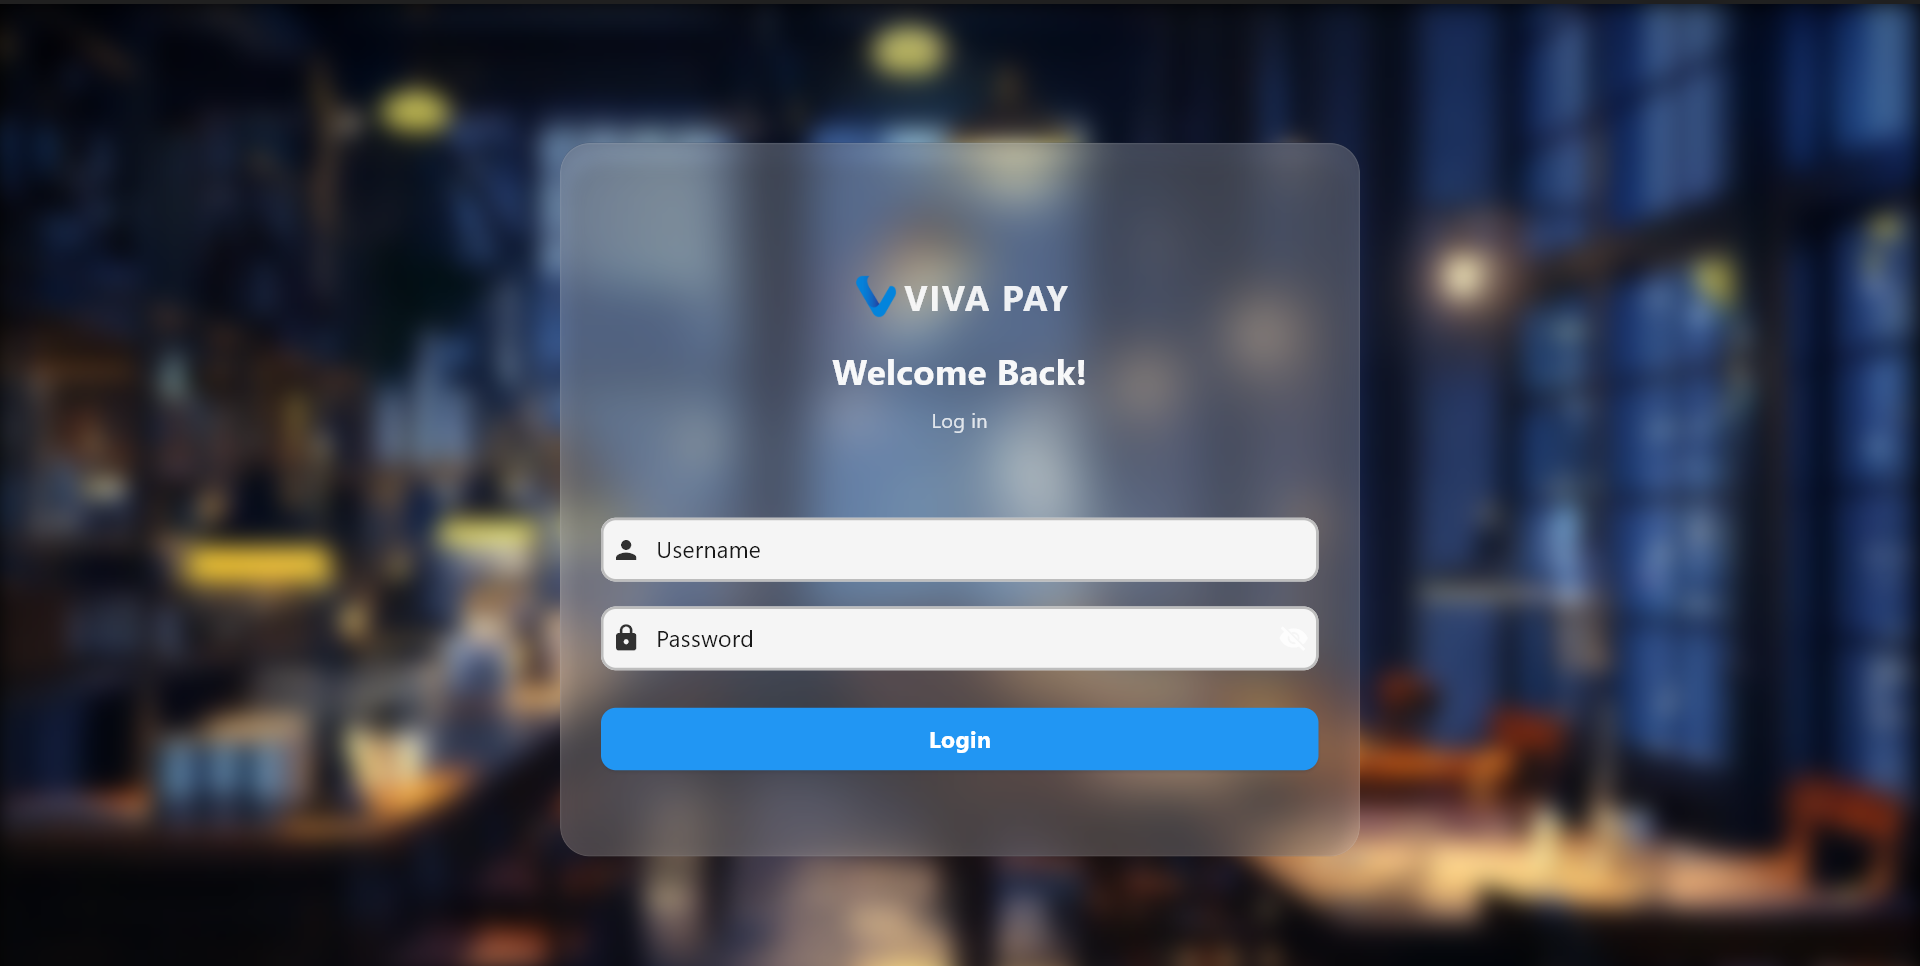
1.3 Authentication
Authentication appears before entering the app and confirms that the right user or device is signing in.
What you may see:
- A user login screen for staff access
- A device credentials screen for first-time setup or device access
How to use:
- Enter the required credentials.
- Check that the details are correct.
- Continue to open the app.
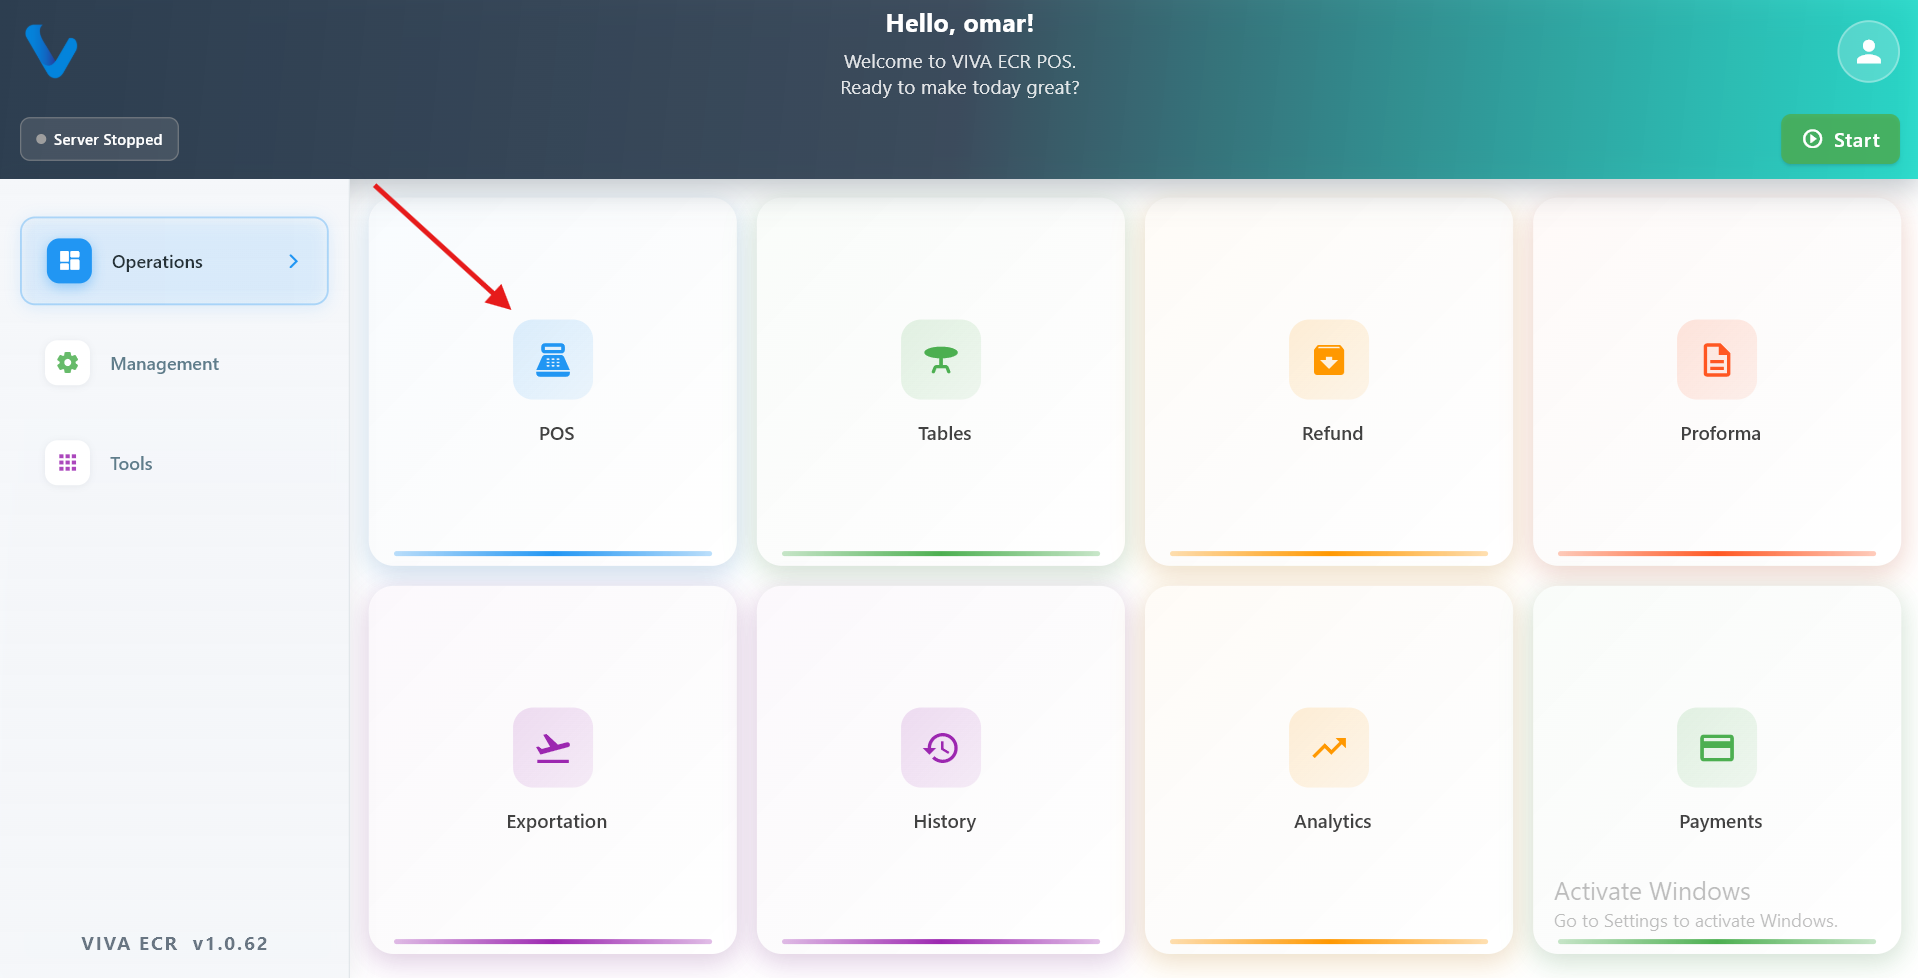
2. Operations Section
This section is used during sales and daily front-of-house work.
2.1 POS
The POS screen is where staff build orders, review the cart, and complete the sale.
What you can do:
- Browse products by category
- Add and remove items from the cart
- Review subtotal, VAT, and total
- Proceed to payment when the order is ready
Typical flow:
- Select a category.
- Add products to the cart.
- Review the totals.
- Continue to payment.
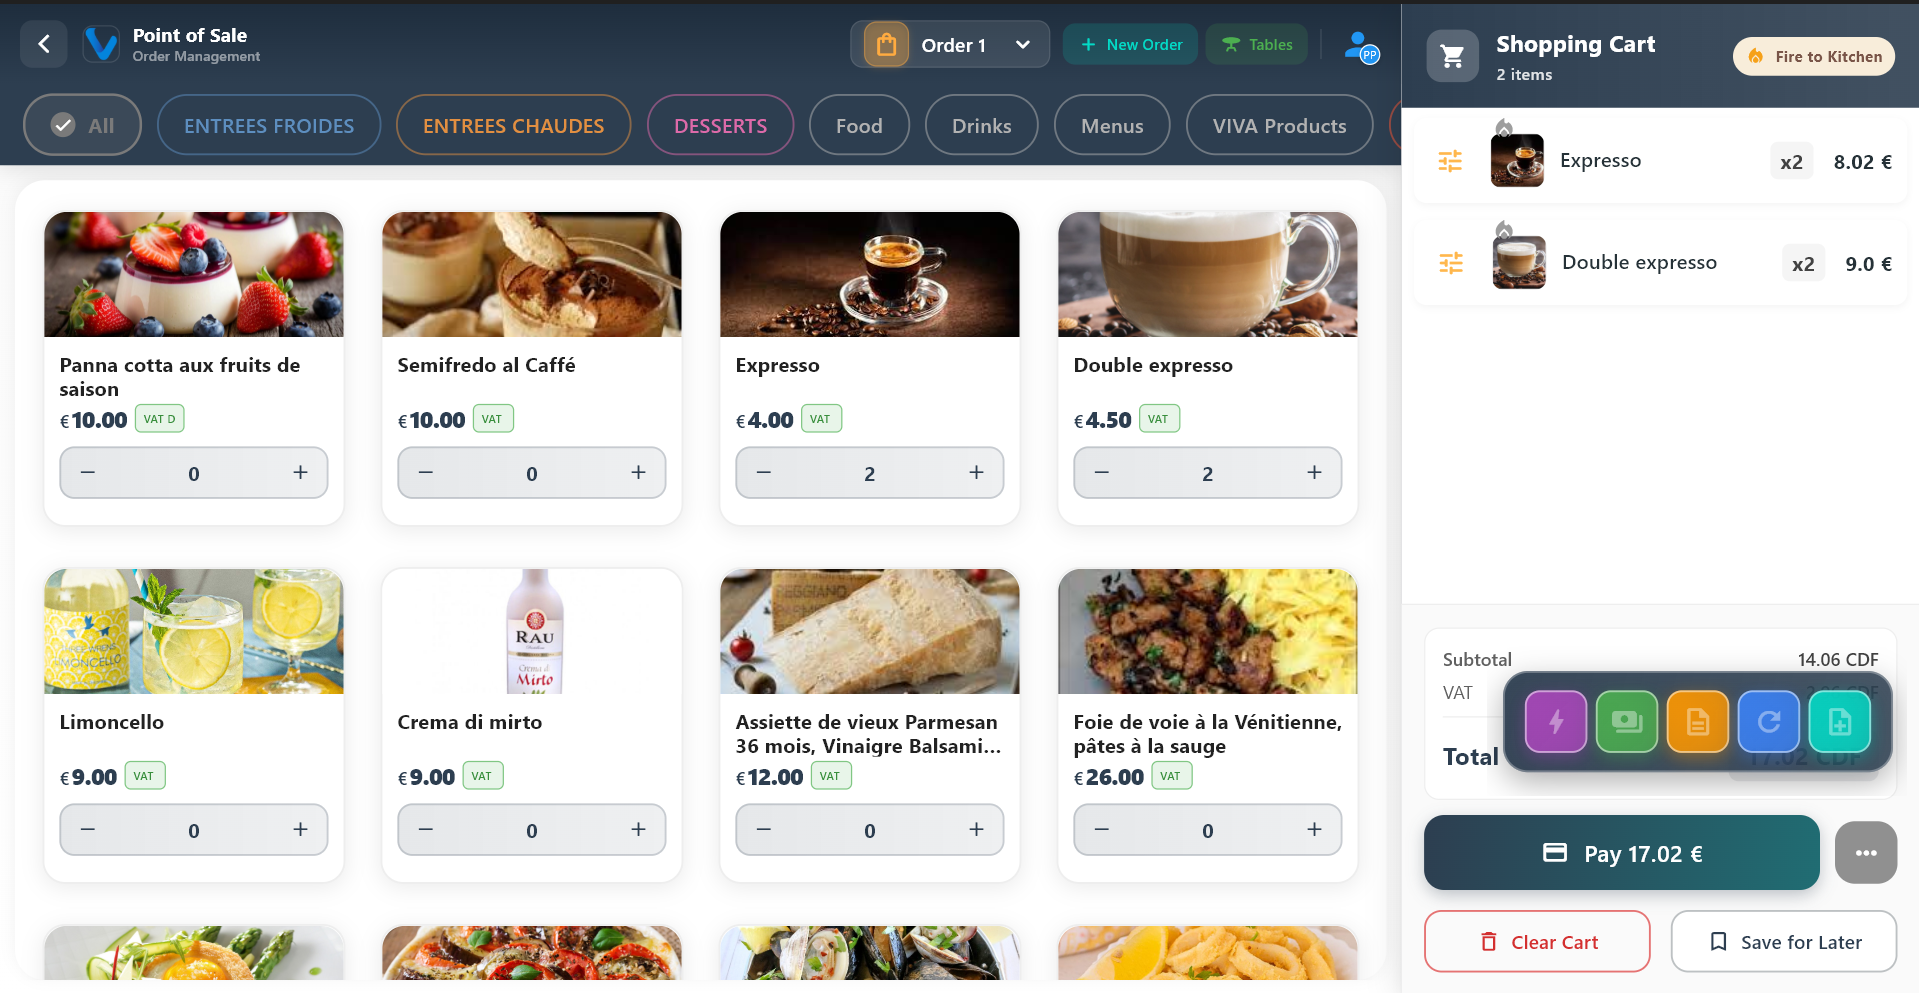 Main POS layout: pick categories and products, build the cart on the side, and see totals update as you go.
Start a fresh sale: clear the current cart and begin a new order for the next customer.
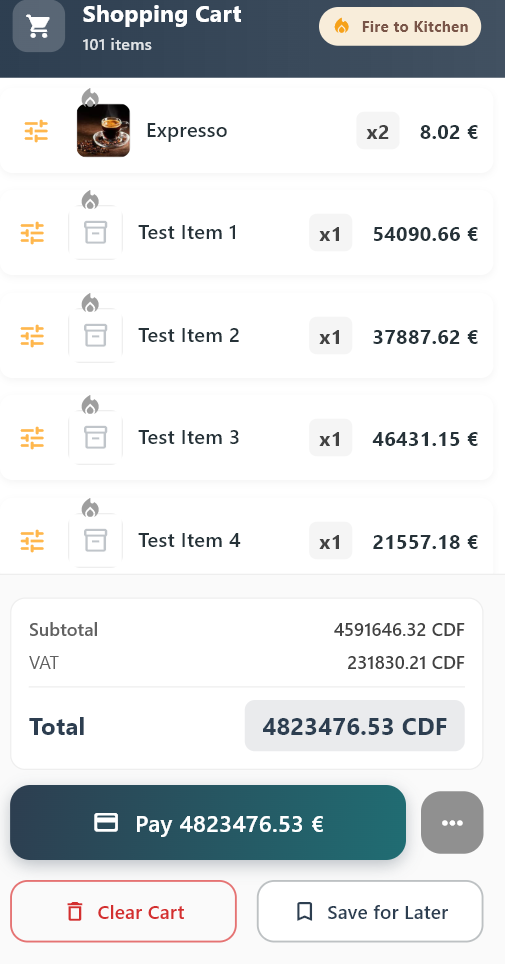
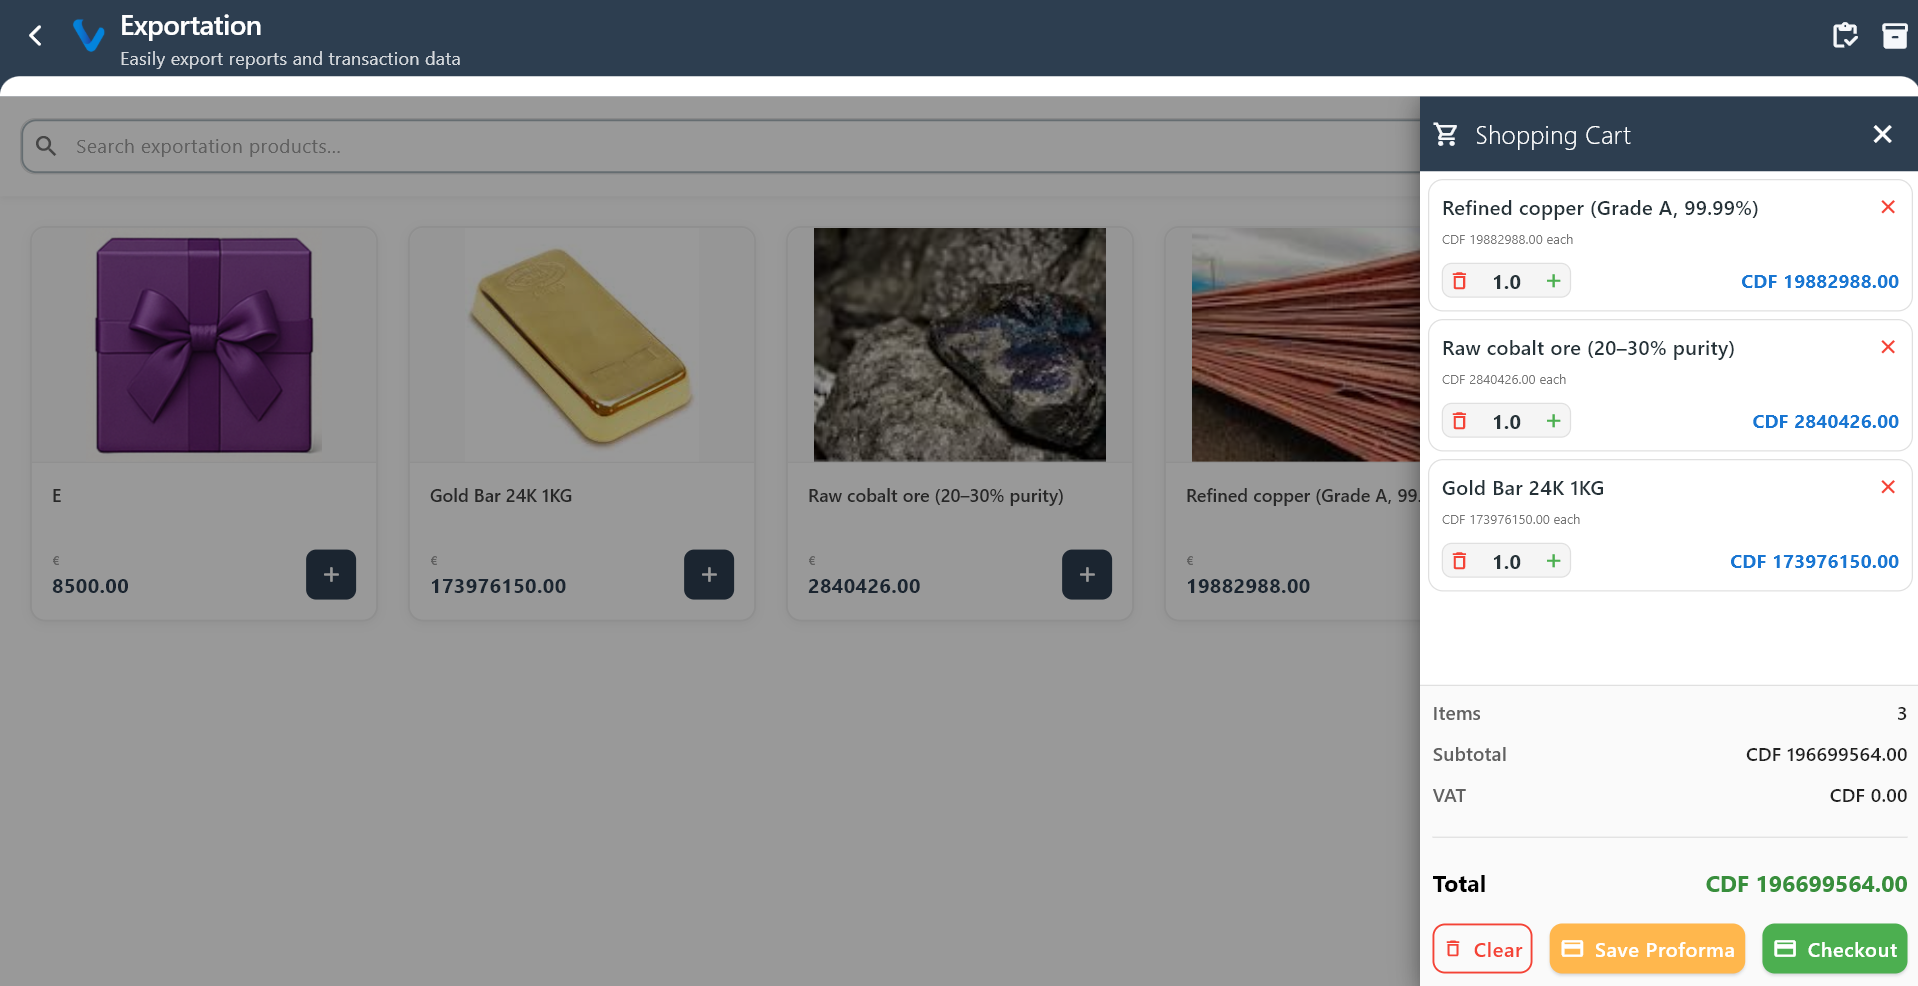
Example of a full cart with many lines — shows how the list and totals scale when the order is large.
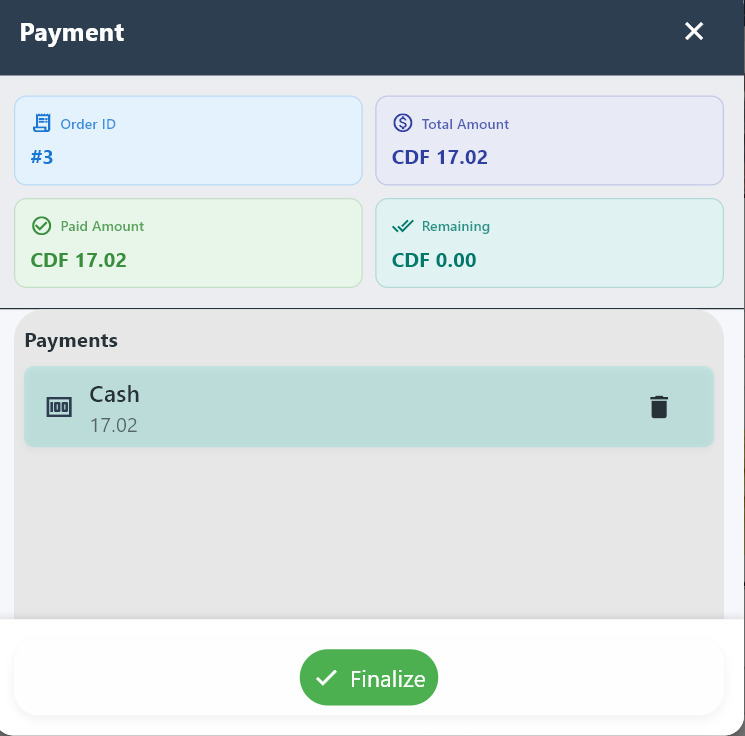
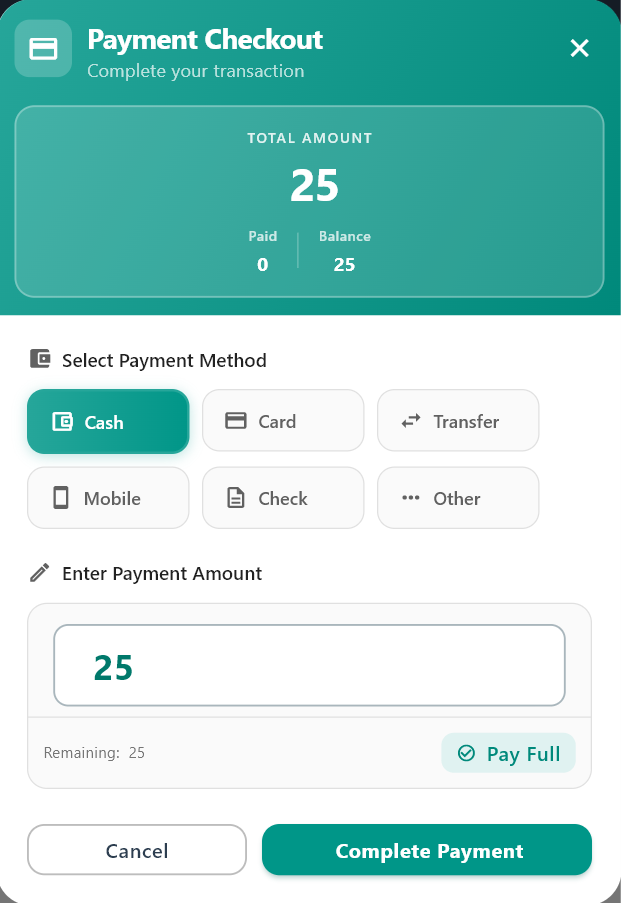
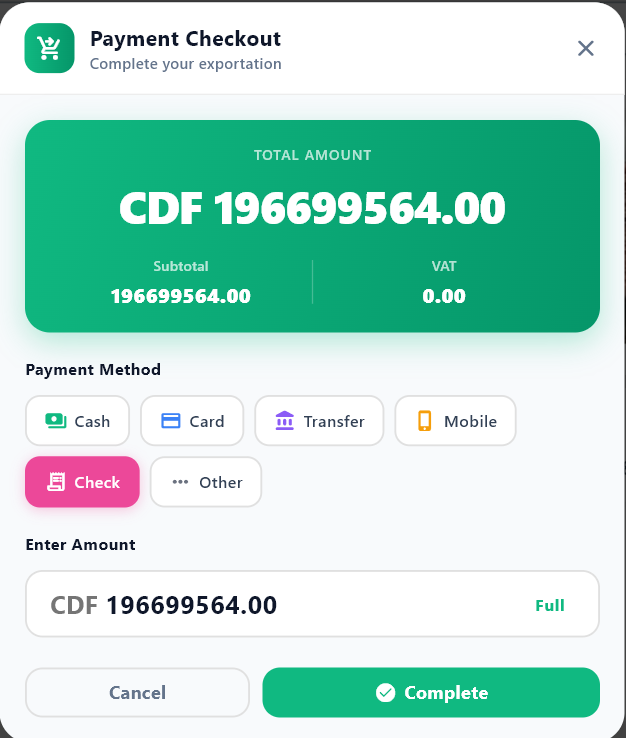
Entering or confirming a cash payment: amount received, change, and closing the sale in cash.

Generate a proforma (preview bill) from the current cart so the customer can review before paying.

Add notes to a specific product line for the kitchen or for the receipt (e.g. “no onions”, “extra sauce”).
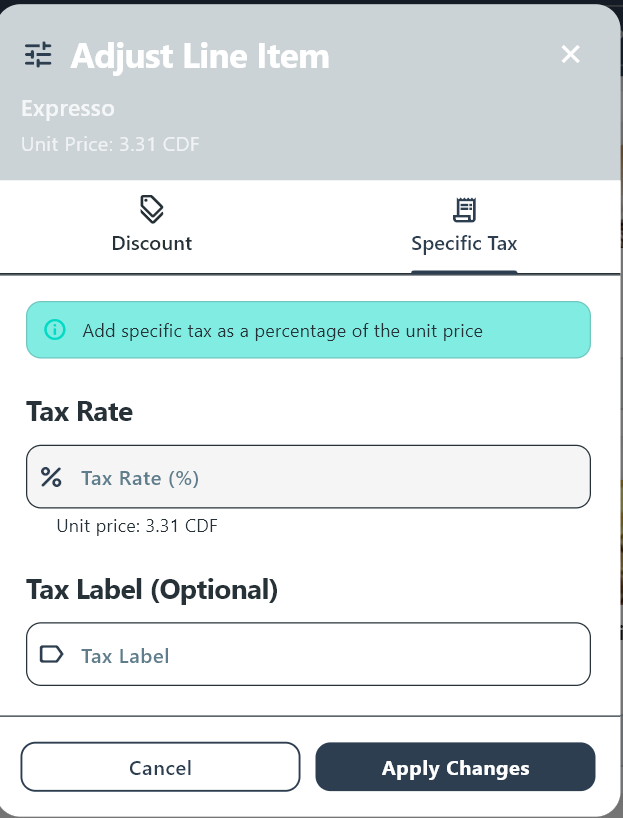
Adjust tax on one product in the cart when your permissions allow per-line tax corrections.
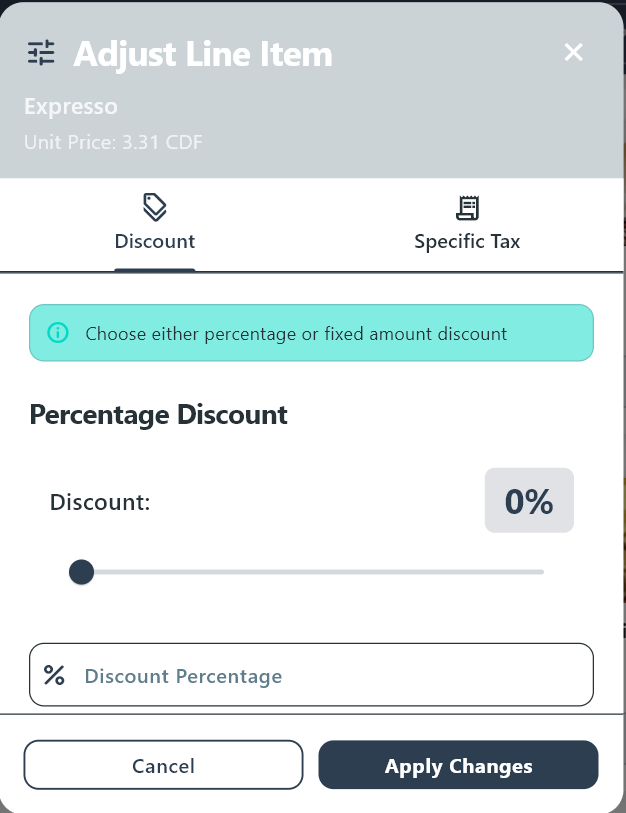
Apply a discount to a single product instead of discounting the whole order.
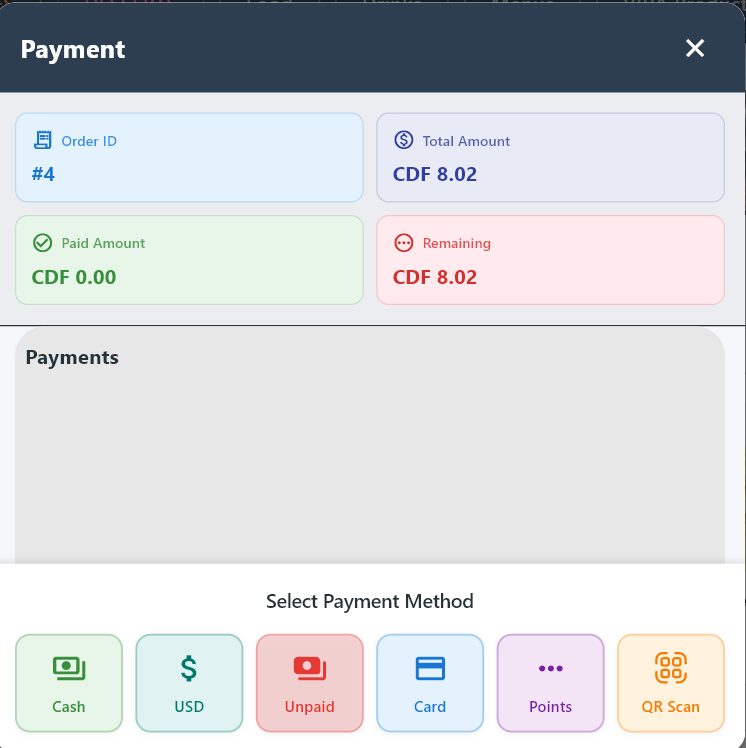
Payment screen: choose how the customer pays and complete the transaction.
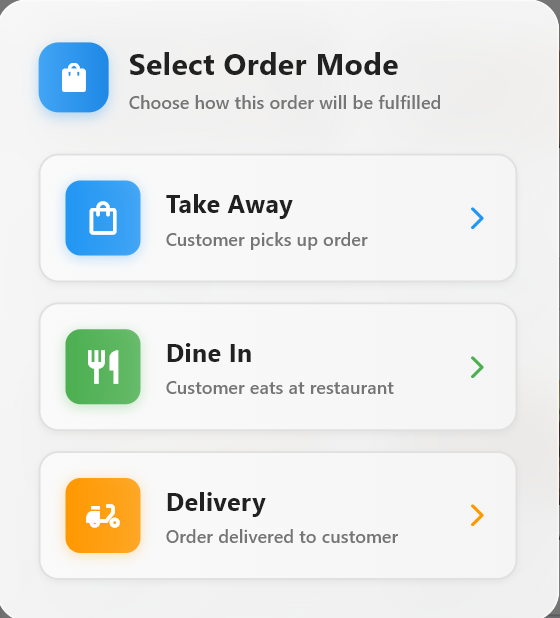
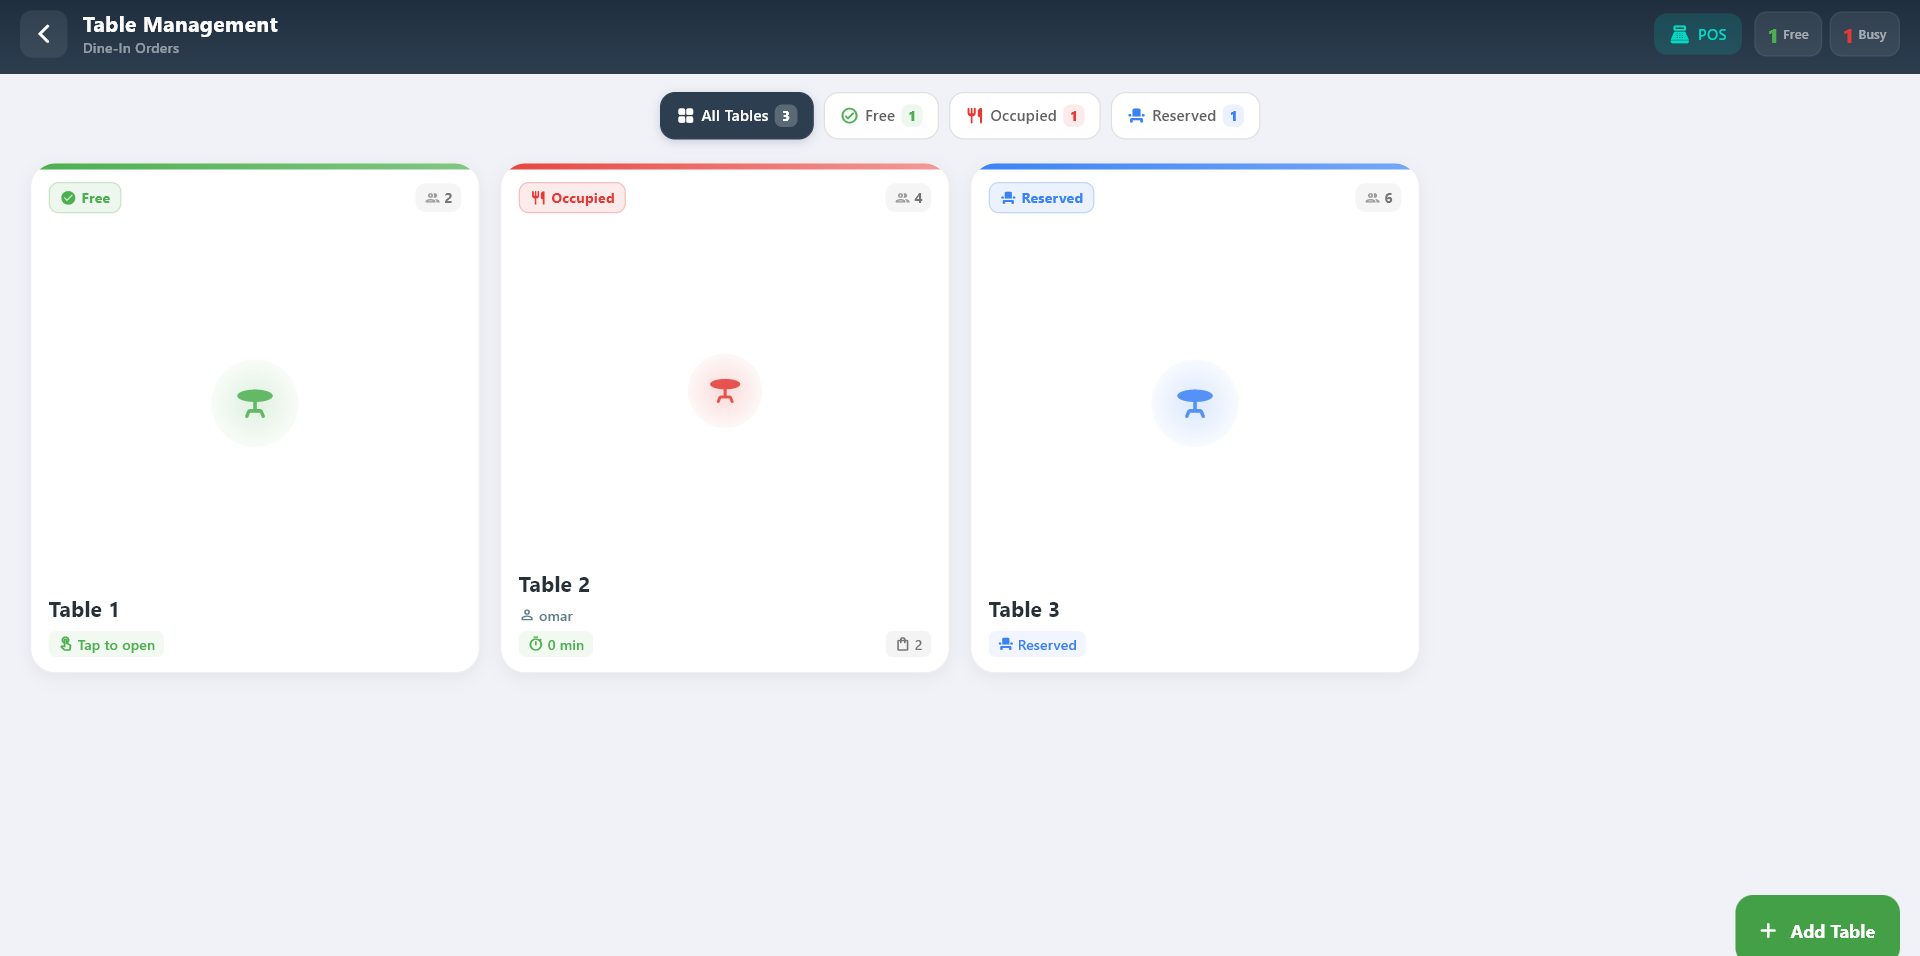
2.2 Table
Table Management is used for dine-in service and helps staff handle orders linked to a table.
What you can do:
- View free, occupied, and reserved tables
- Open table orders directly in POS
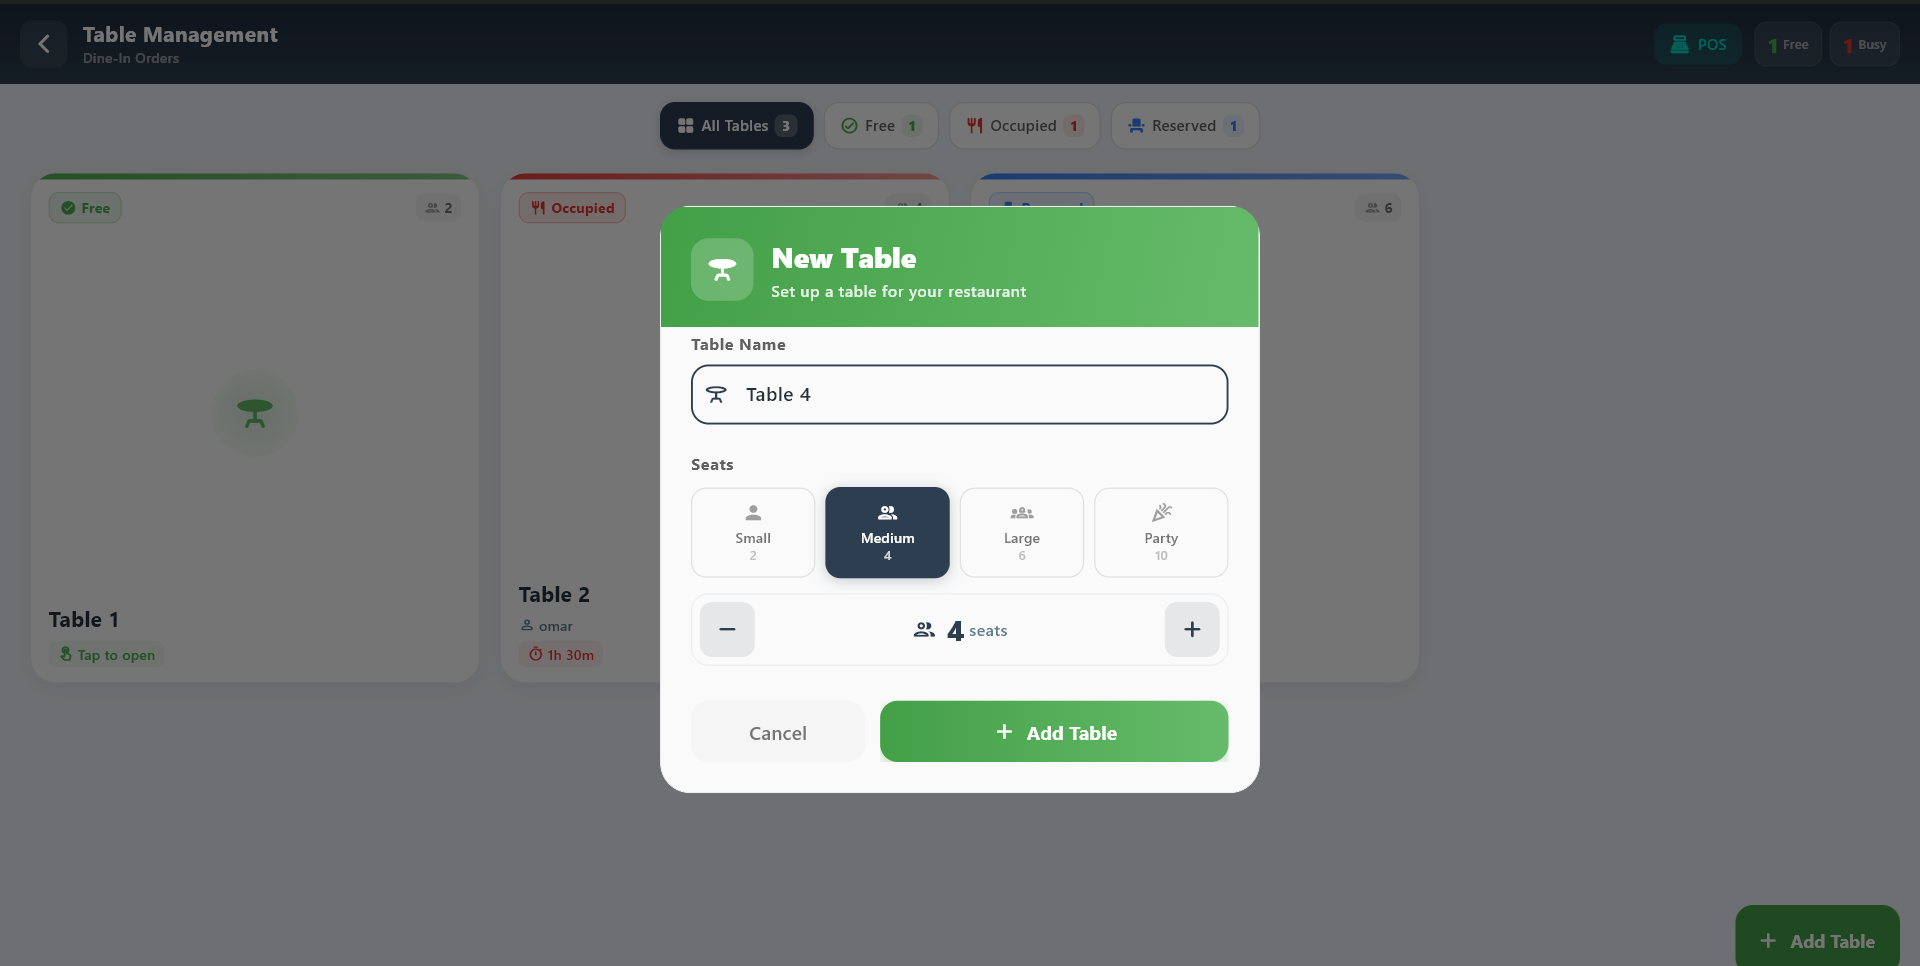
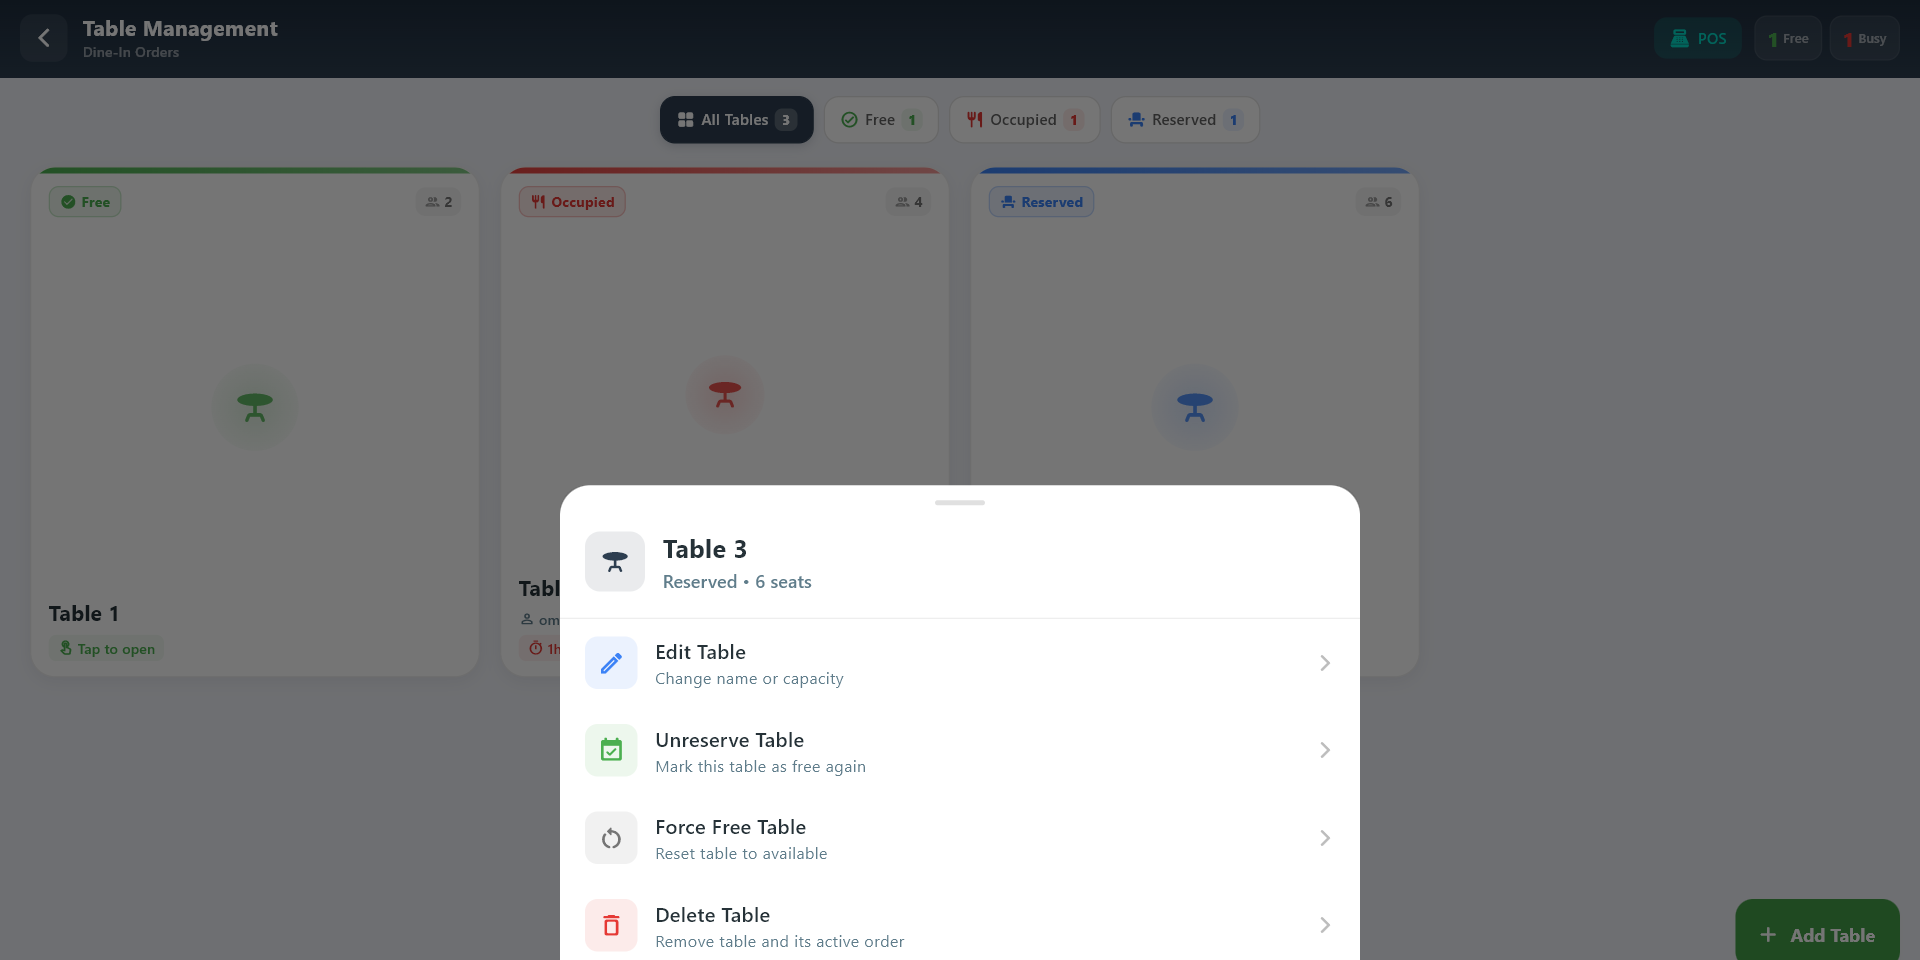
- Add and edit tables when your role allows it
Typical flow:
- Open Tables.
- Choose the correct table.
- Continue the order in POS.
2.3 Refund
Refund is used to return money for an eligible transaction when store rules allow it.

Use it when:
- A customer was charged incorrectly
- A transaction must be reversed
- Store policy allows the refund
Typical flow:
- Find the original transaction.
- Review the refund details.
- Complete the refund.
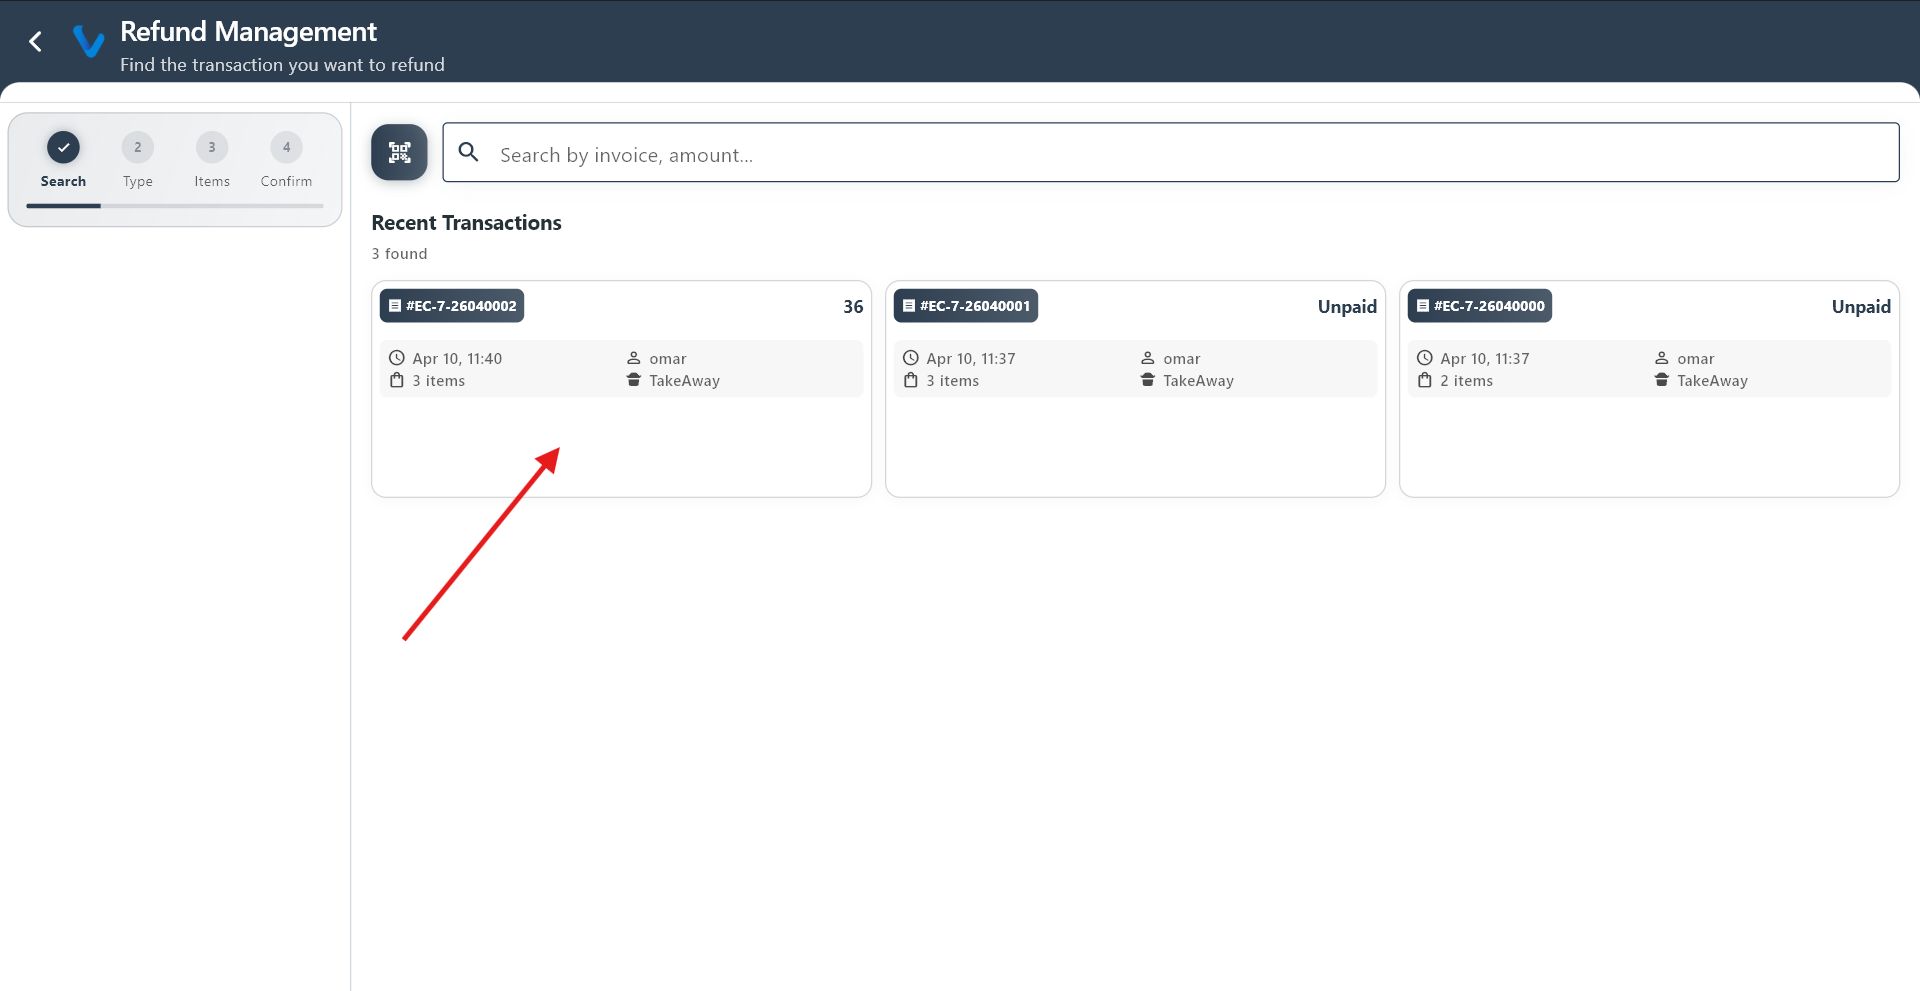 Search for the original transaction by reference number or date before starting the refund.
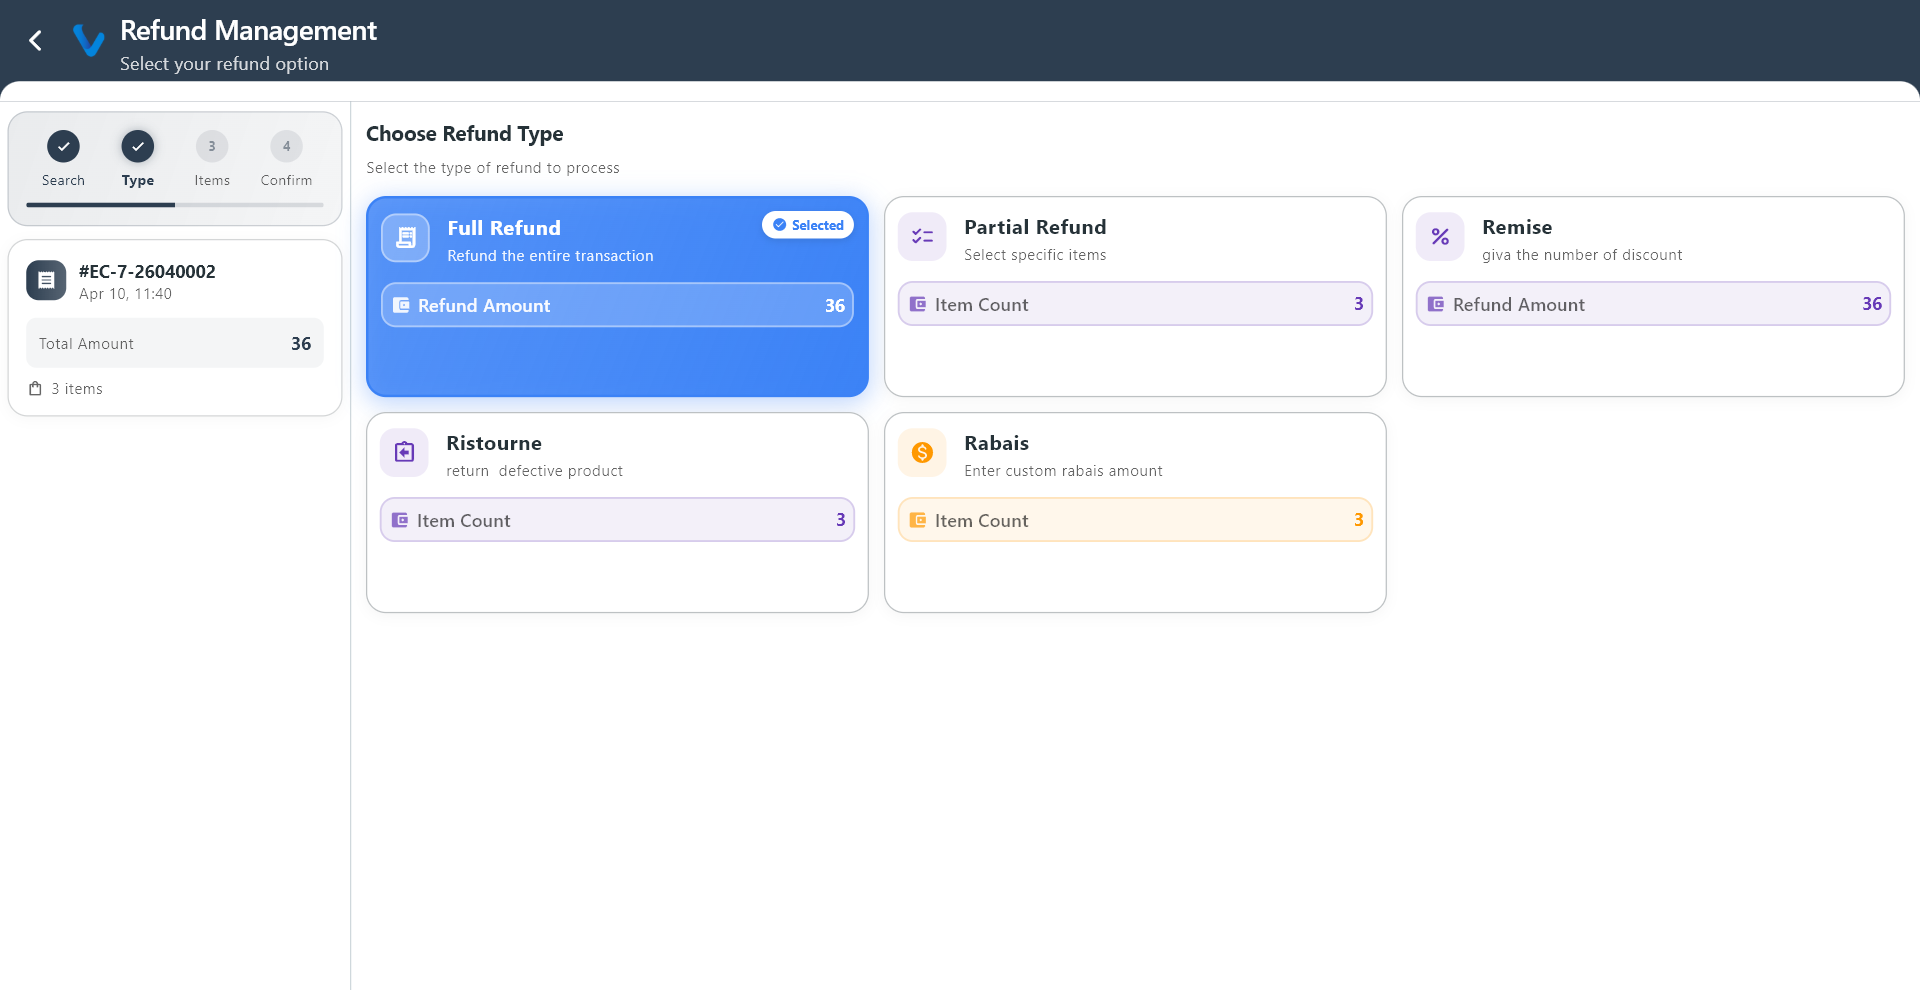 Choose the type of refund to apply: full, partial, discount, or damage.
 Full refund returns the entire amount of the original transaction to the customer.
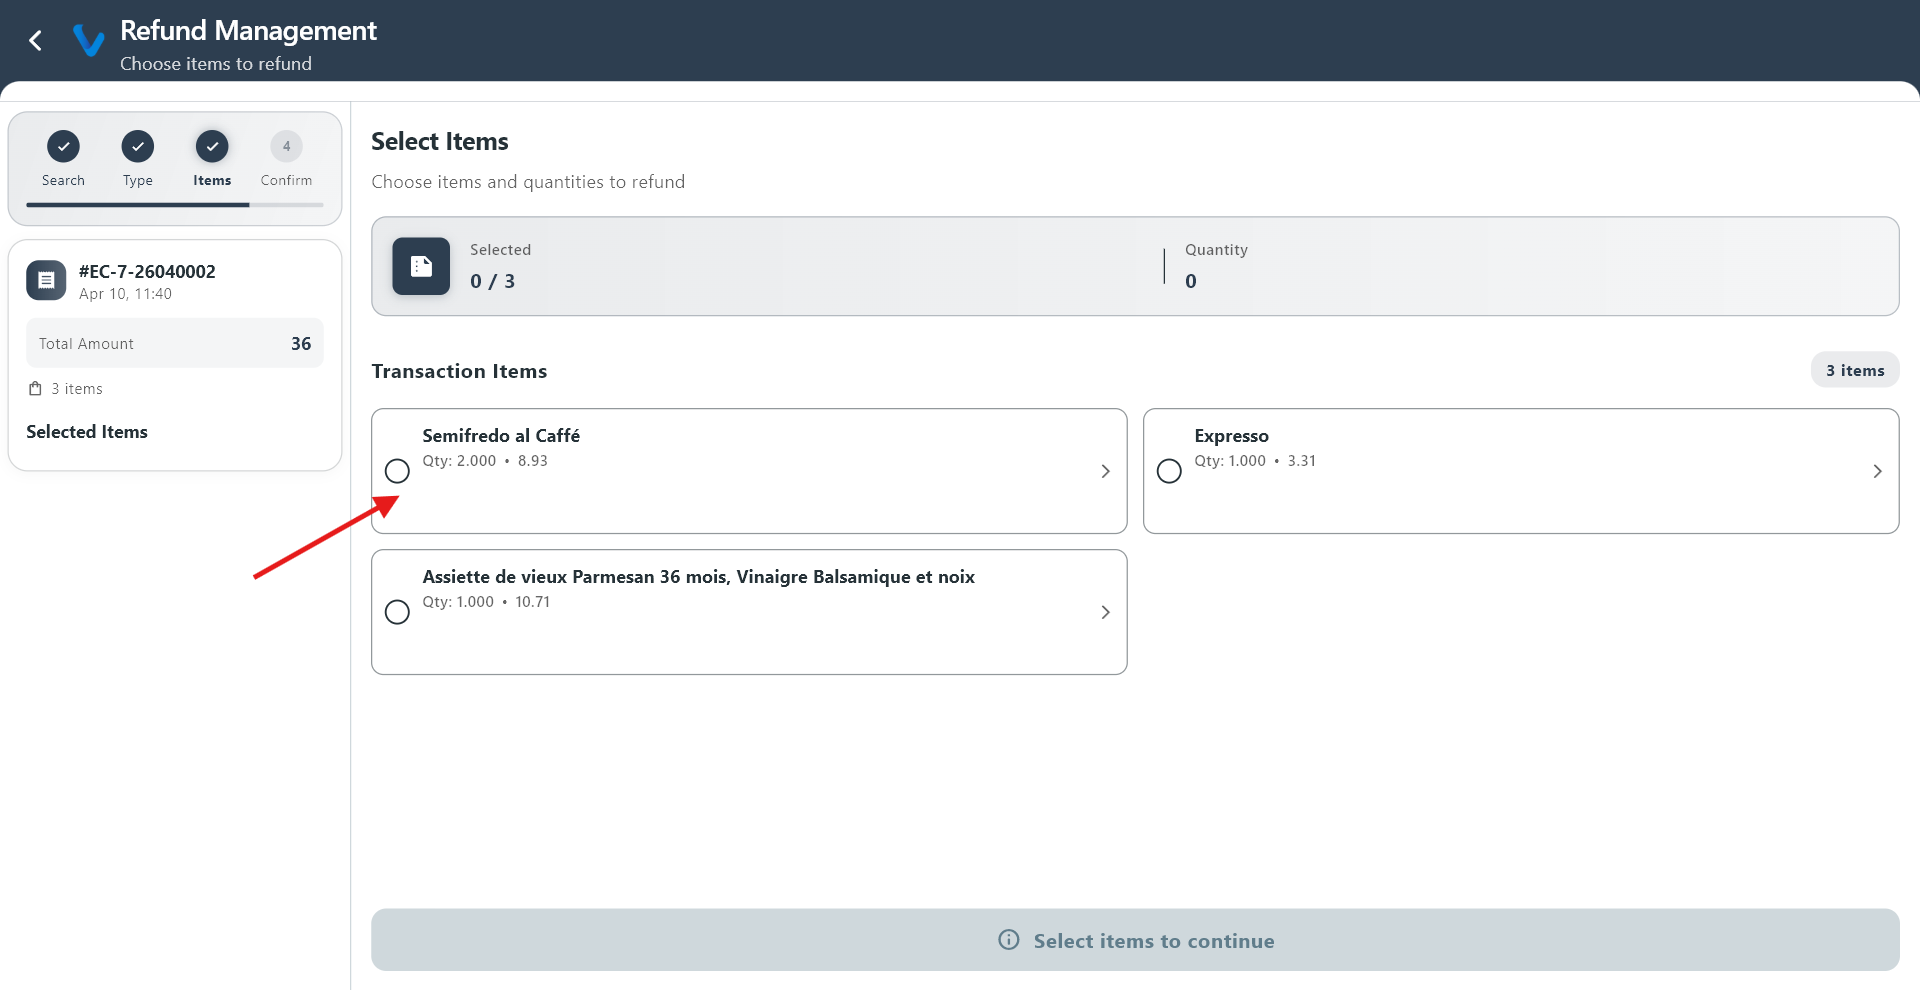 Choose which items or quantities to include in the partial refund.
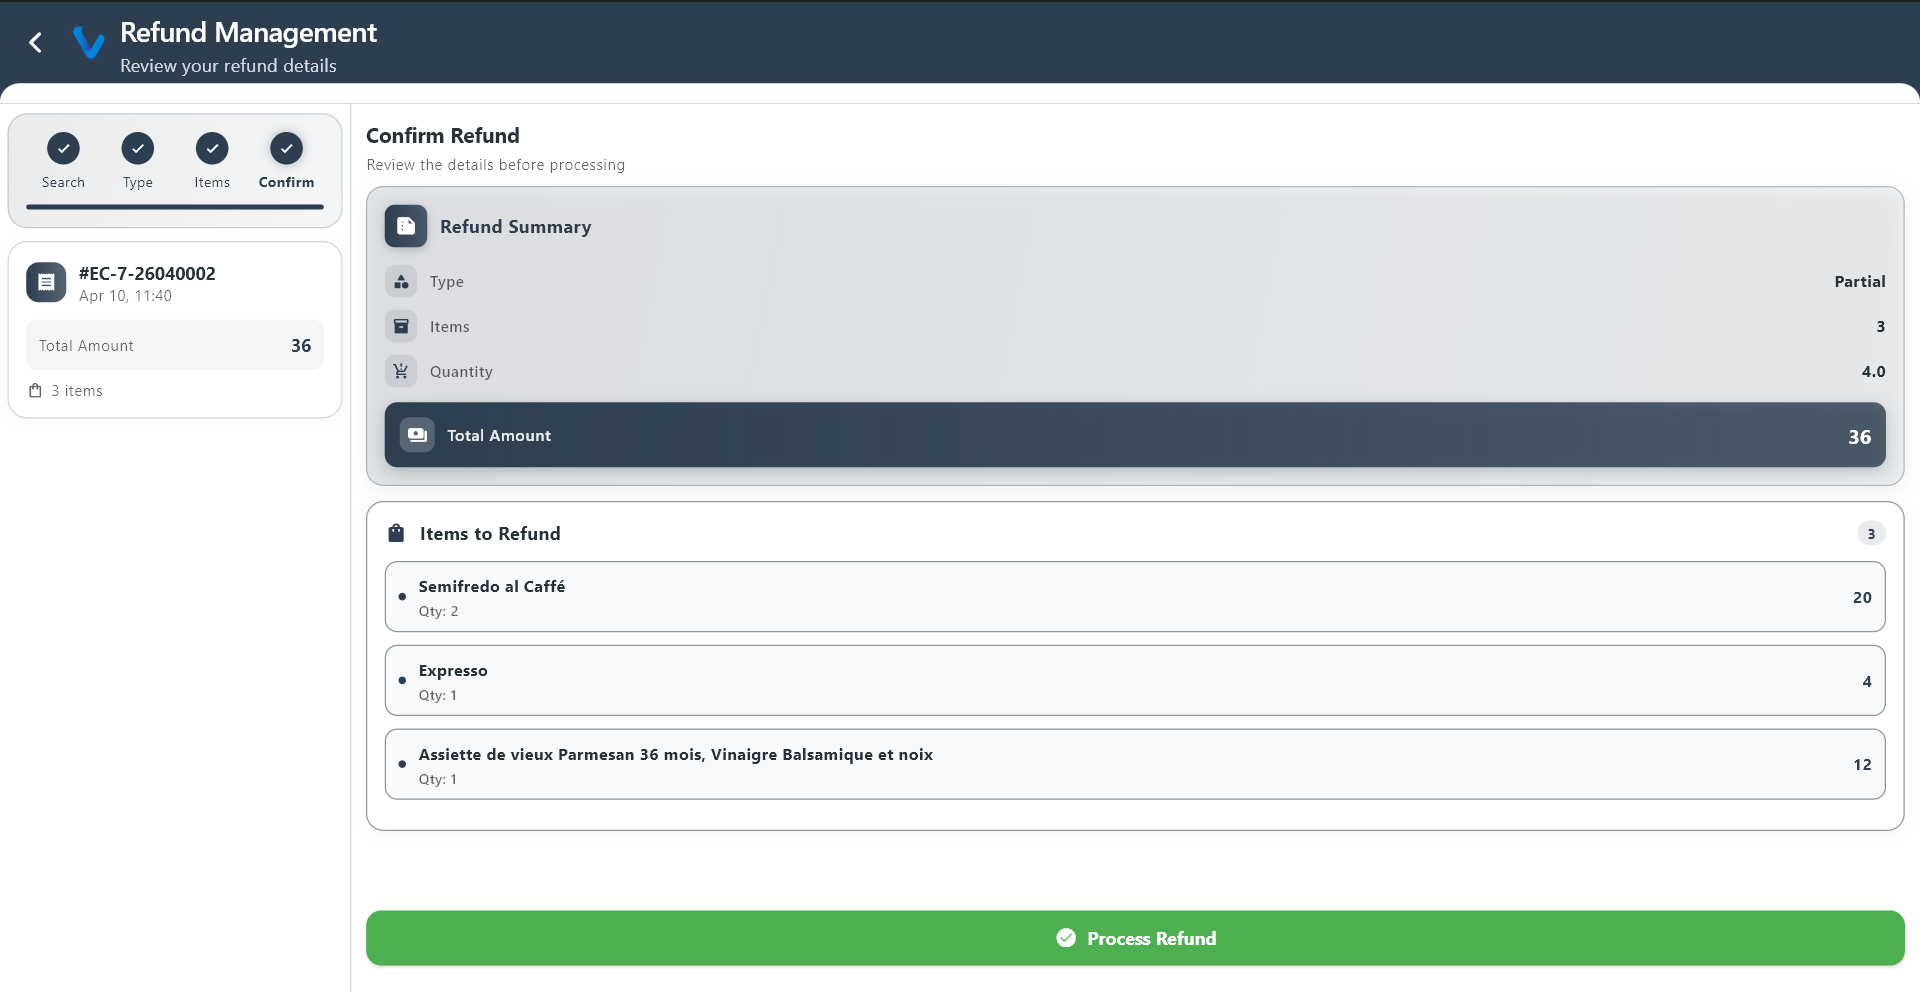
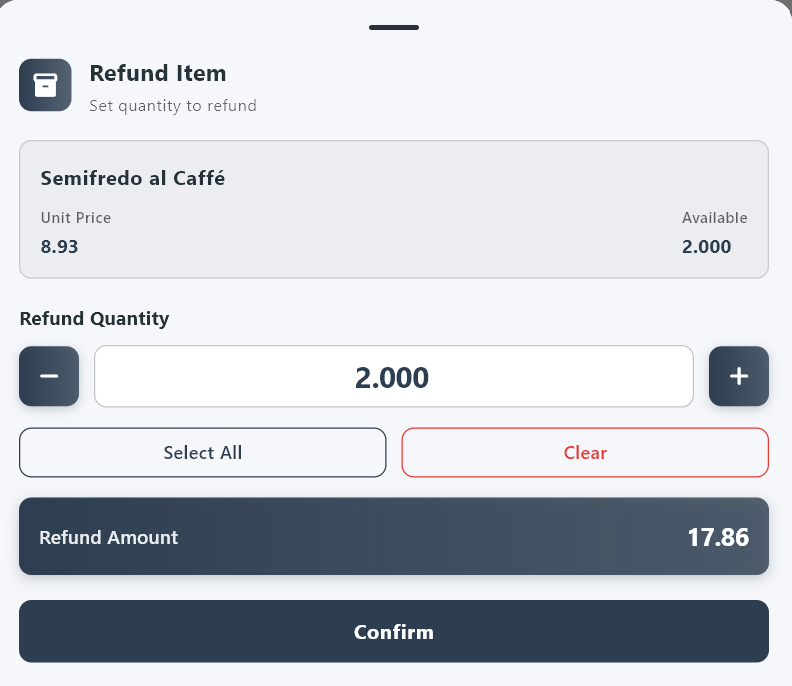 Review the selected items and the refund total before confirming.
 Discount refund is used when the refund is applied as a price correction rather than a full return.
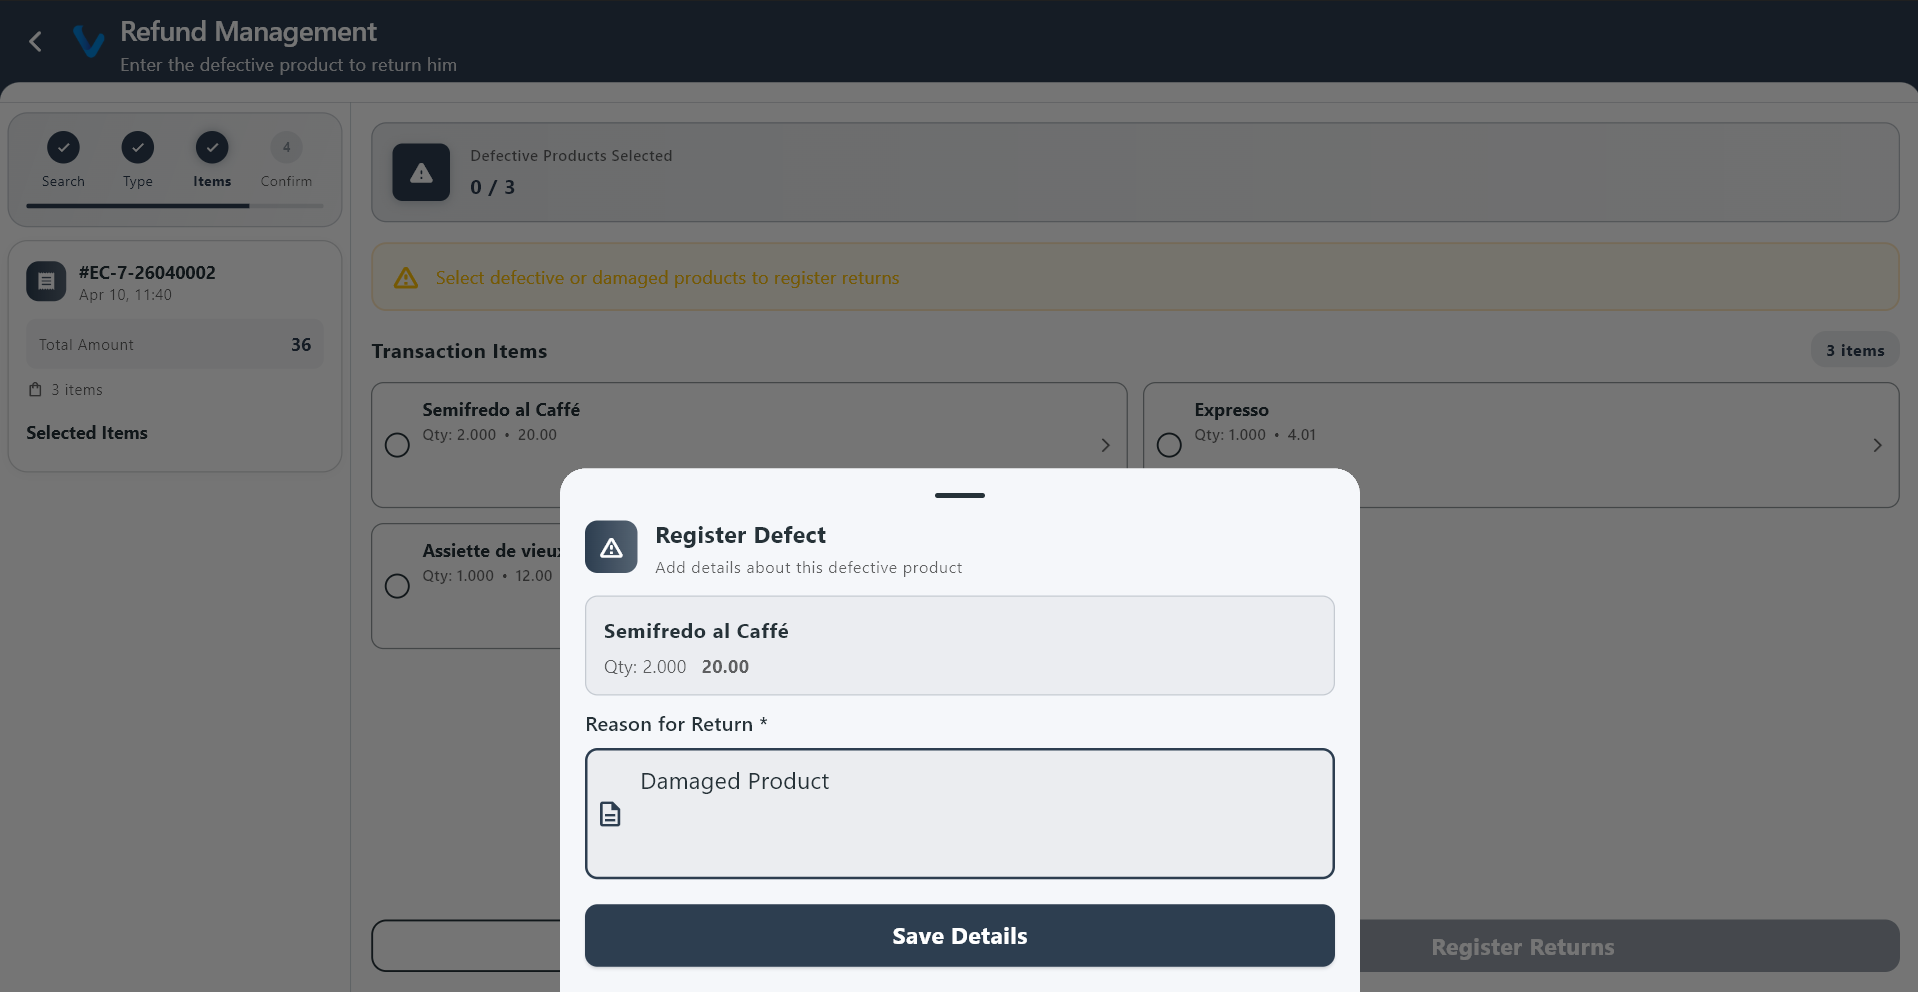 Damage refund is used when goods were returned due to damage or quality issues.
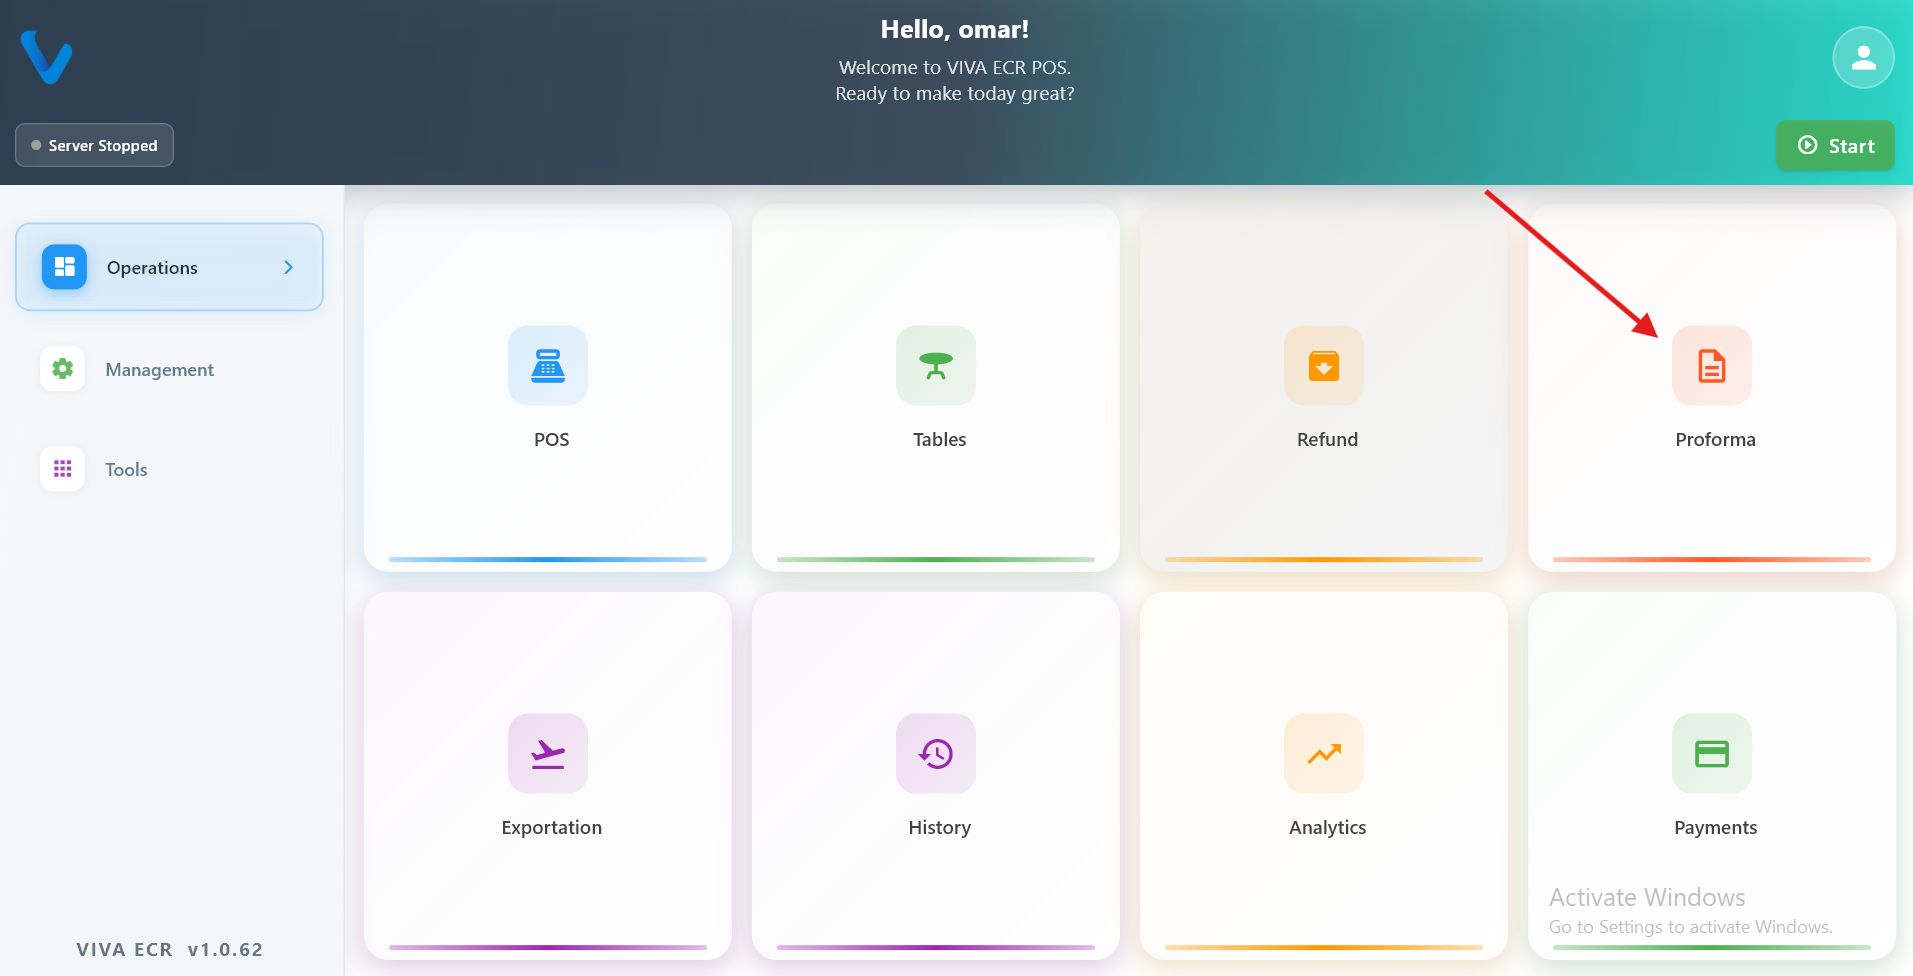
2.4 Proforma
Proforma is used to prepare a temporary bill for review before the final payment is made.
Use it when:
- The customer wants to check the order first
- The bill should not be finalized yet
- You want to show the current order before payment
Typical flow:
- Build the order in POS.
- Generate the proforma.
- Show it to the customer.
- Continue or adjust the order if needed.
 The proforma screen shows the current order as a temporary bill, not yet finalized or recorded as a transaction.
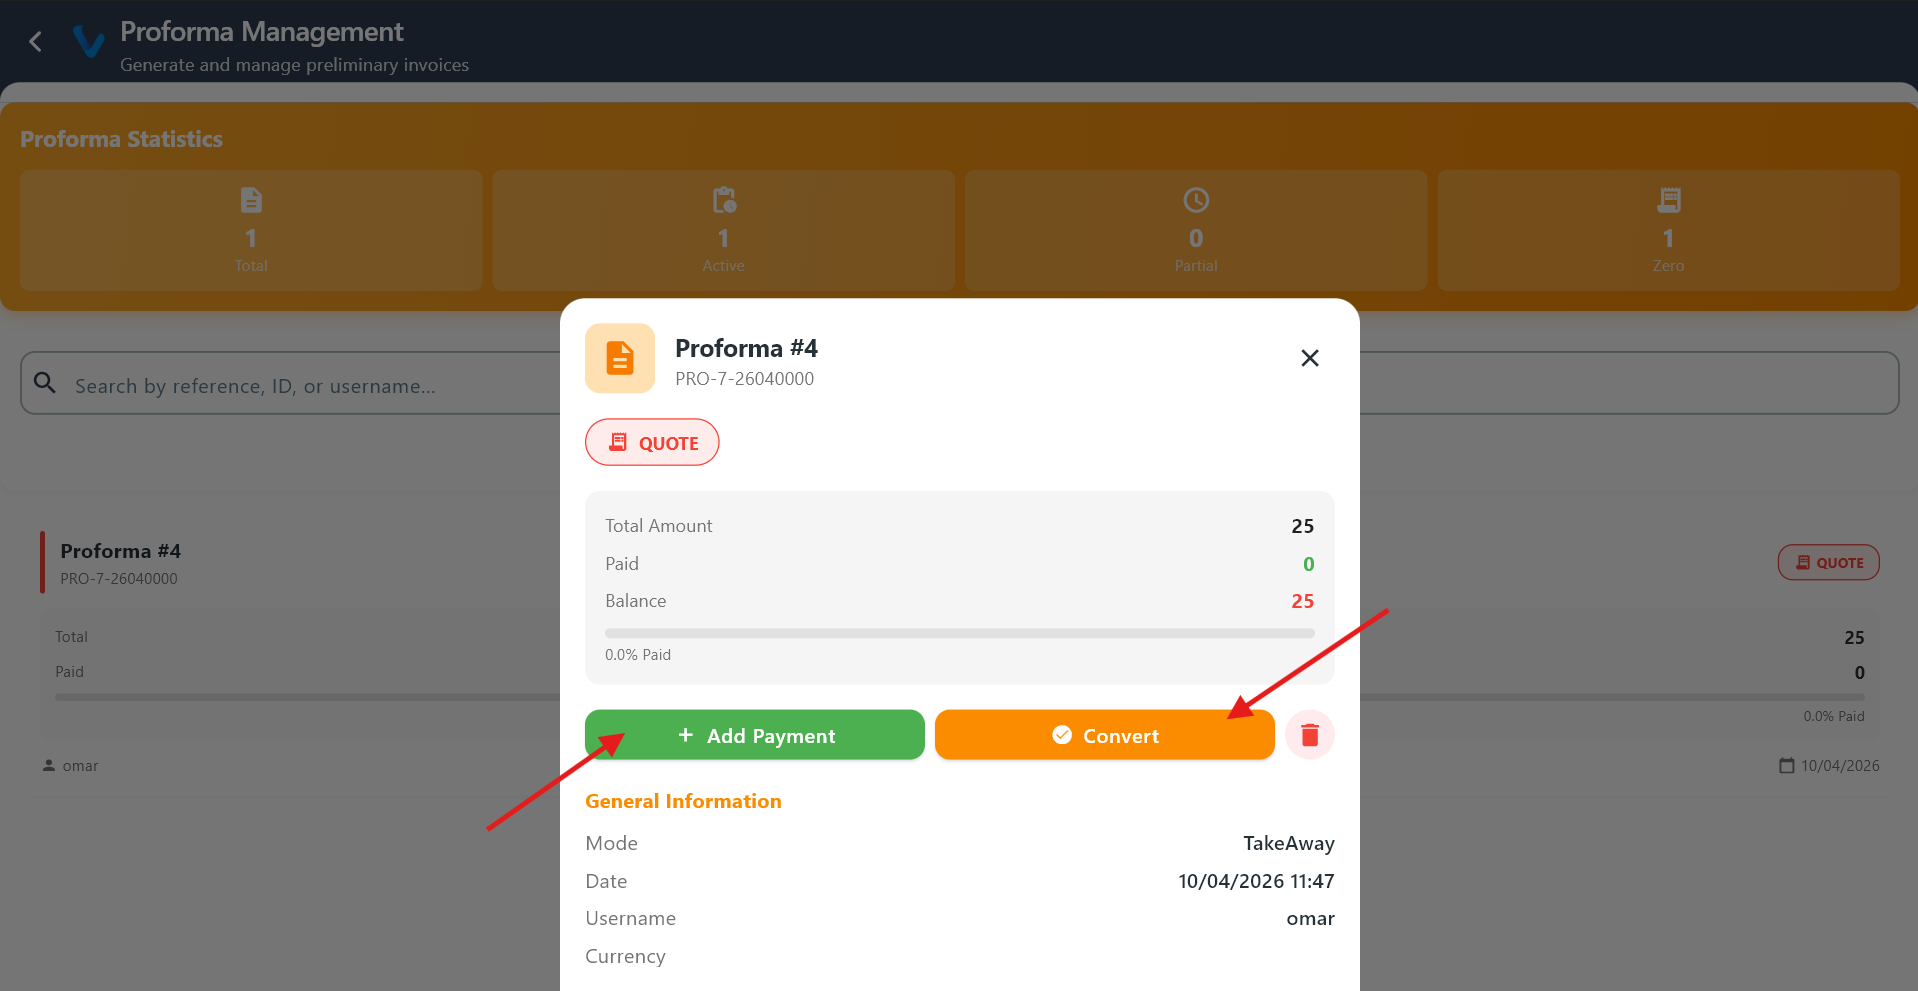
 If the customer agrees, you can proceed to payment directly from the proforma.
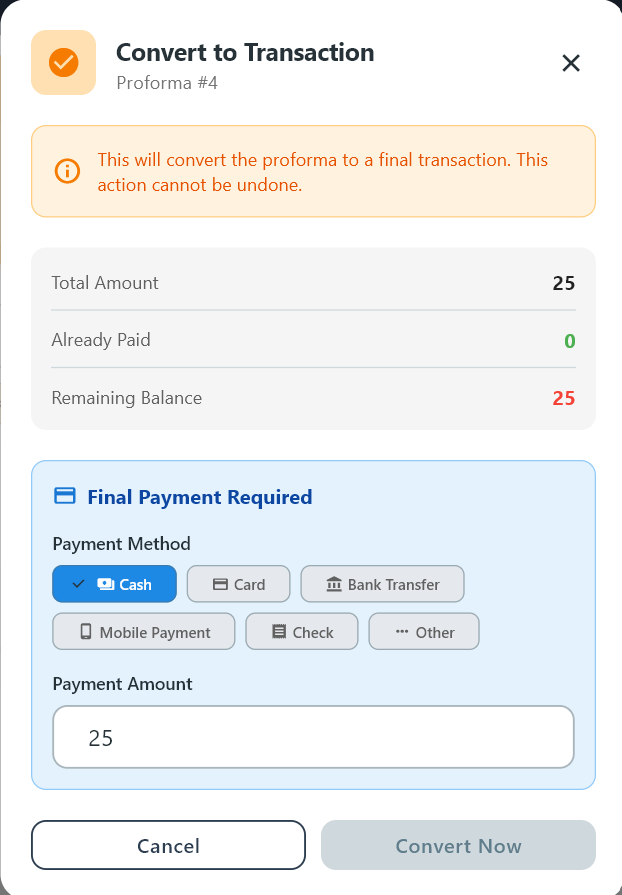 Converting the proforma finalizes the bill and records it as a completed transaction.
2.5 Exportation
Exportation is used to send selected business data out of the app for review, sharing, or record keeping.
Use it when:
- You need a copy of data for reporting
- You want to review records outside the app
- You need to export a specific period or dataset
Typical flow:
- Open Exportation.
- Choose the data type or date range.
- Start the export.
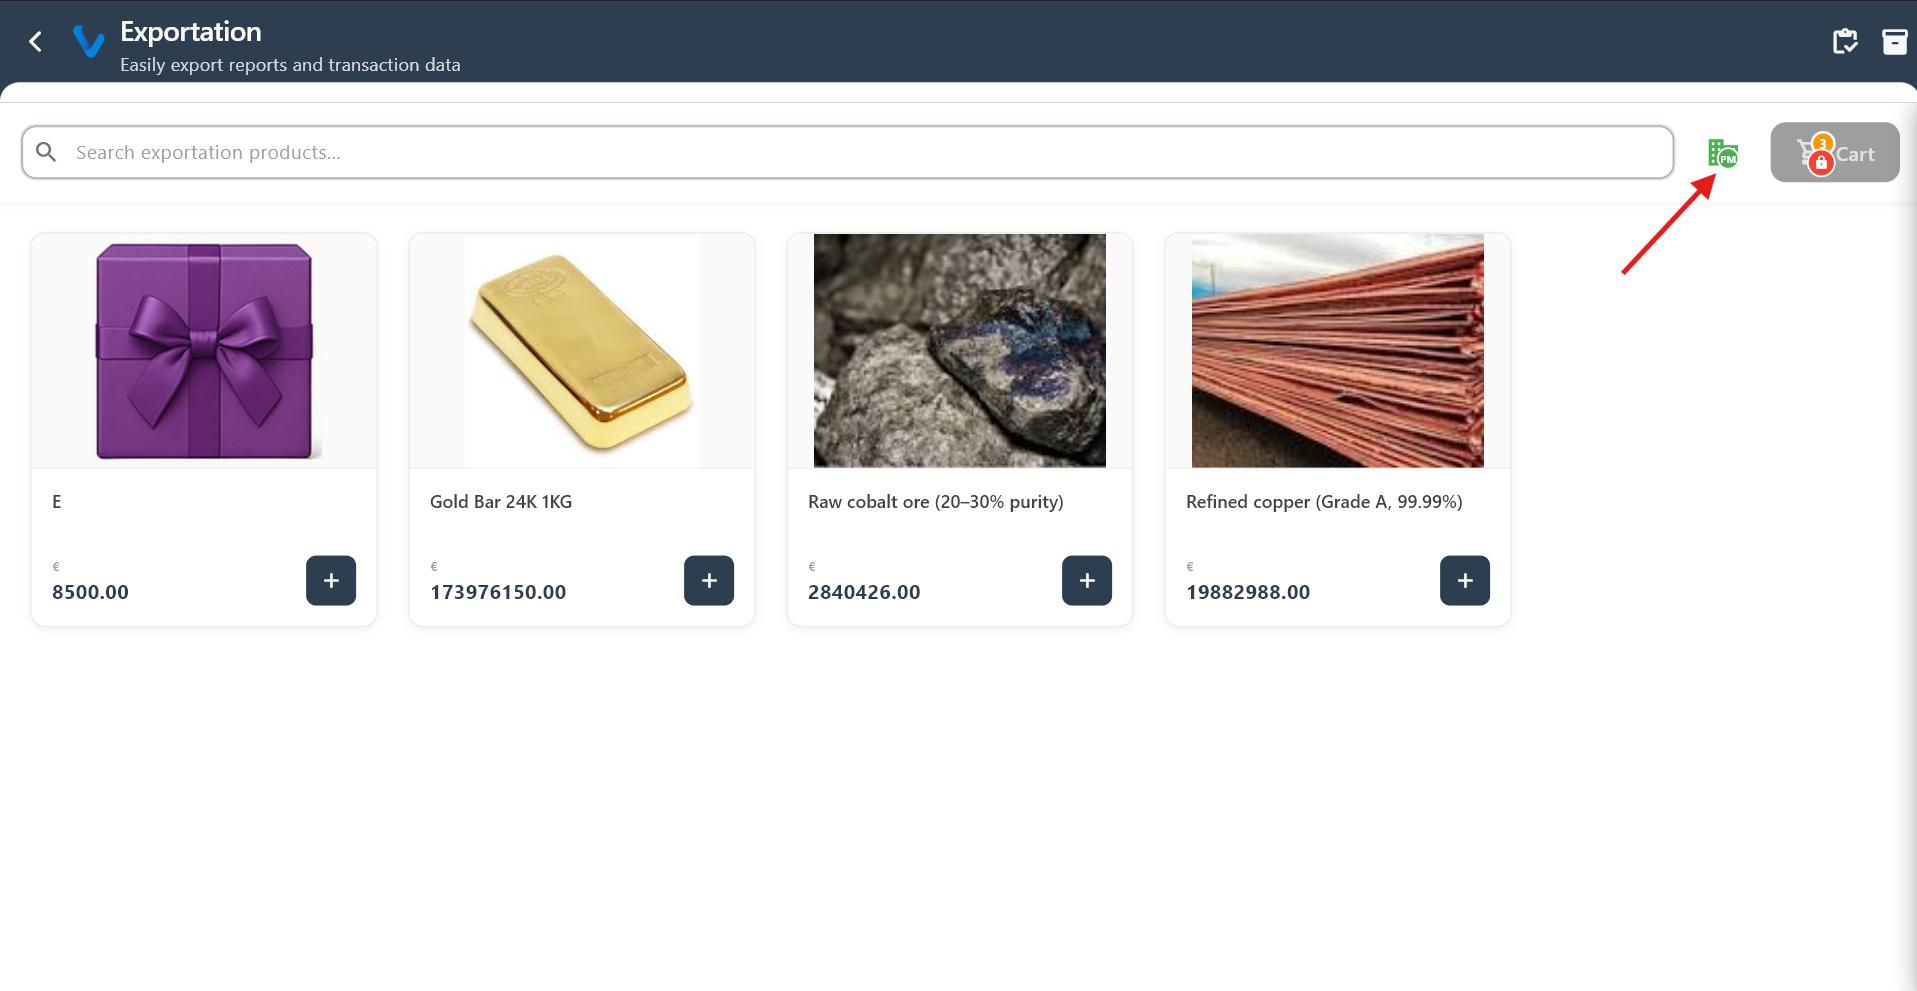 The main exportation screen where you select the type of data to export.
 Choose the date range and configure which records to include in the export.
 The app prepares and packages the selected data for export.
 Review the final summary before the export is sent or saved.
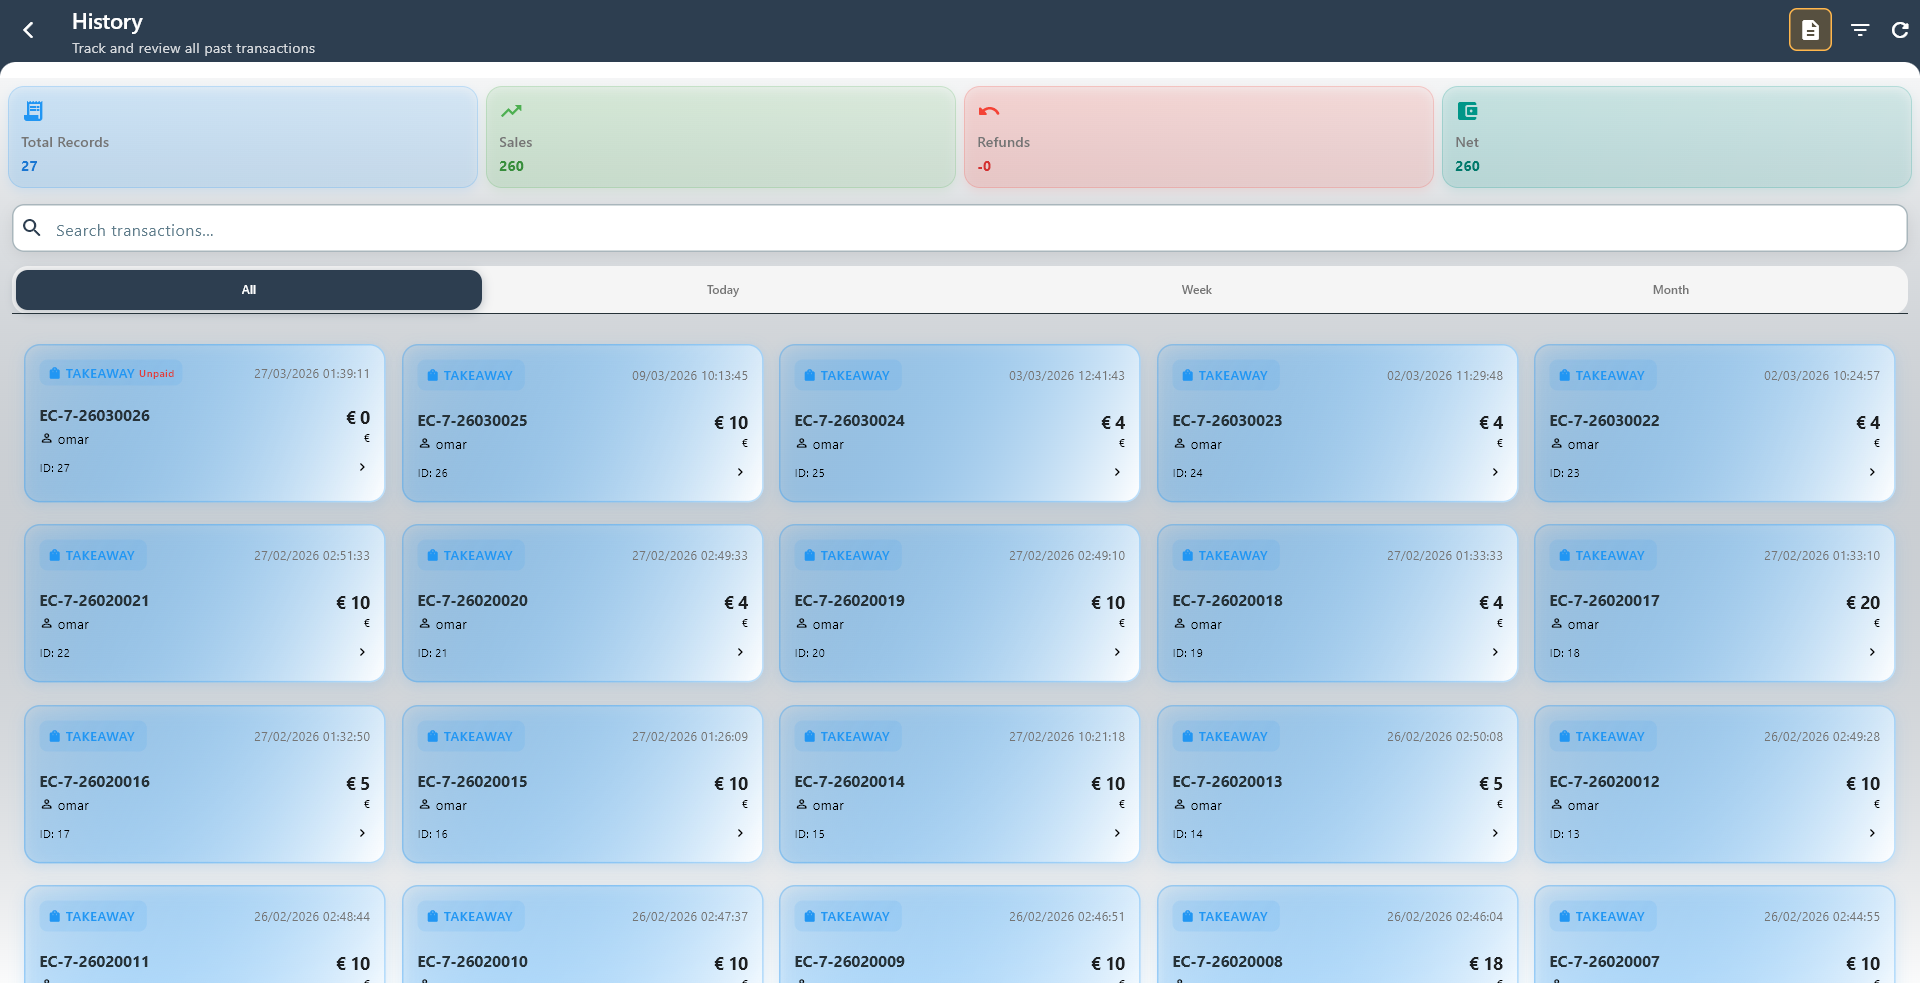
2.6 History
History lets you review previous transactions and quickly find what happened on a past sale.
What you can do:
- Search transactions by reference or record details
- Filter by date or time period
- Open a transaction for more information
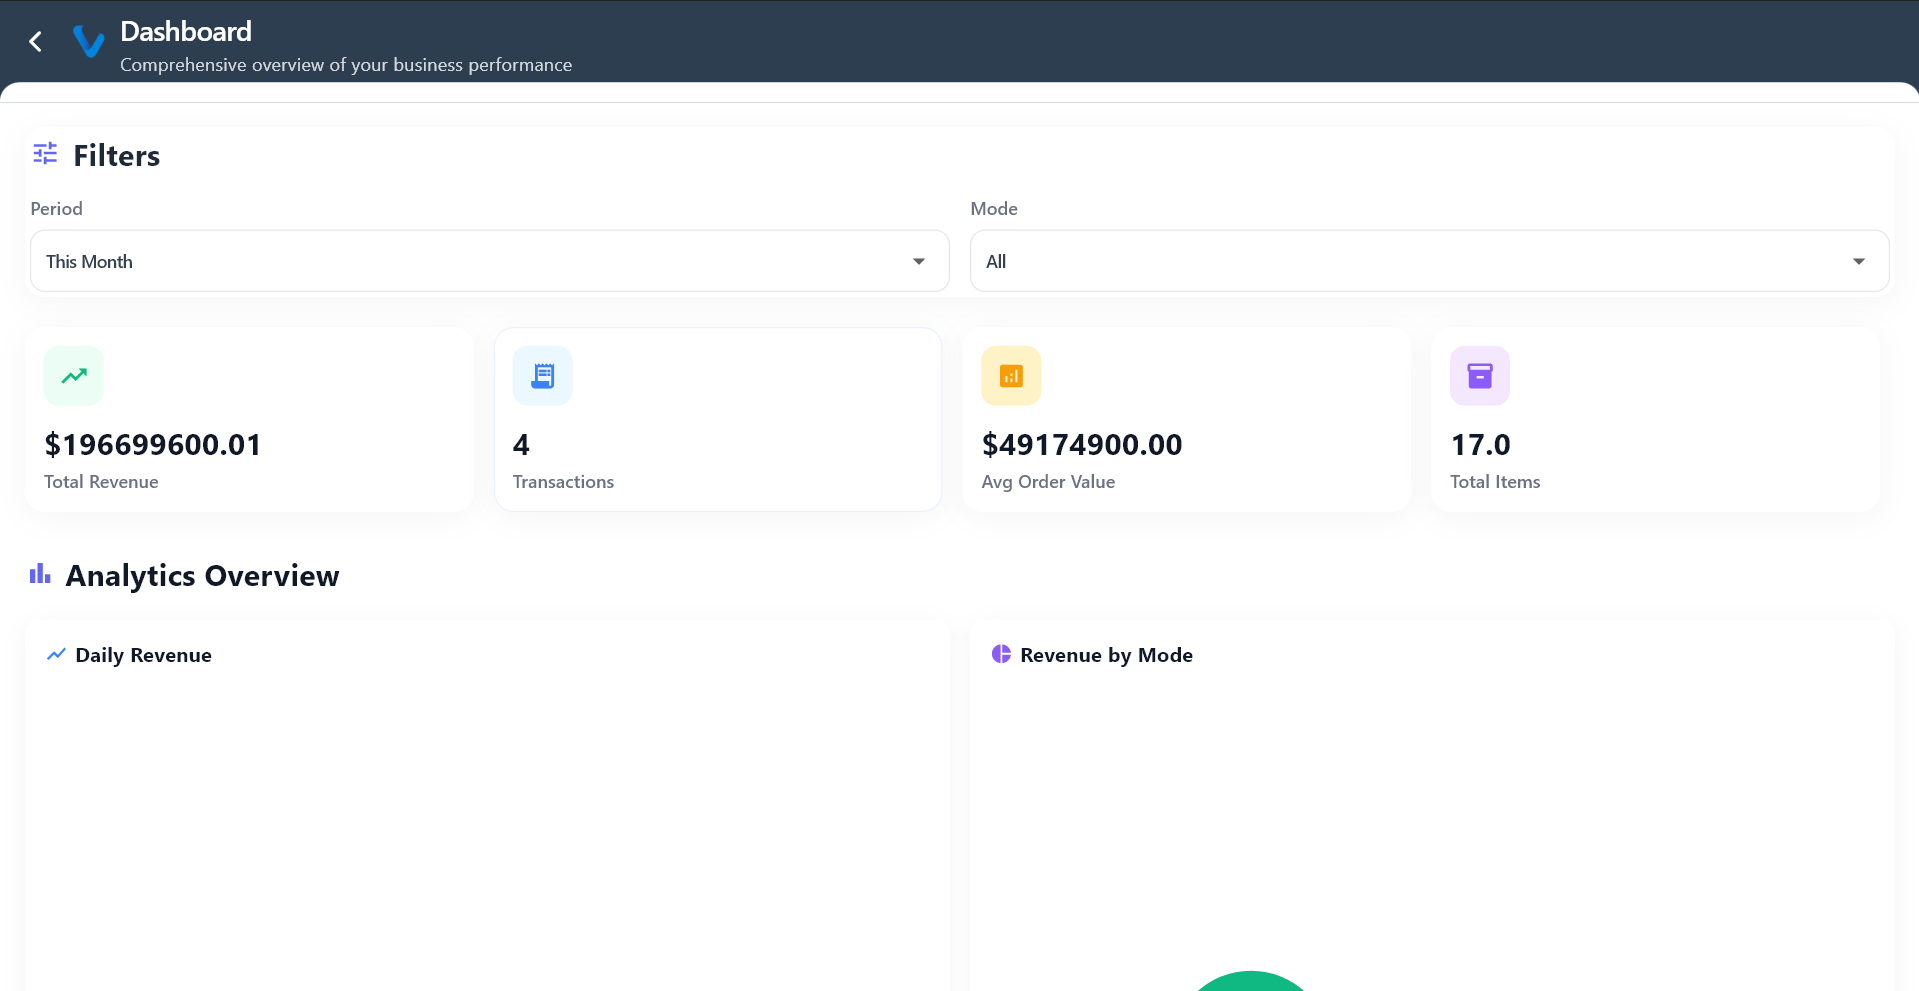
2.7 Analytics
Analytics gives a quick view of how sales are performing over time.
What it helps with:
- Seeing sales movement
- Checking trends and totals
- Understanding the day’s overall activity at a glance
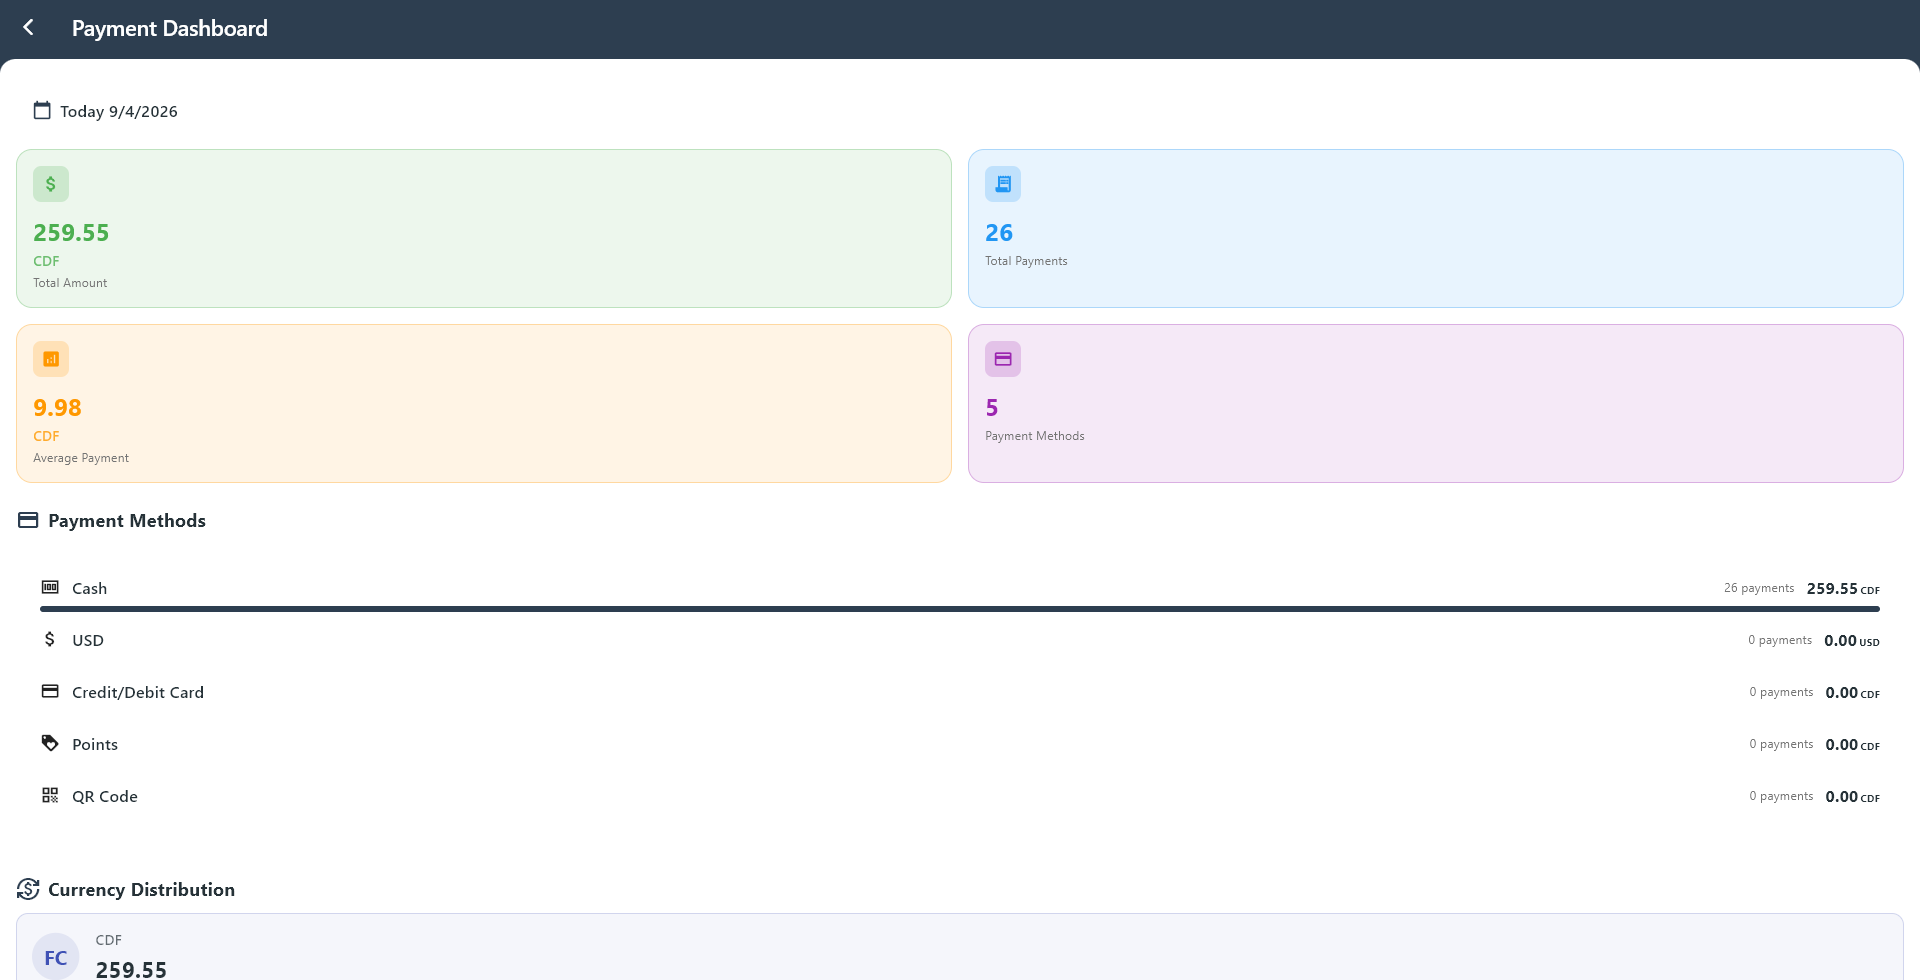
2.8 Payments
Payments shows payment activity and how sales were paid.
What you can do:
- Review payment totals
- See which payment methods were used
- Check the distribution of currencies
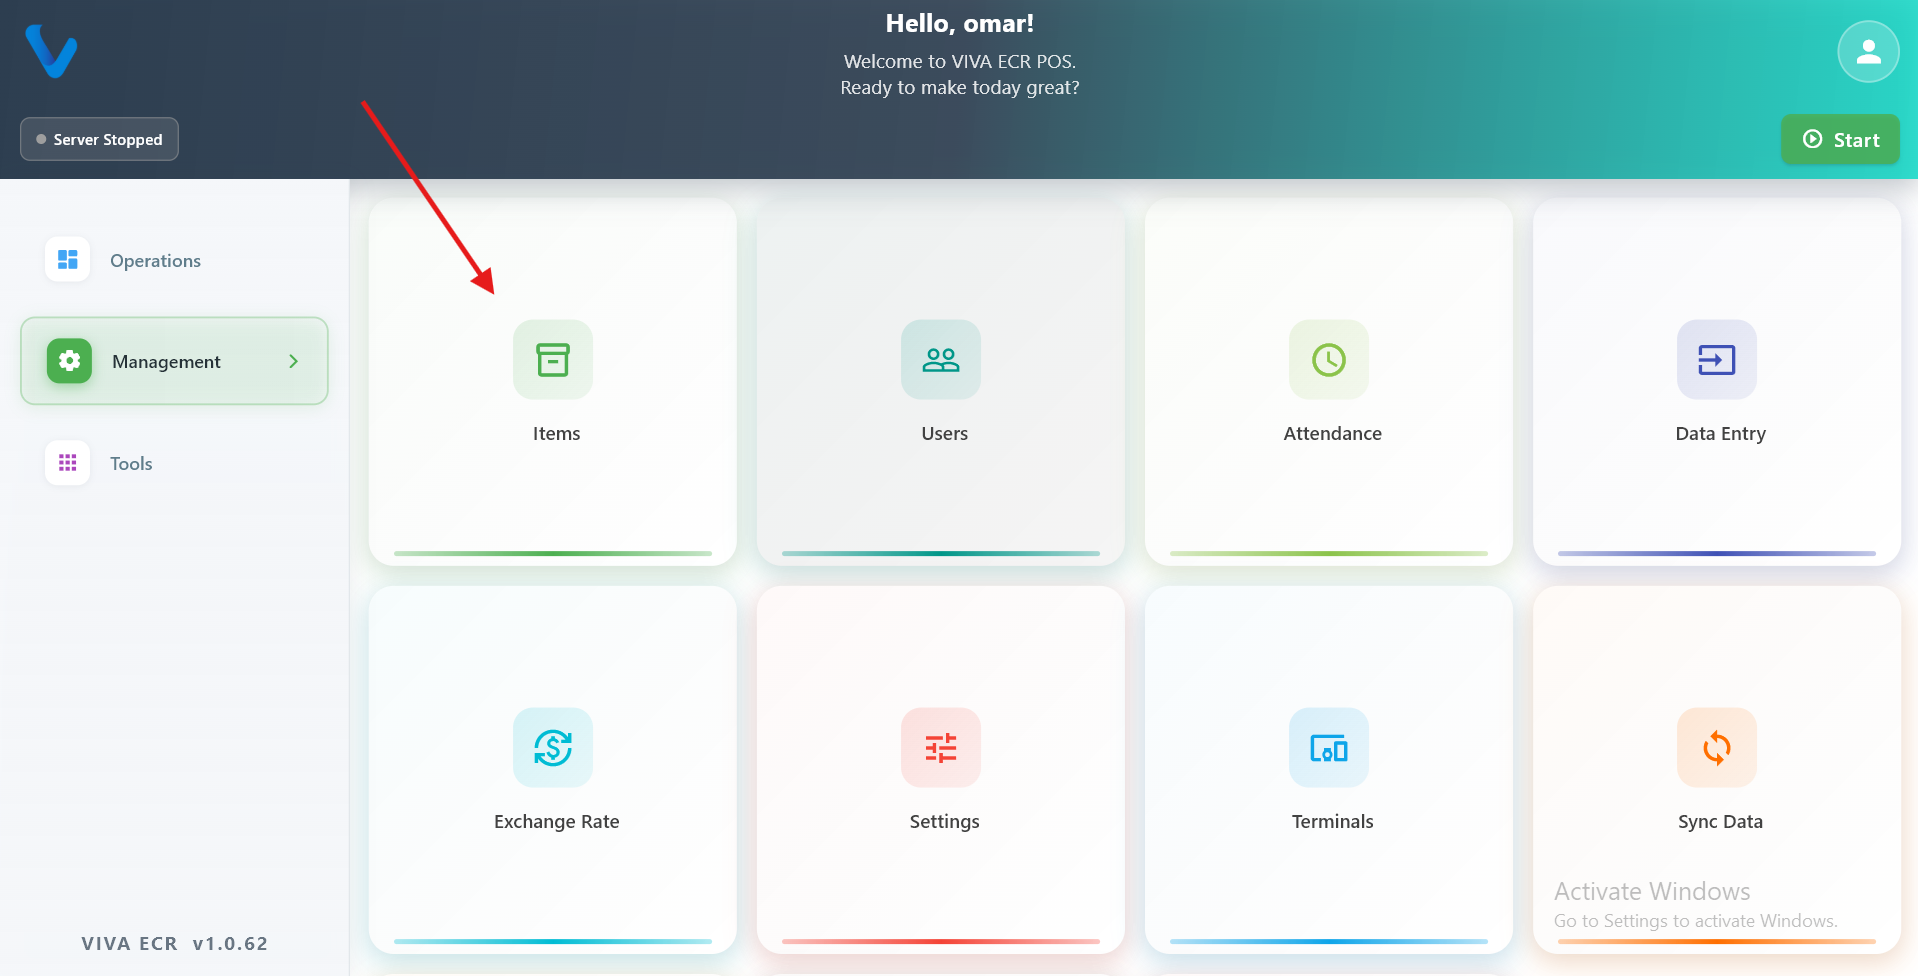
3. Management Section
This section is mainly for configuration, supervision, and control tasks.
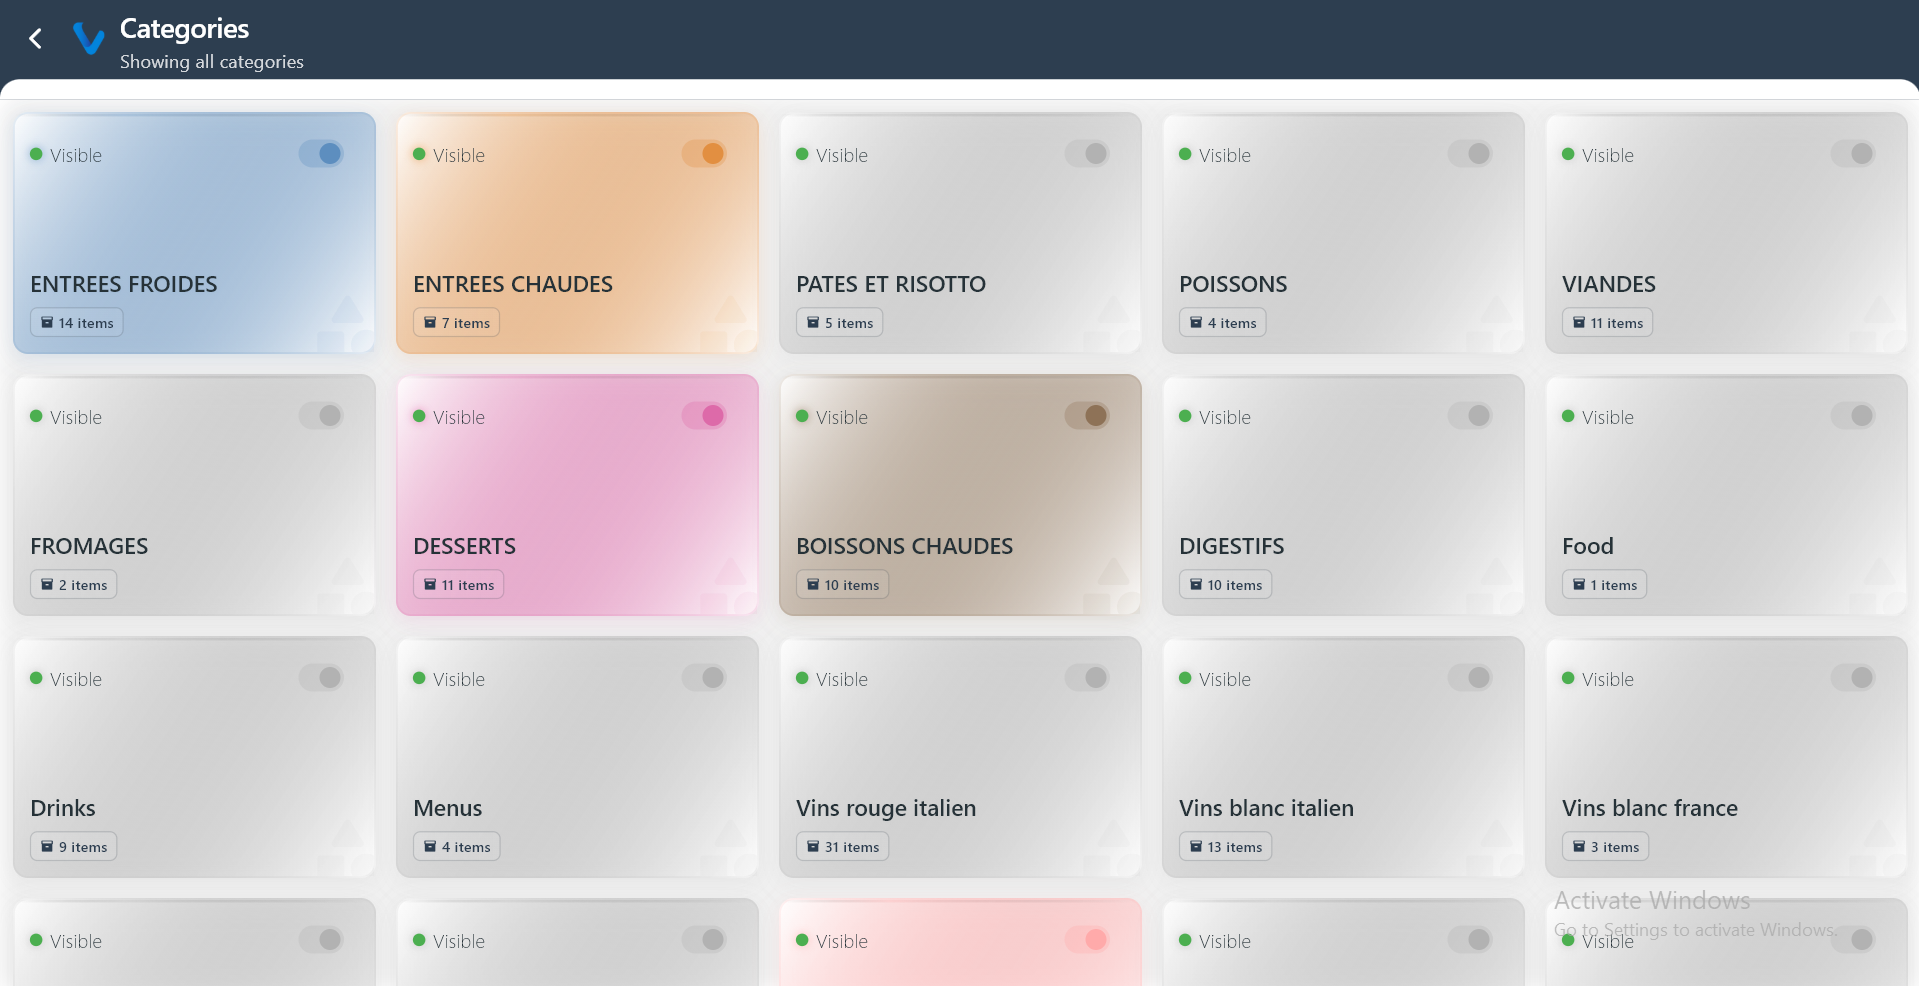
3.1 Items
Items helps you view and manage products, categories, and visibility in the catalog.
What you can do:
- Search products quickly
- Review stock and visibility
- Open product lists by category

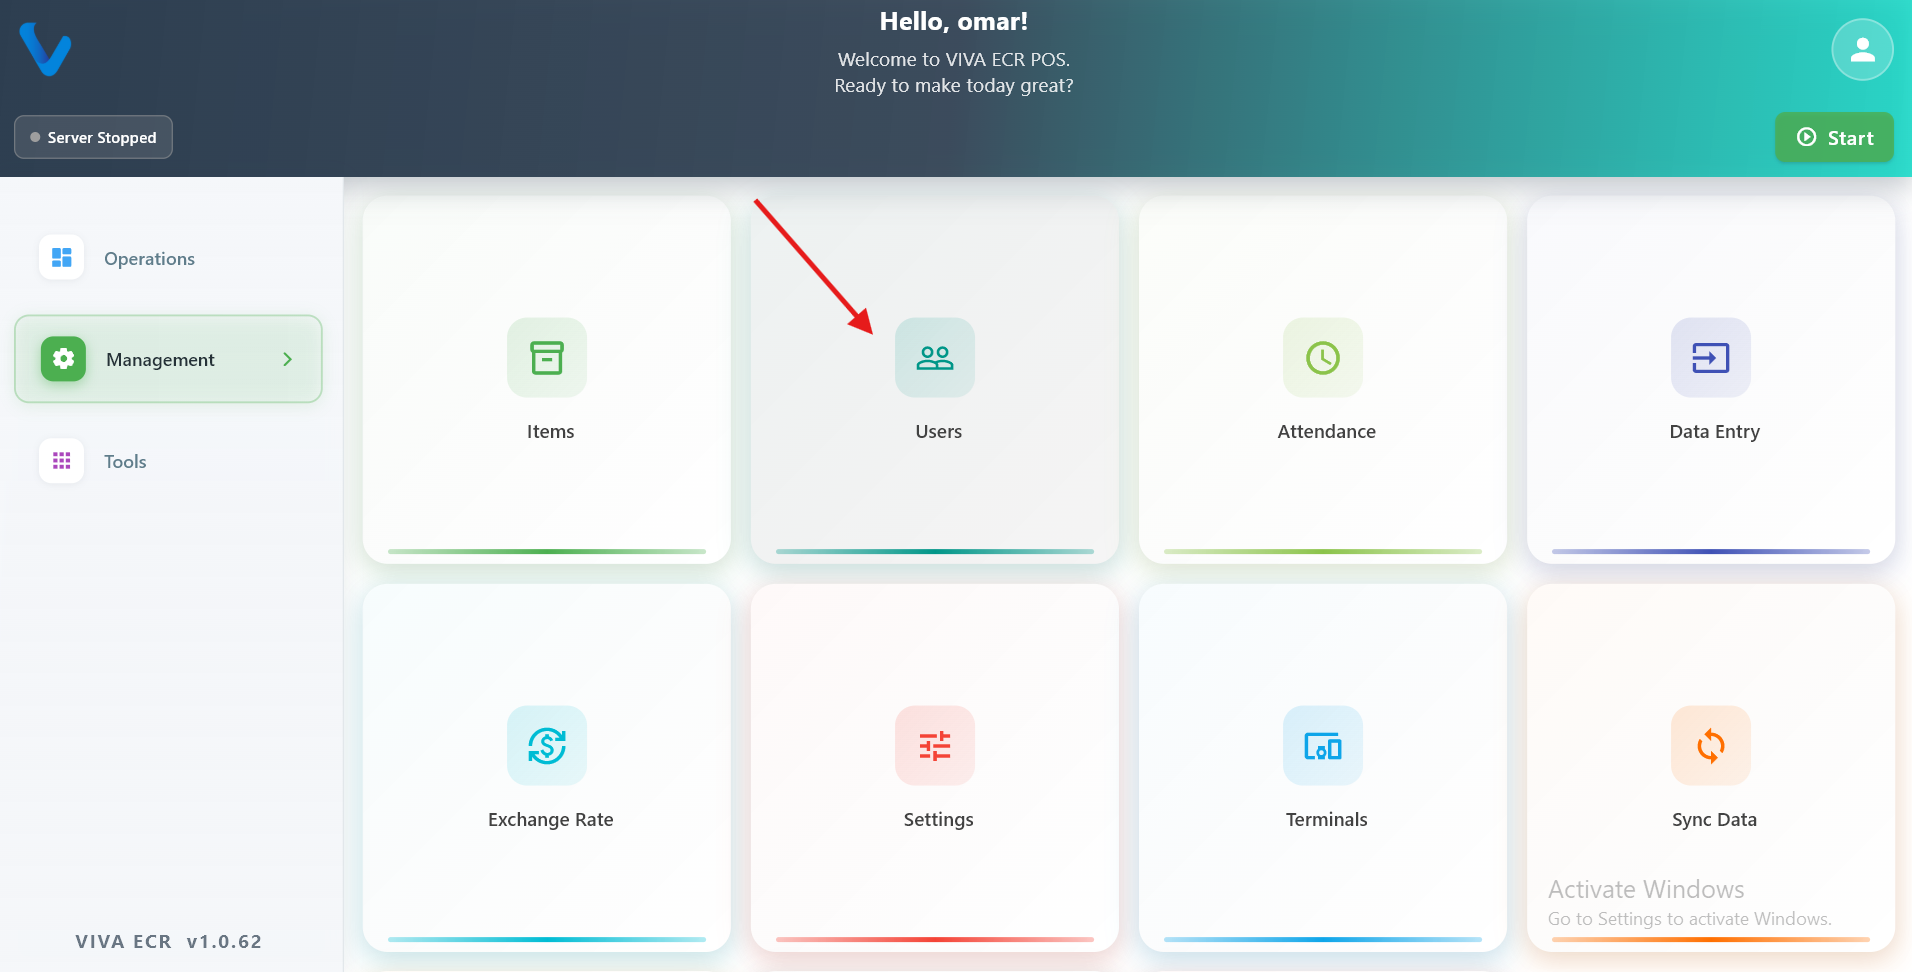
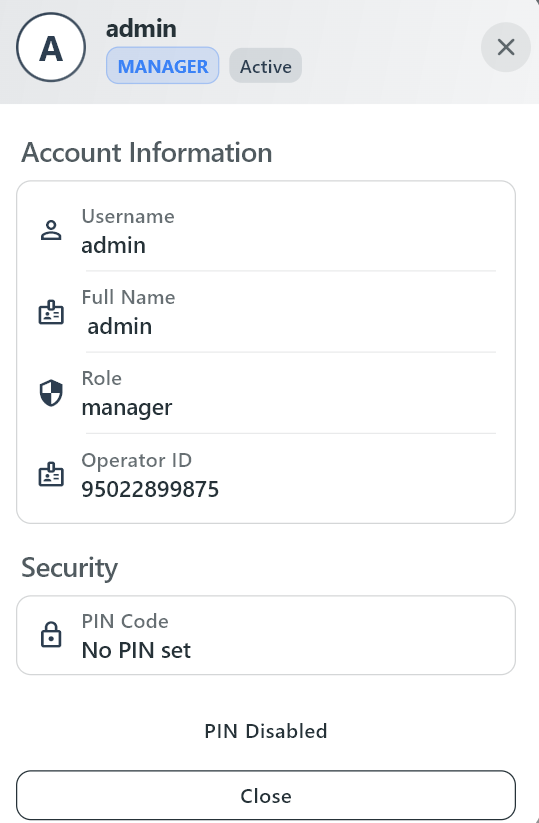
3.2 Users
Users is where registered users are reviewed and managed.
What you can do:
- Search users by name
- Filter by role
- Open user profile details

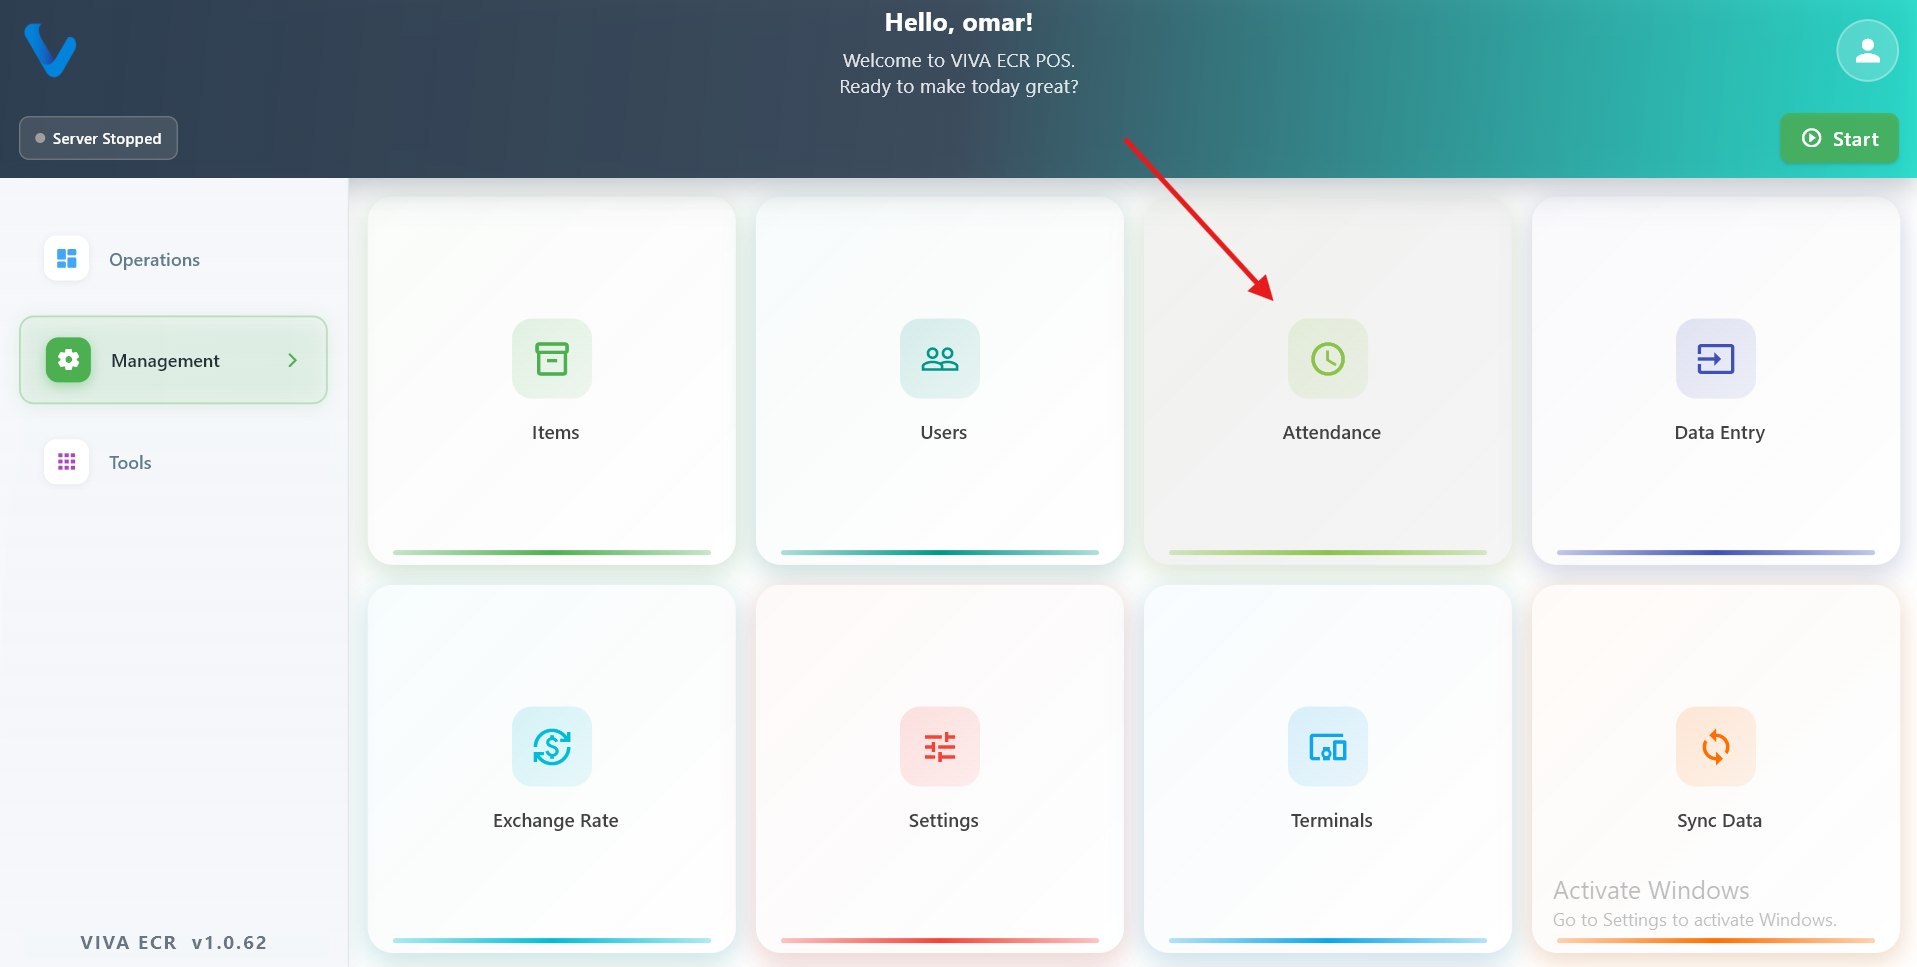
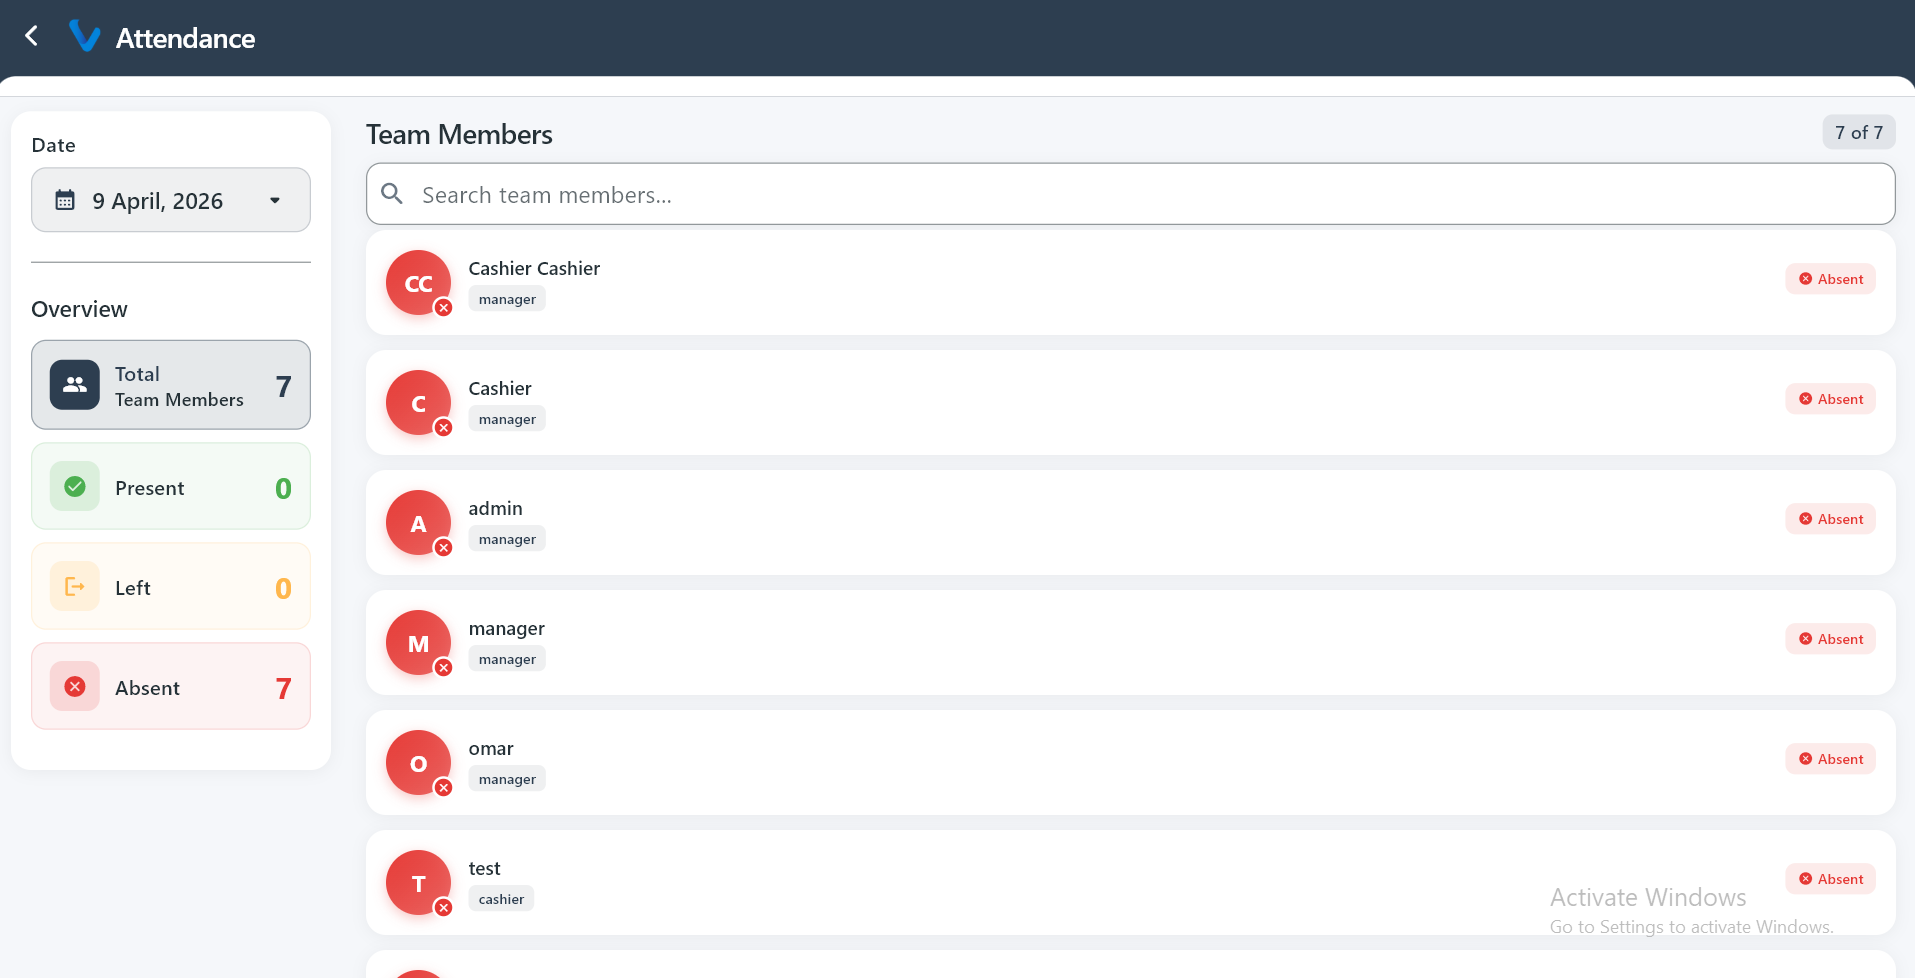
3.3 Attendance
Attendance shows team presence for a selected day so managers can quickly check who is working.
What you can do:
- See Present, Left, and Absent counts
- Review staff attendance status
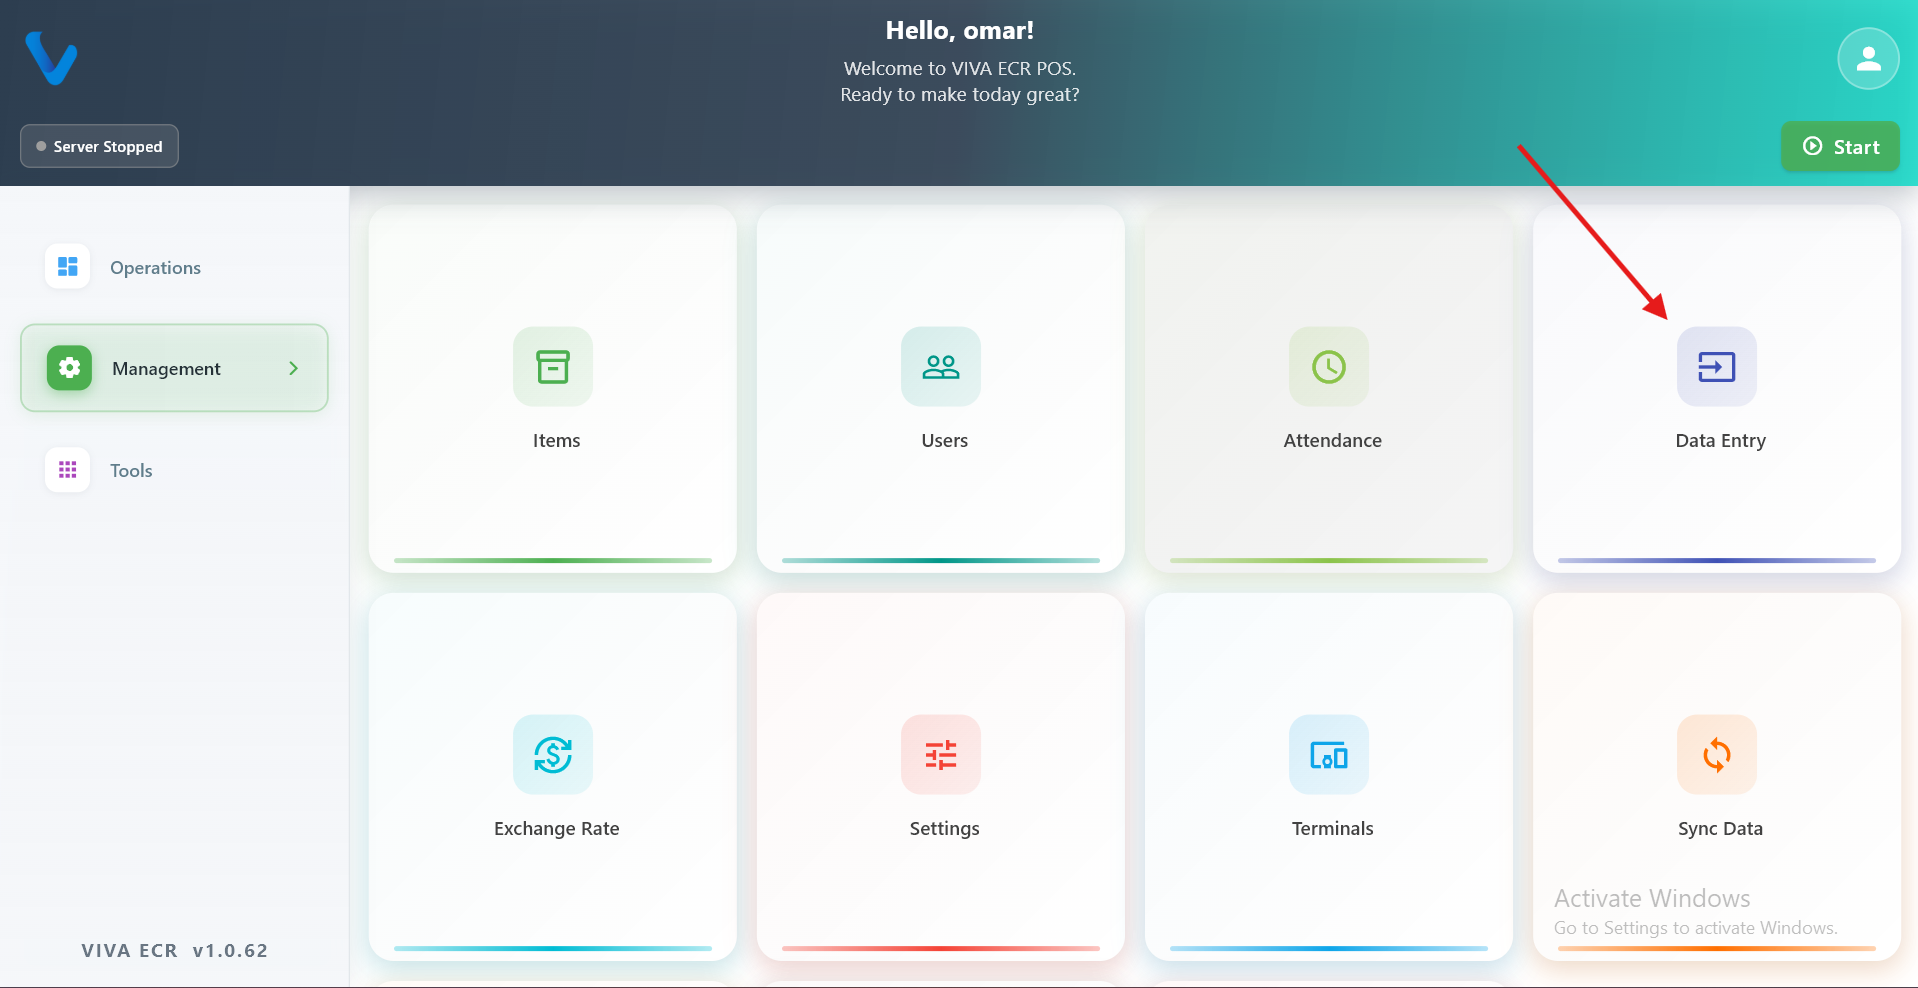
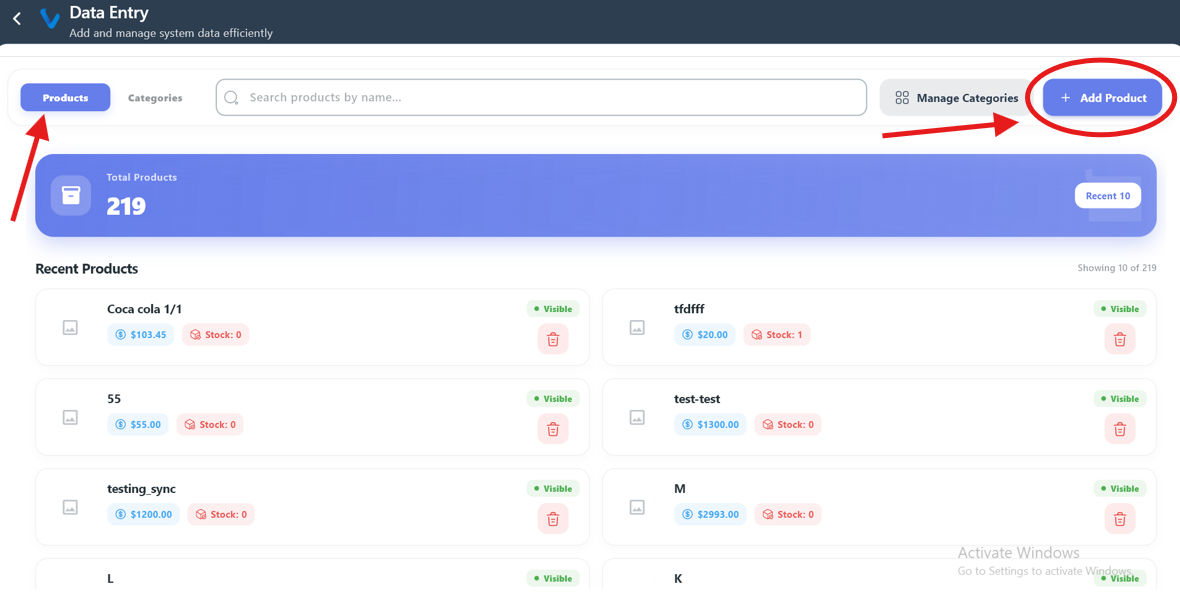
3.4 Data Entry
Data Entry is used to manage products and categories from one place.
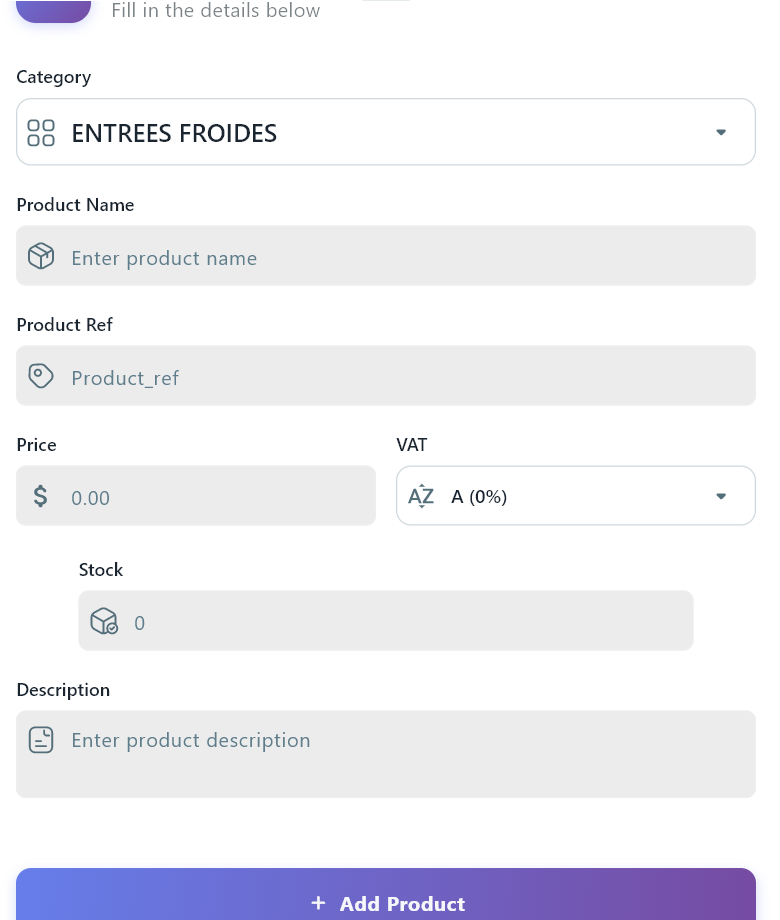
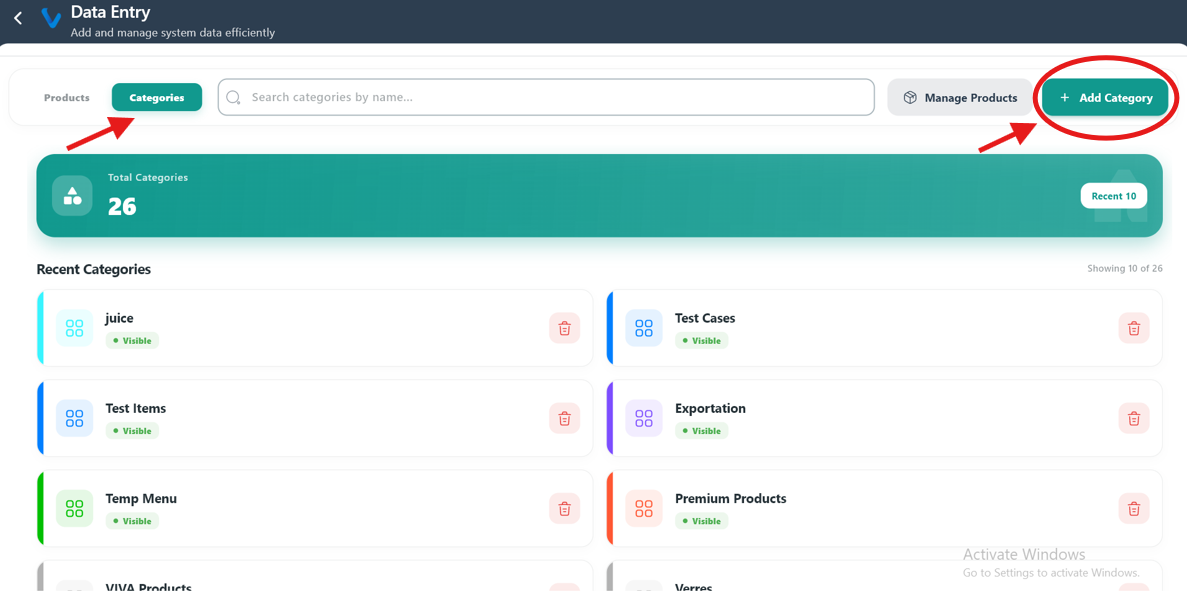
What you can do:
- Add new products
- Add new categories
- Search and manage existing records

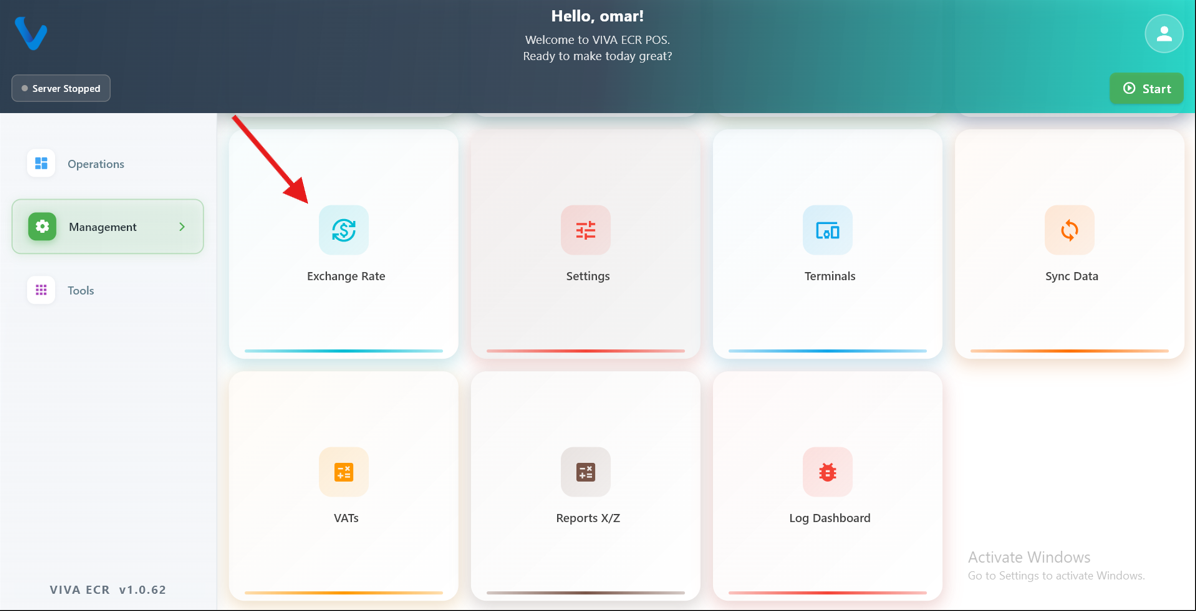
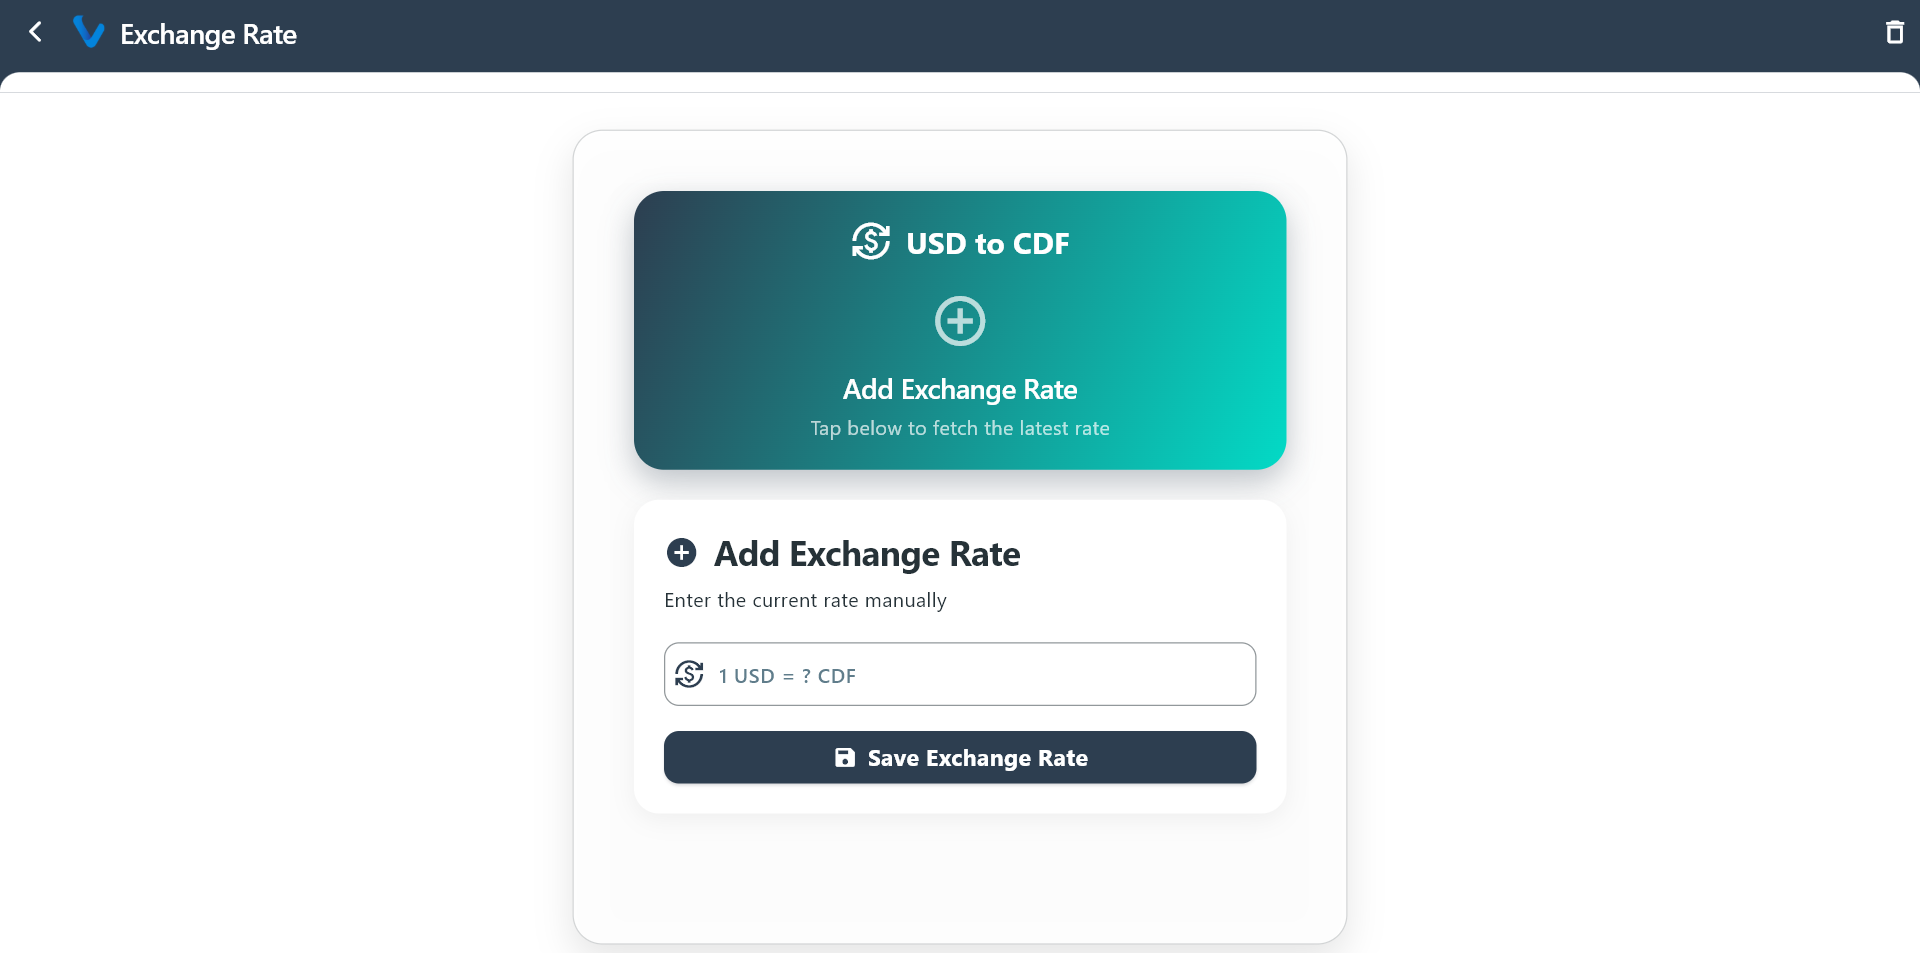
3.5 Exchange Rate
Exchange Rate is used to define the currency conversion value used in the app.
How to use:
- Open Exchange Rate.
- Enter or update the rate.
- Save the changes.
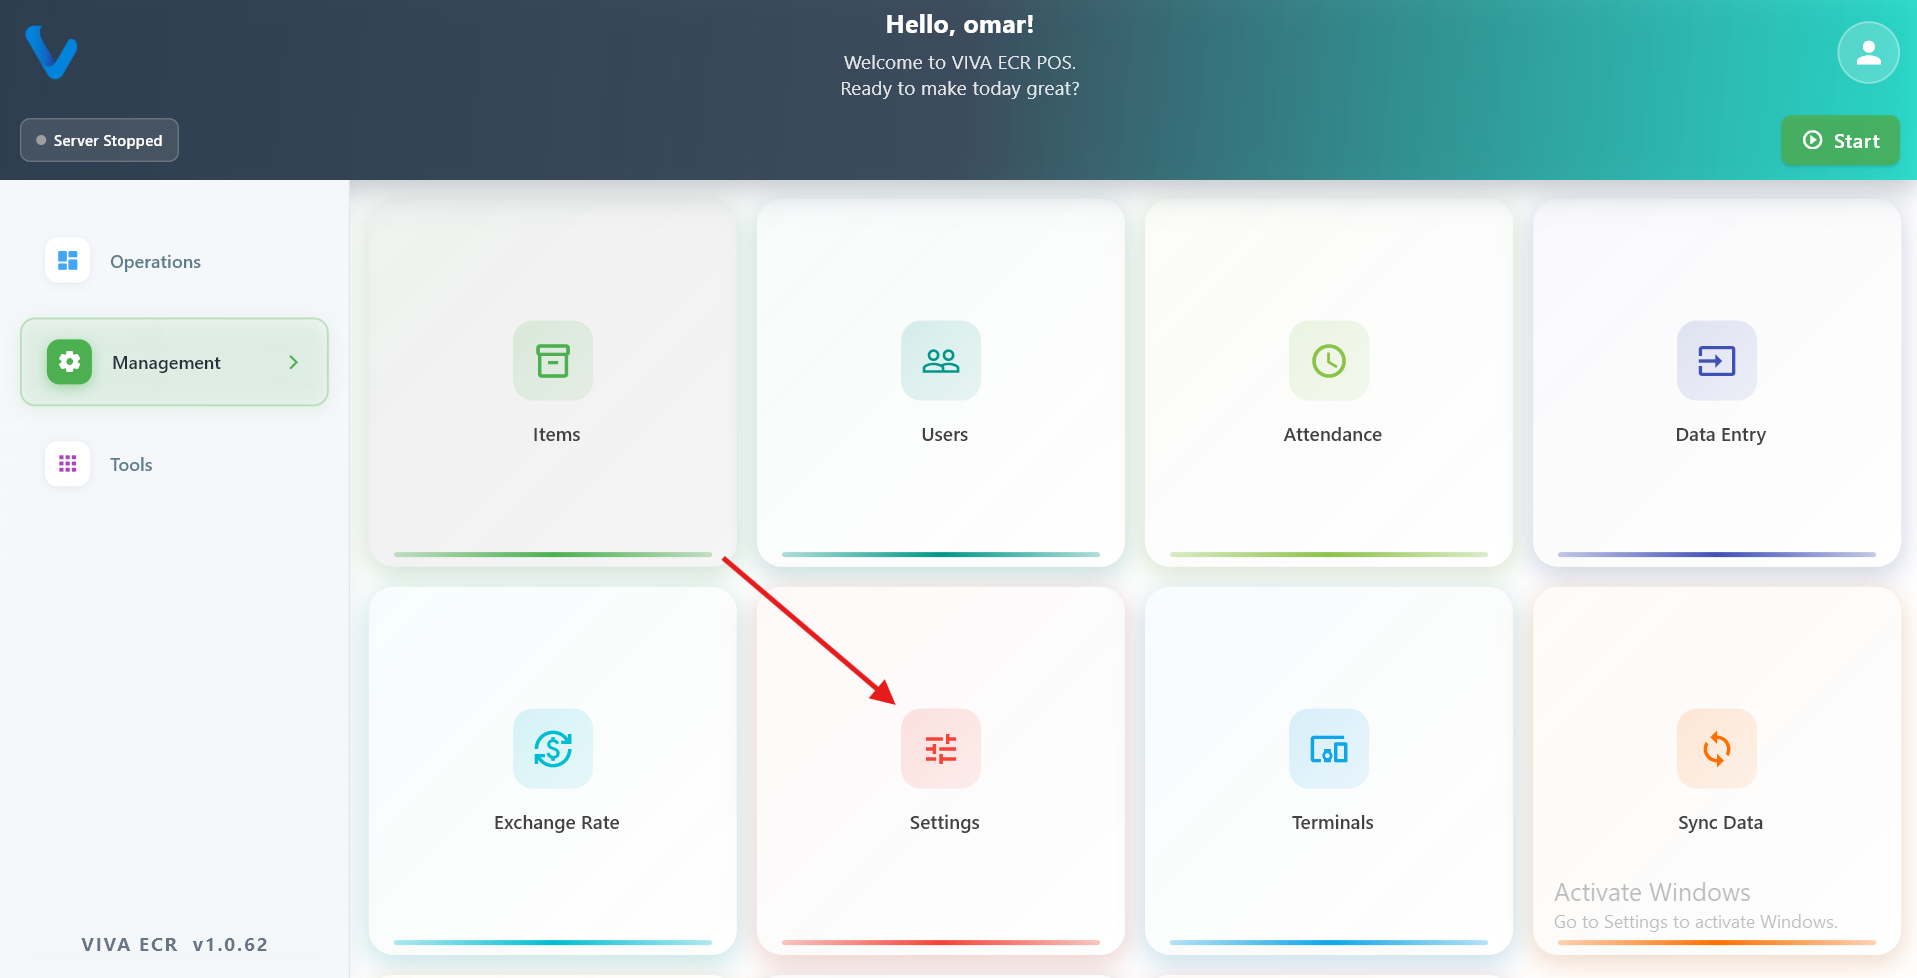
3.6 Settings
Settings control how the app looks, connects, prints, and handles access.
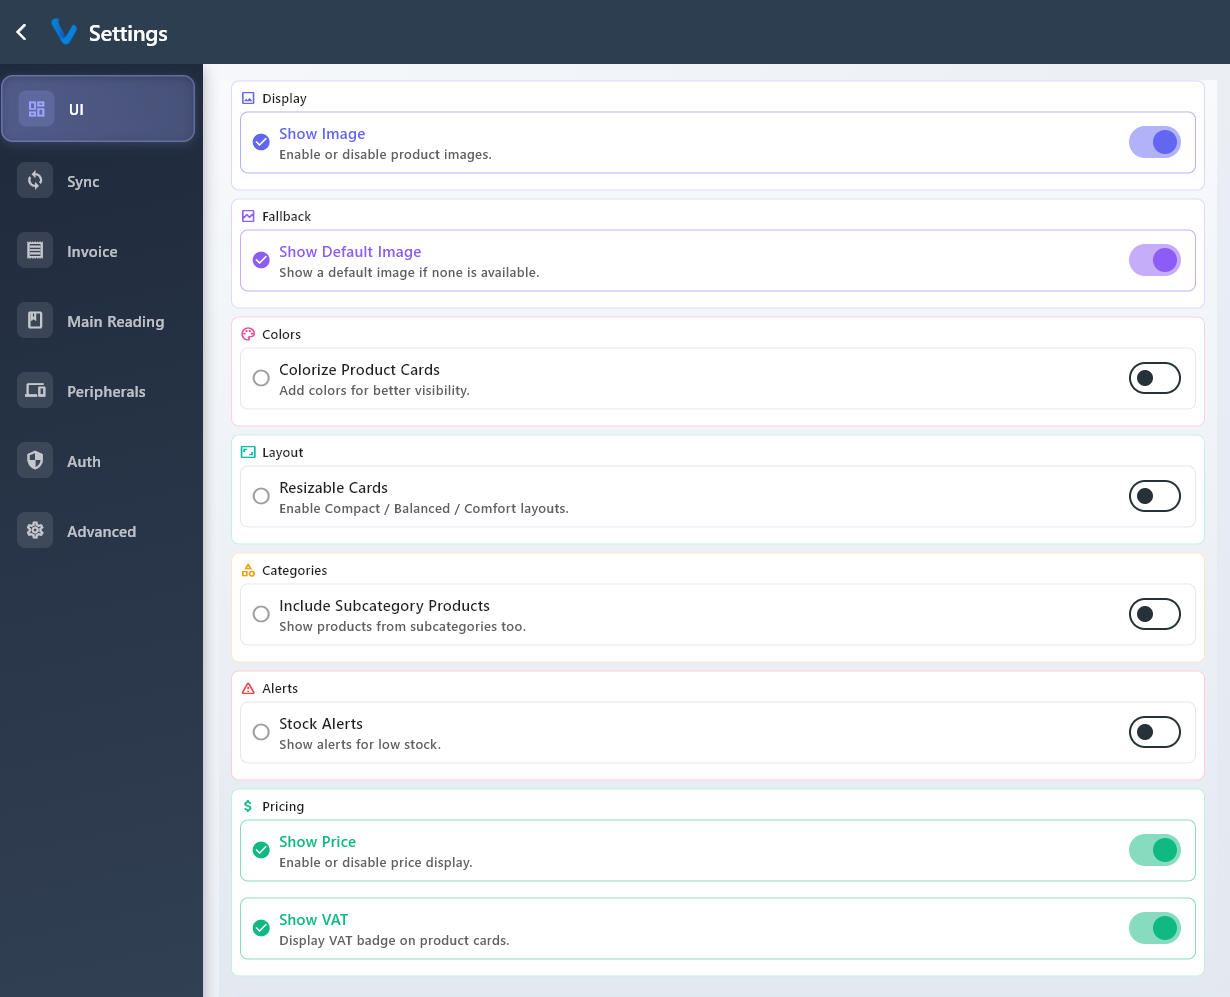
3.6.1 UI
UI controls visual display options such as product card size, layout, and other on-screen preferences.
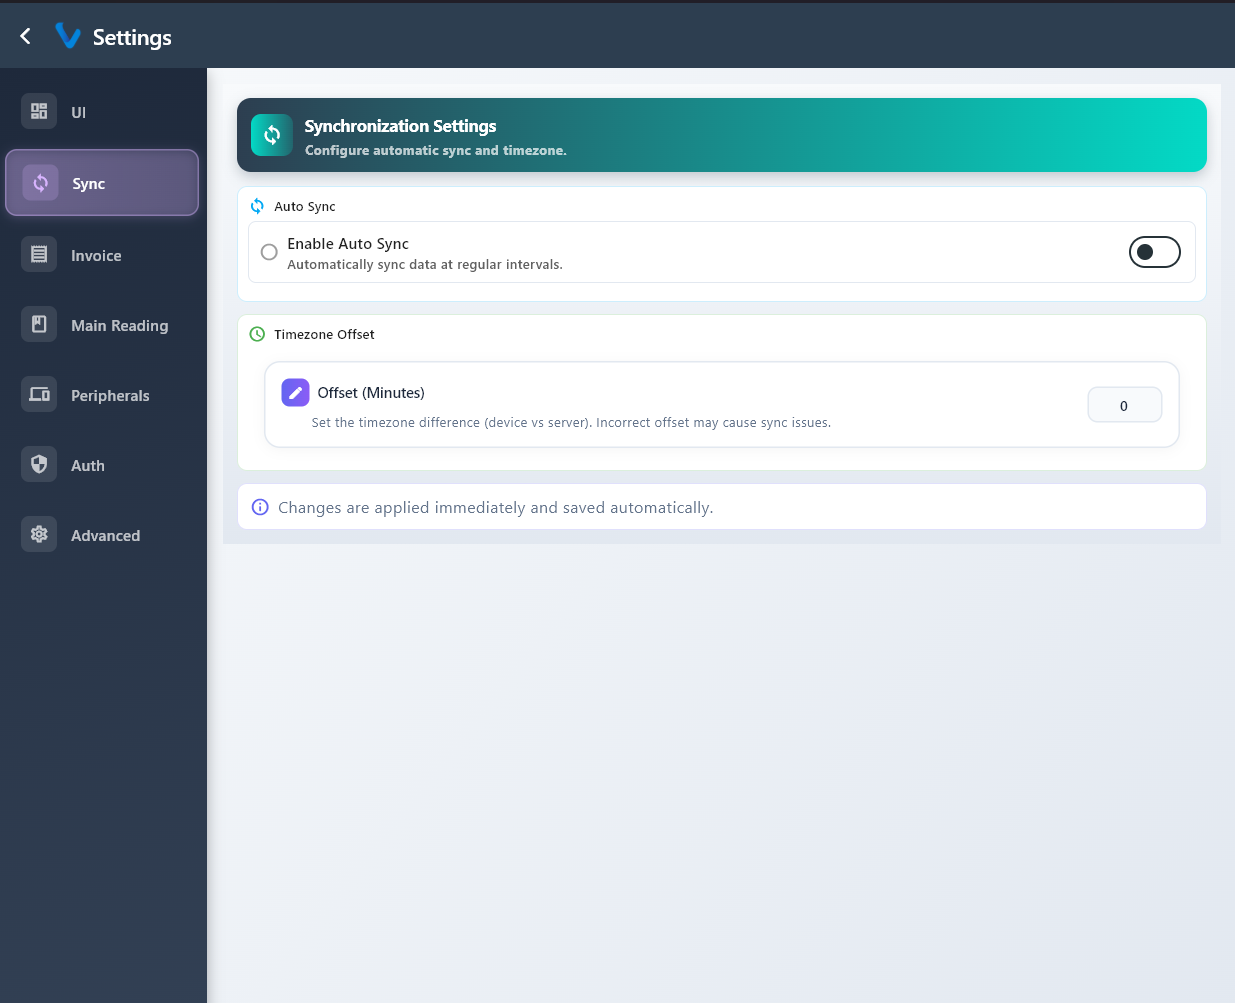
3.6.2 Sync
Sync settings control automatic synchronization and timing so the device stays up to date.
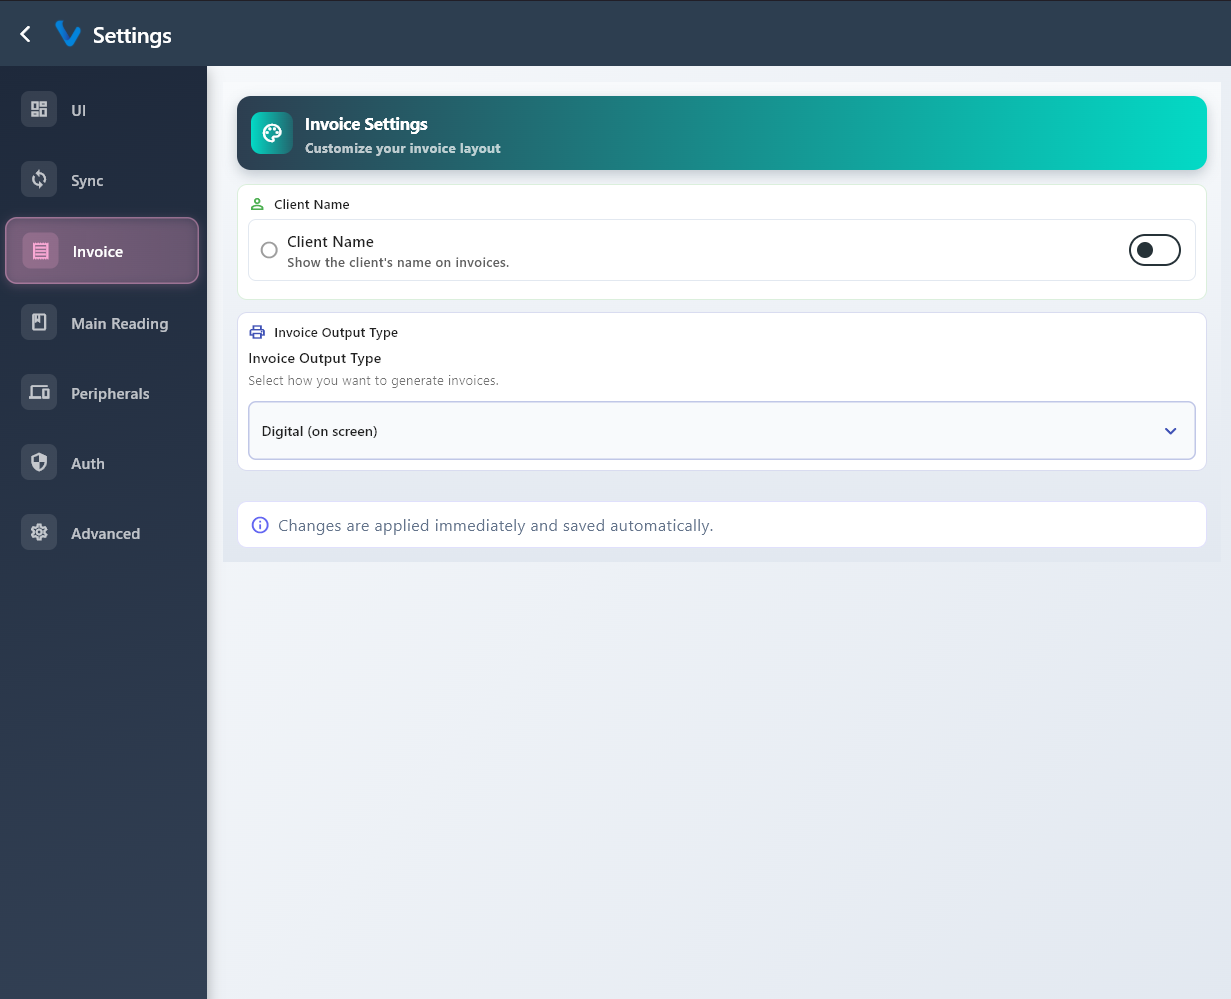
3.6.3 Invoice
Invoice settings control how invoice information appears and how it is shown to the customer.
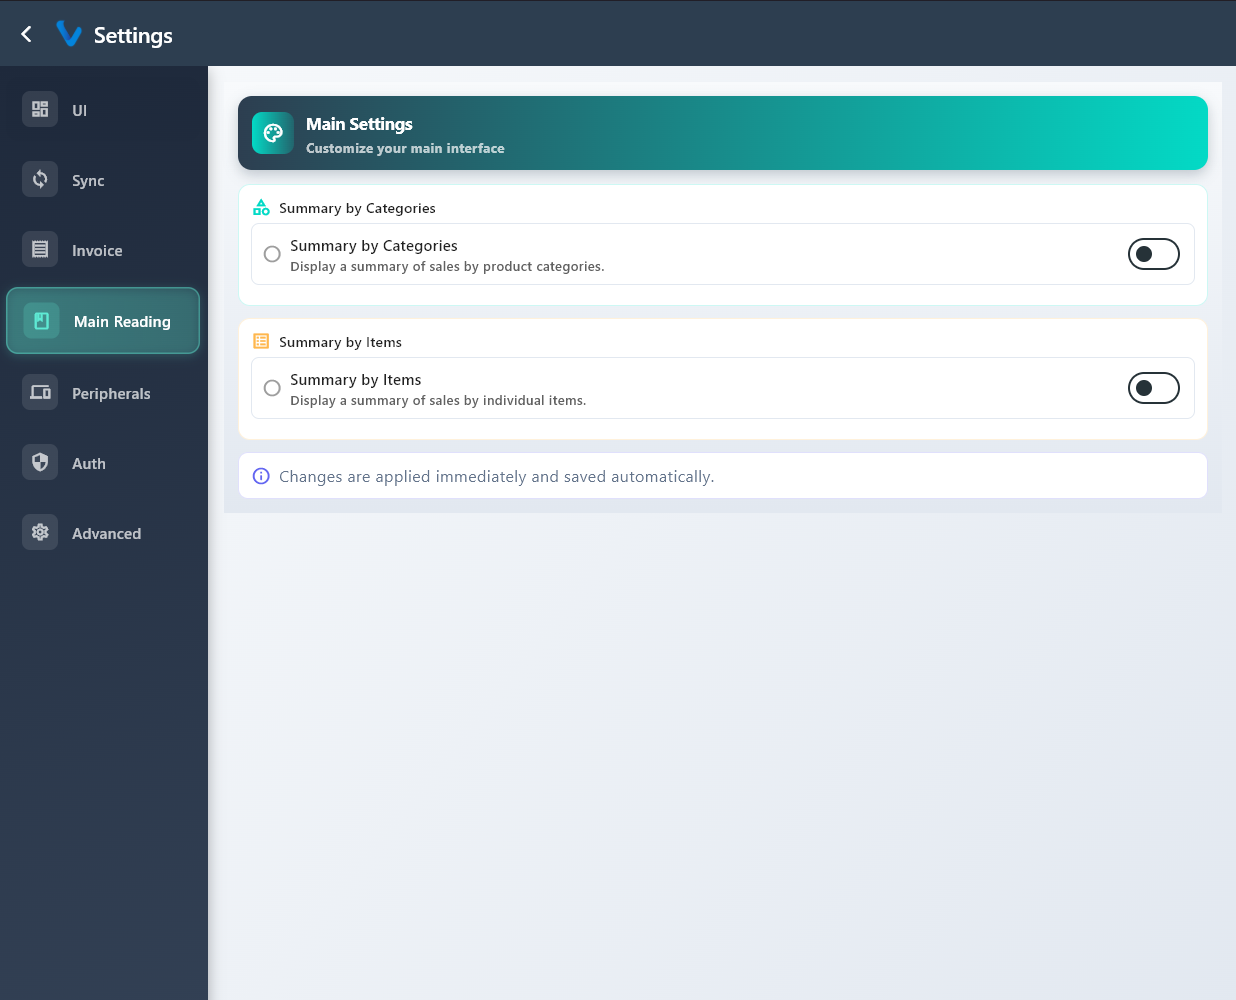
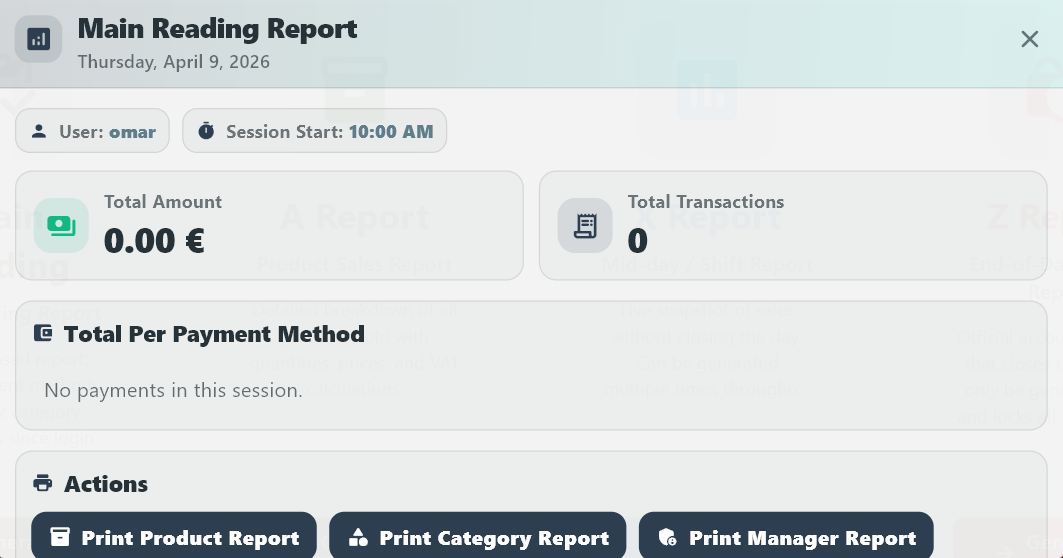
3.6.4 Main Reading
Main Reading settings control which summary style is shown on the main reading screen.
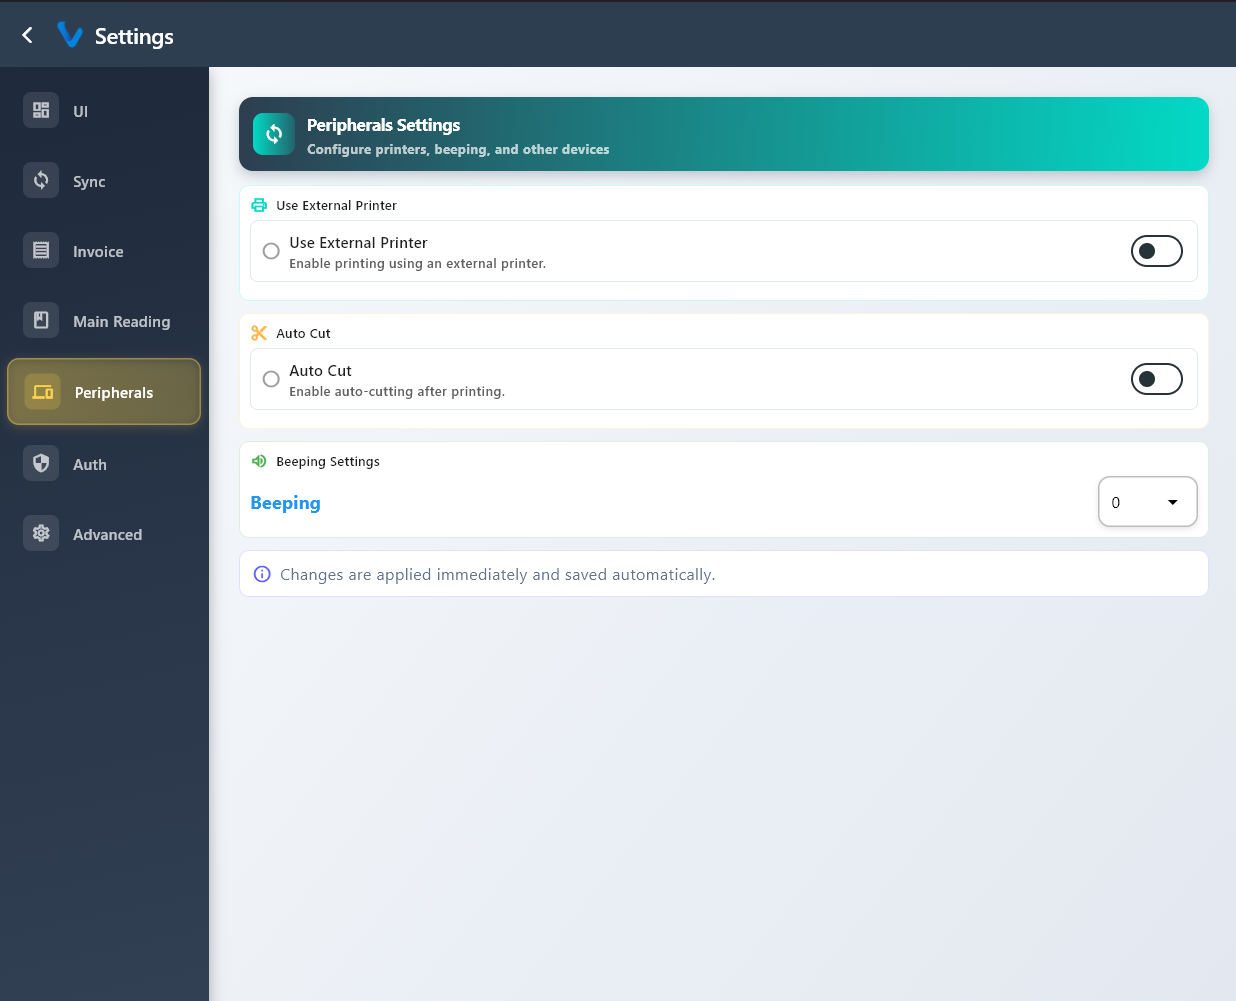
3.6.5 Peripherals
Peripherals settings are used for printer and other connected device options.
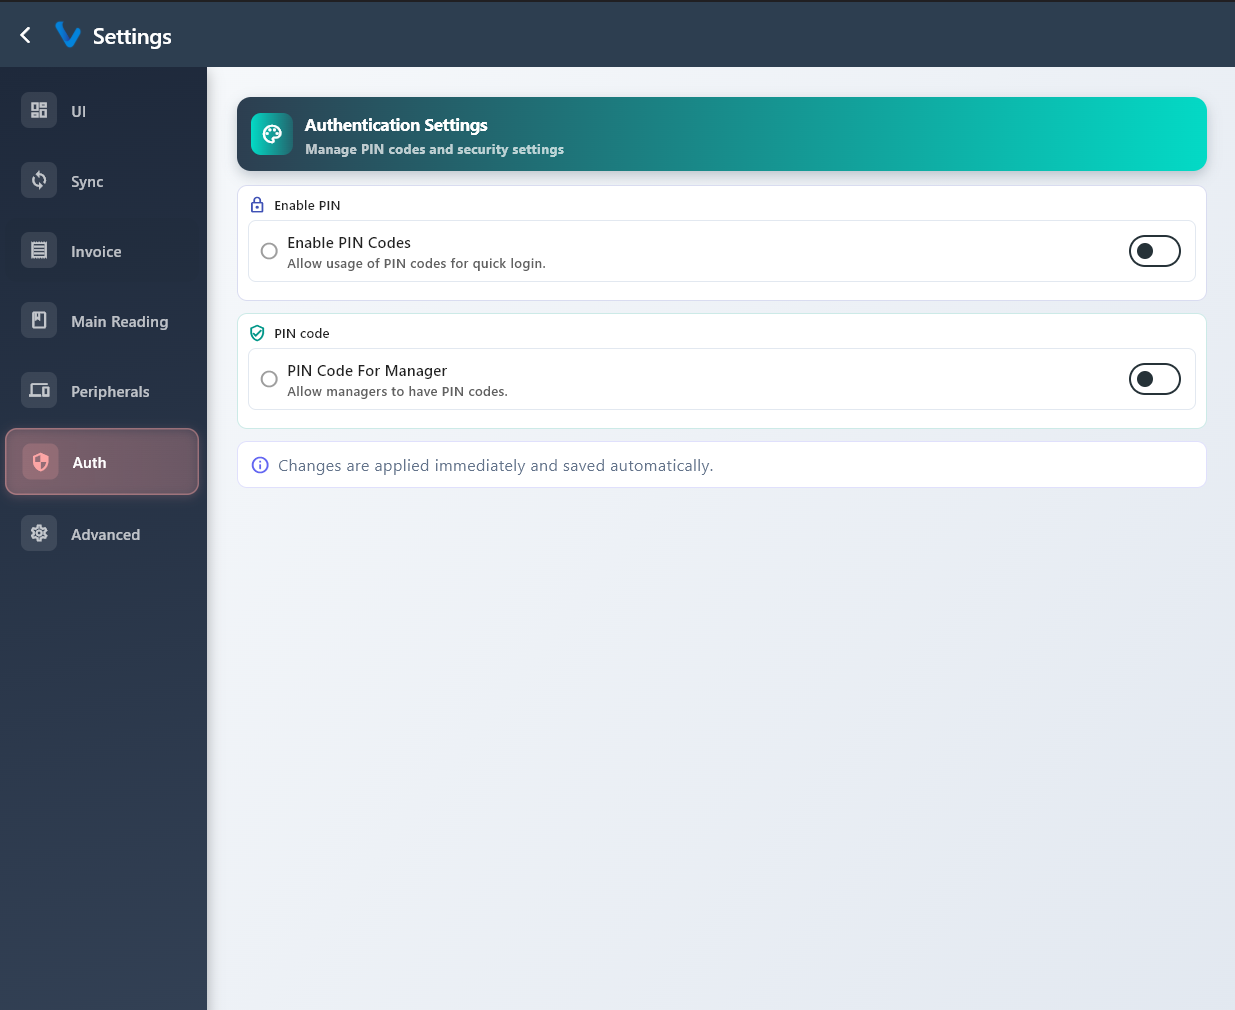
3.6.6 Auth
Auth settings control PIN rules and access security for users.
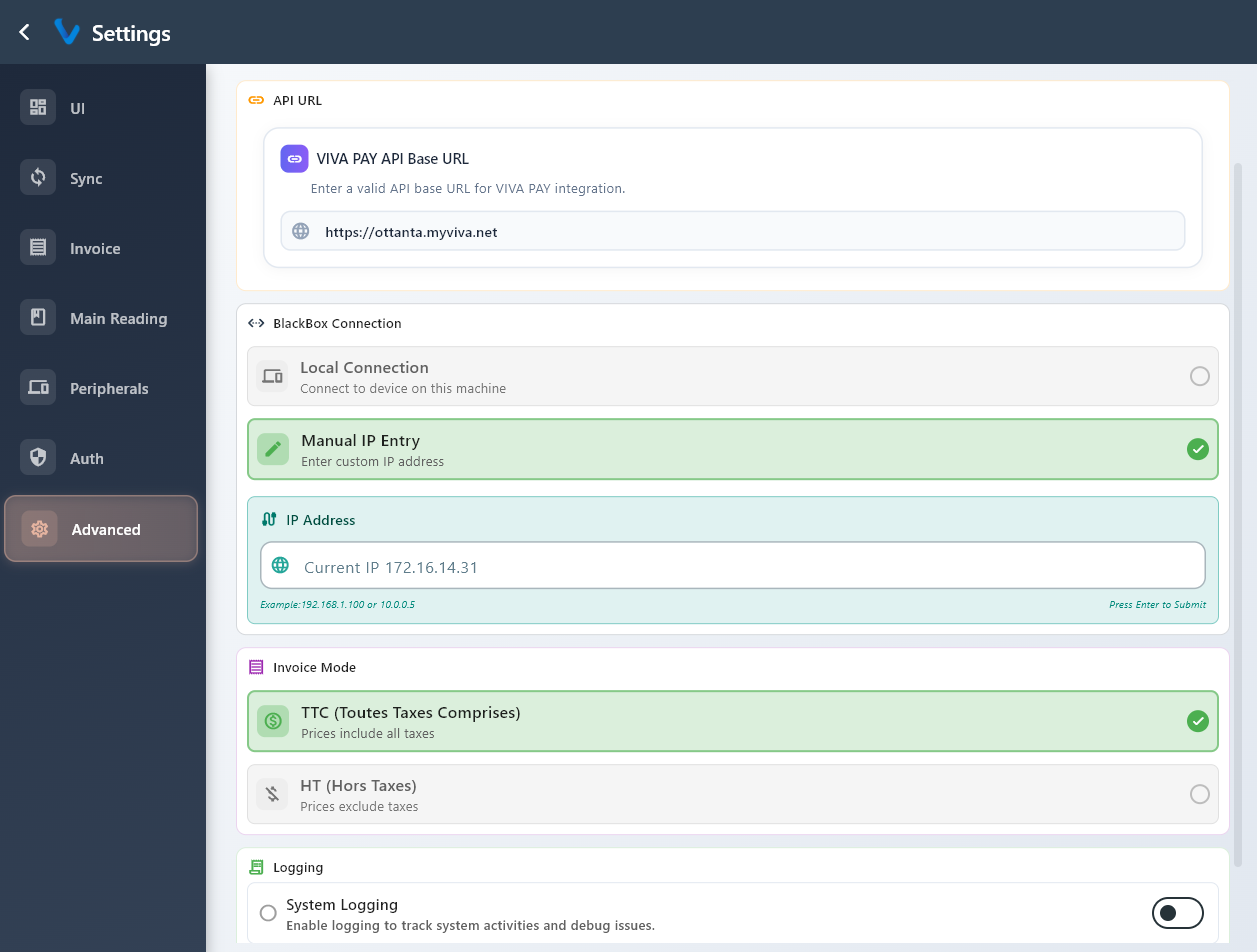
3.6.7 Advanced
Advanced settings are used for higher-level options that are usually adjusted by supervisors or administrators.
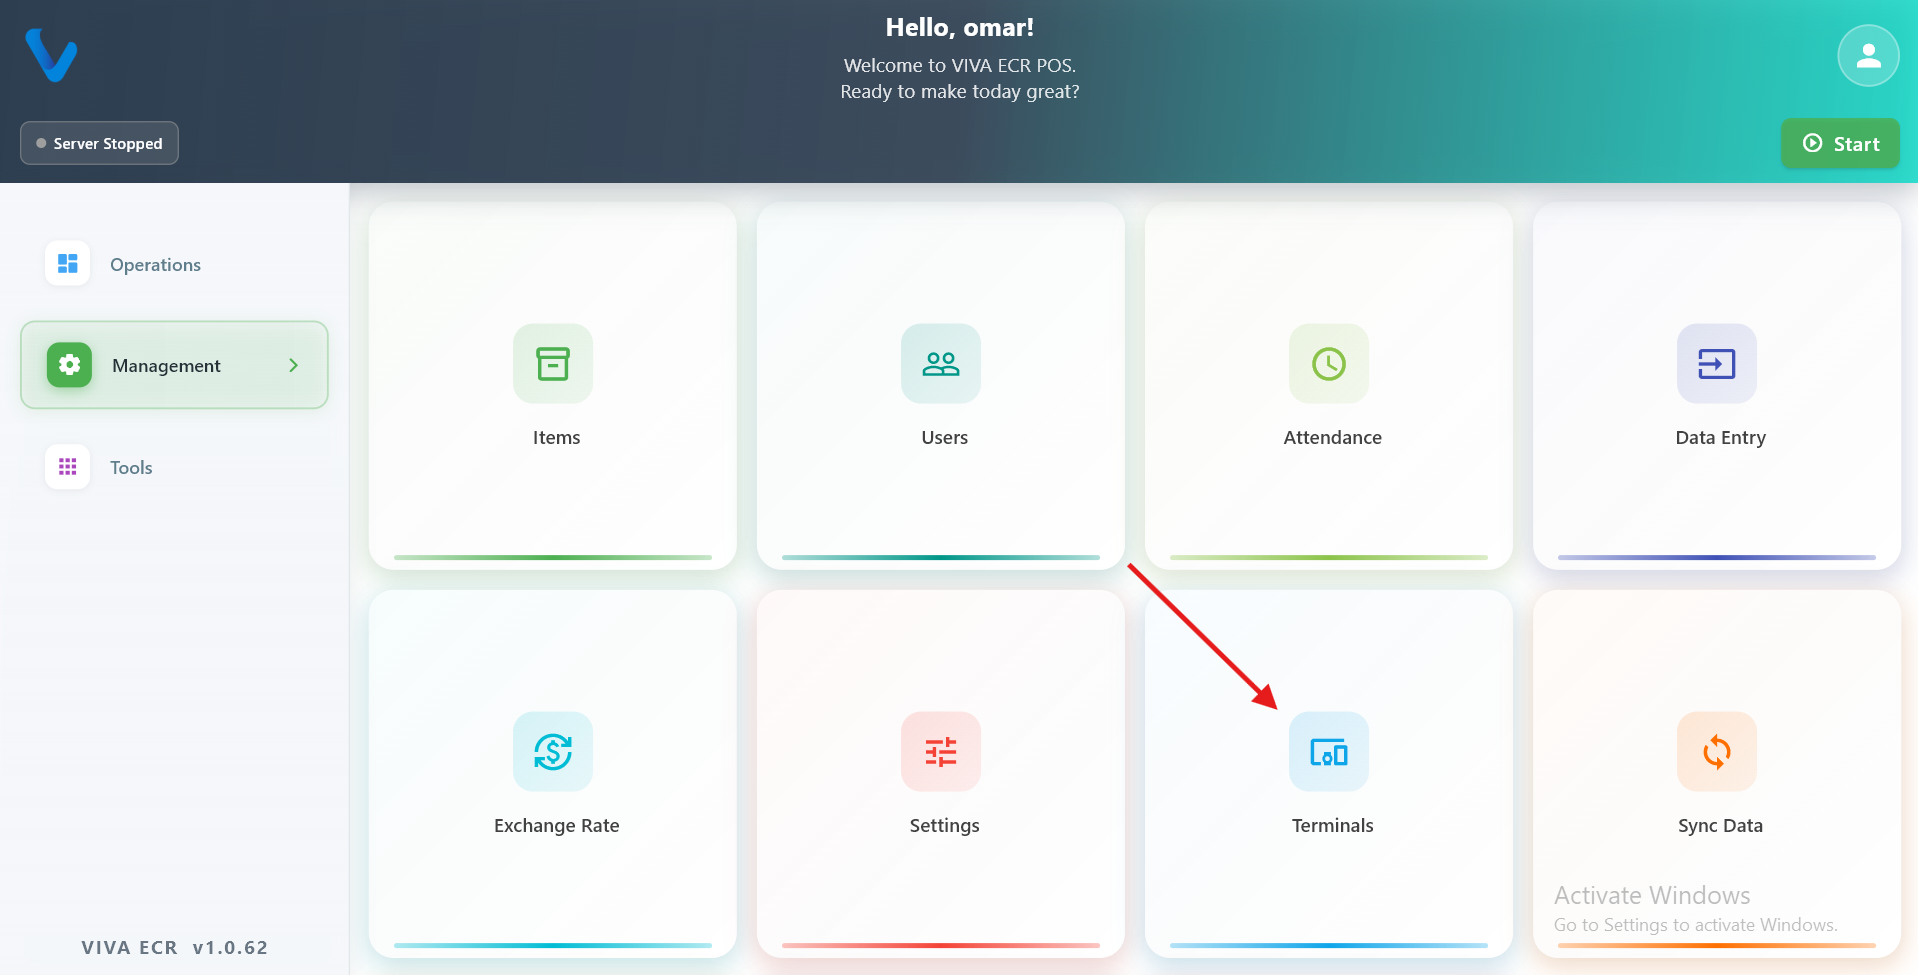
3.7 Terminals
In this setup, the Station is the main device that holds all data and runs the system. Terminals are secondary devices — usually tablets carried by waiters or staff on the floor — that connect to the Station over the local Wi-Fi network. When a waiter takes an order on a Terminal, that order flows through to the Station automatically.
The Terminals section in Management is where the Station keeps track of which Terminal devices exist and which staff members are allowed to use them.
3.7.1 Terminal Registry
The Terminal Registry is the list of all Terminal devices that have been introduced to this Station. Each entry represents a physical device (a tablet or phone) that is allowed to connect and communicate with the Station.
When you add a terminal here, you give it a name and an identifier so the Station can recognize it on the network. If a device is not in this list, it will not be able to pair with the Station.
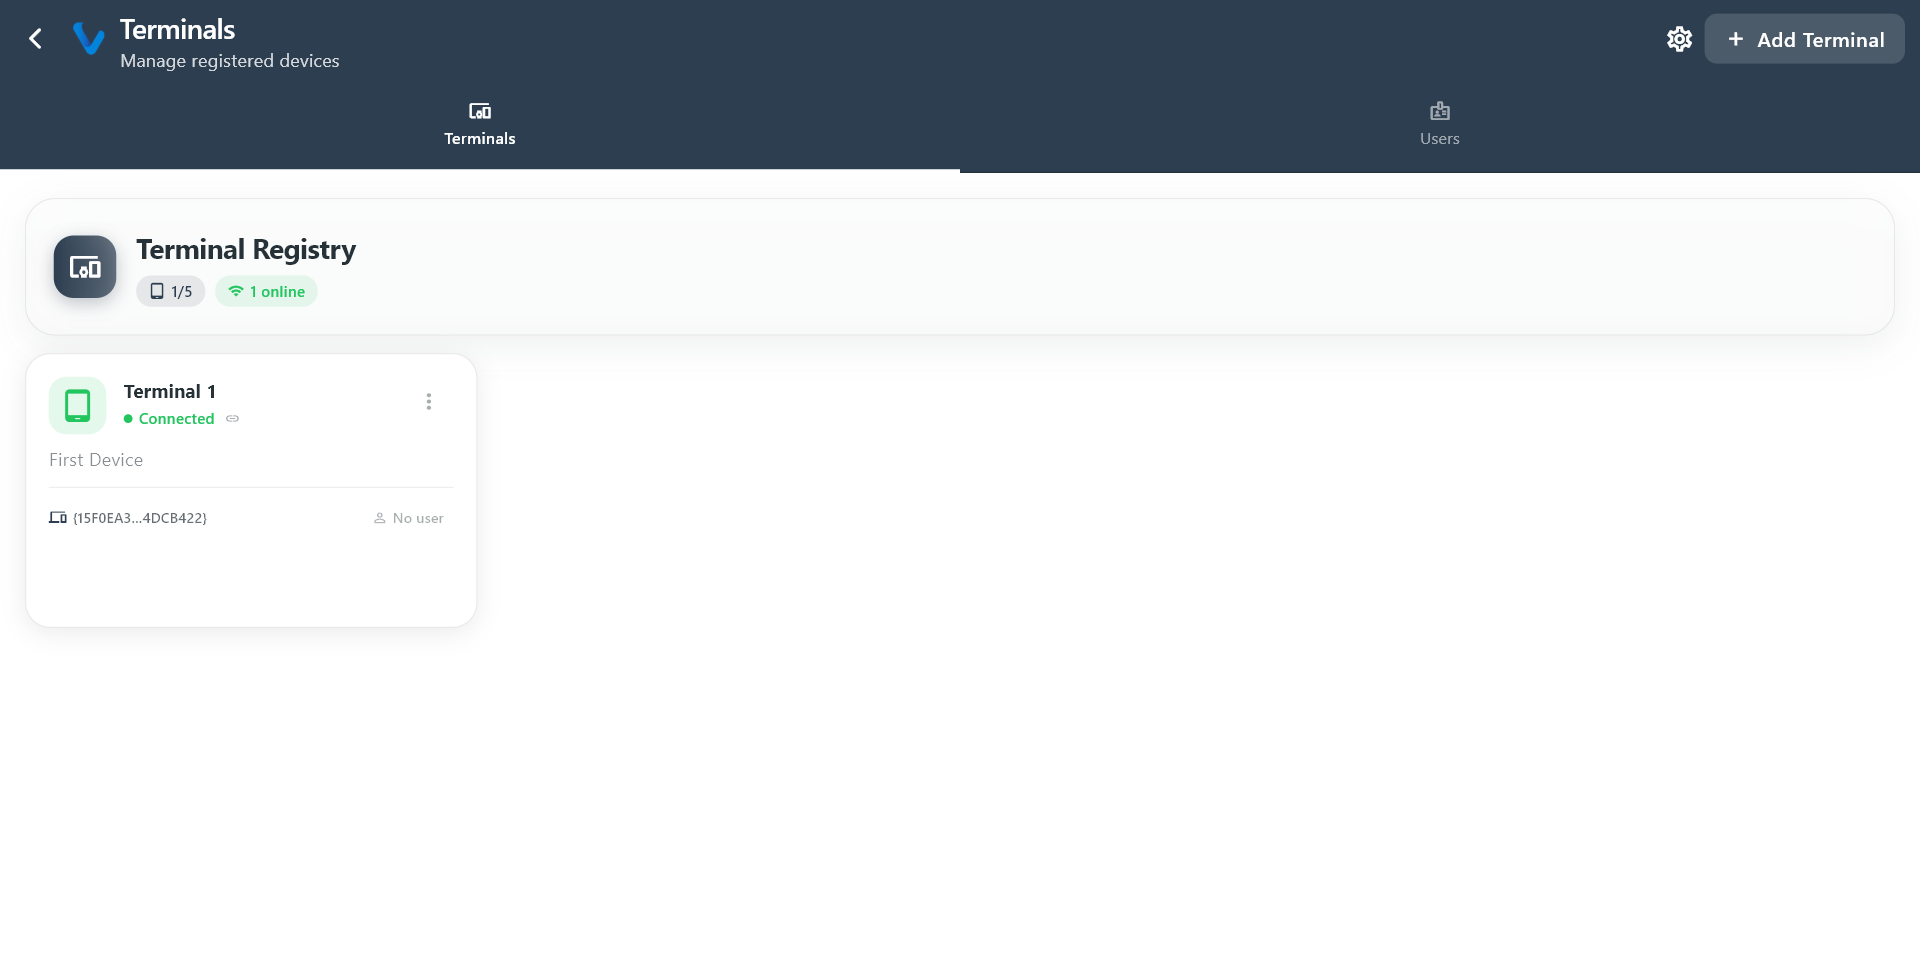
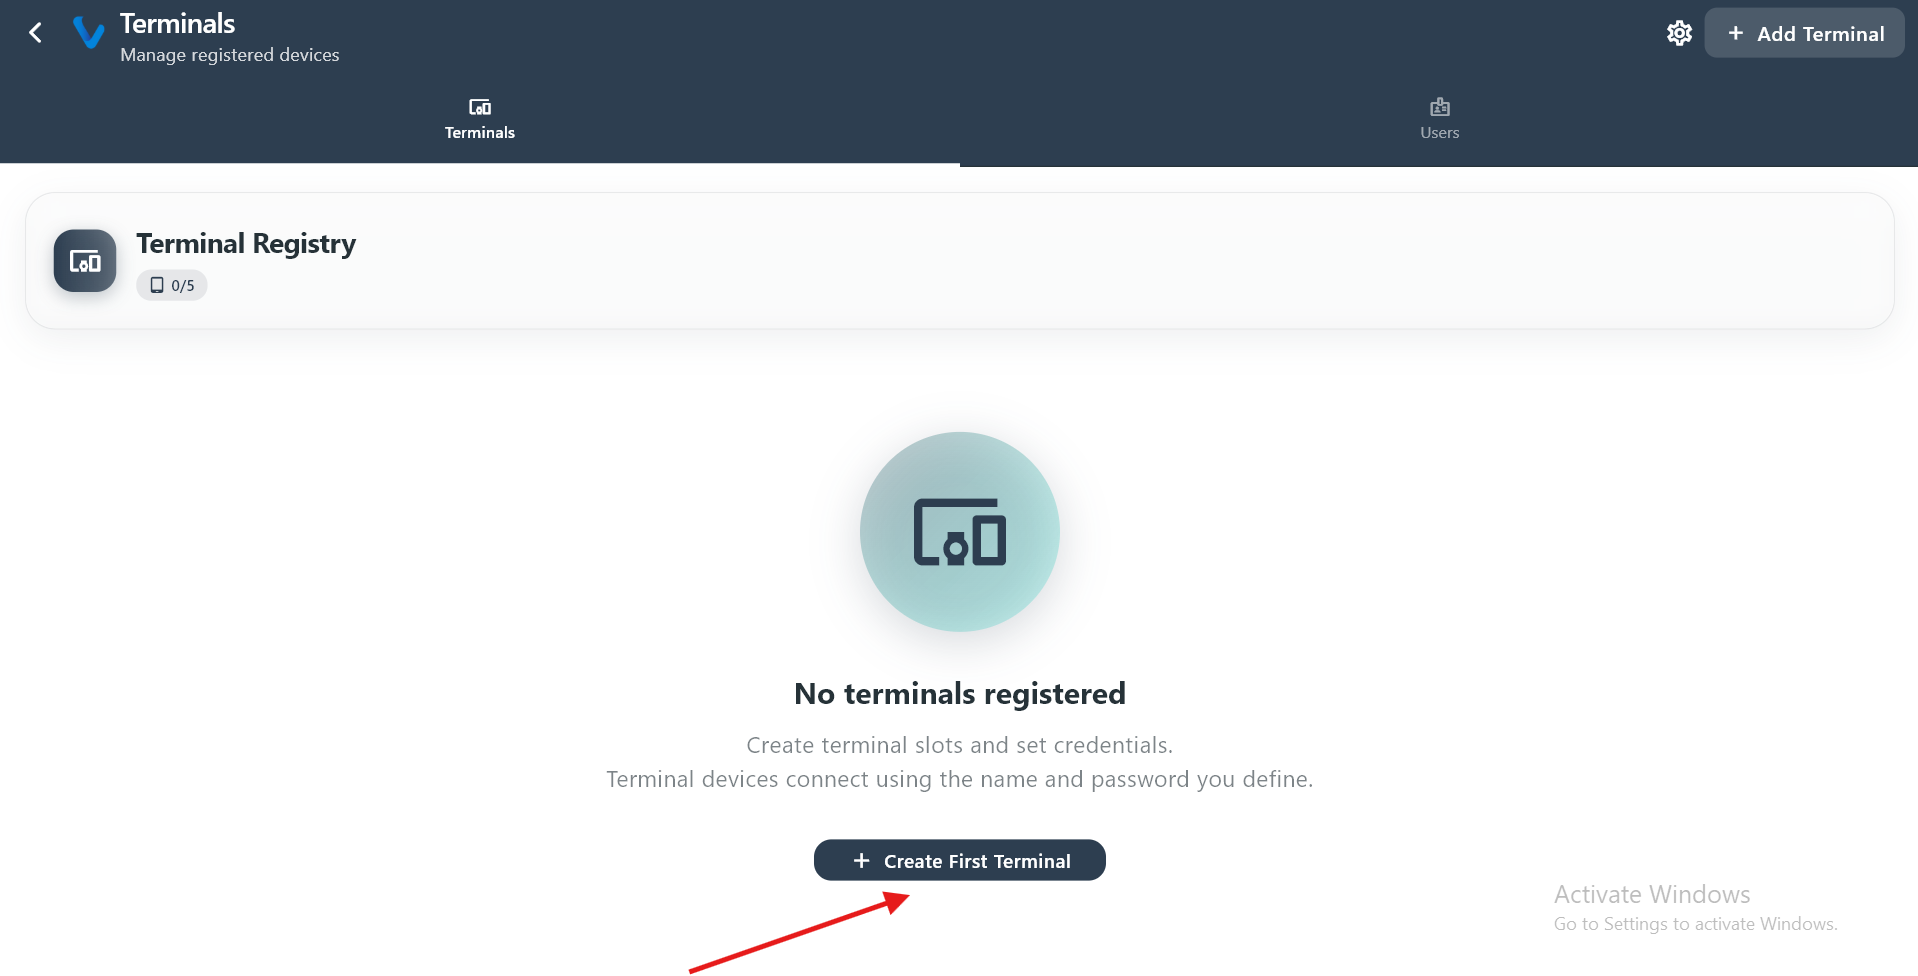 The list of registered terminals showing each device name and its current connection status.
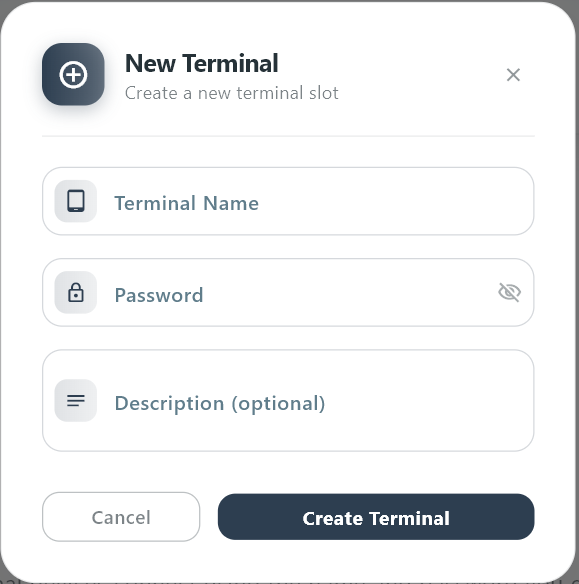 Fill in the device details to register a new terminal and allow it to connect to this Station.
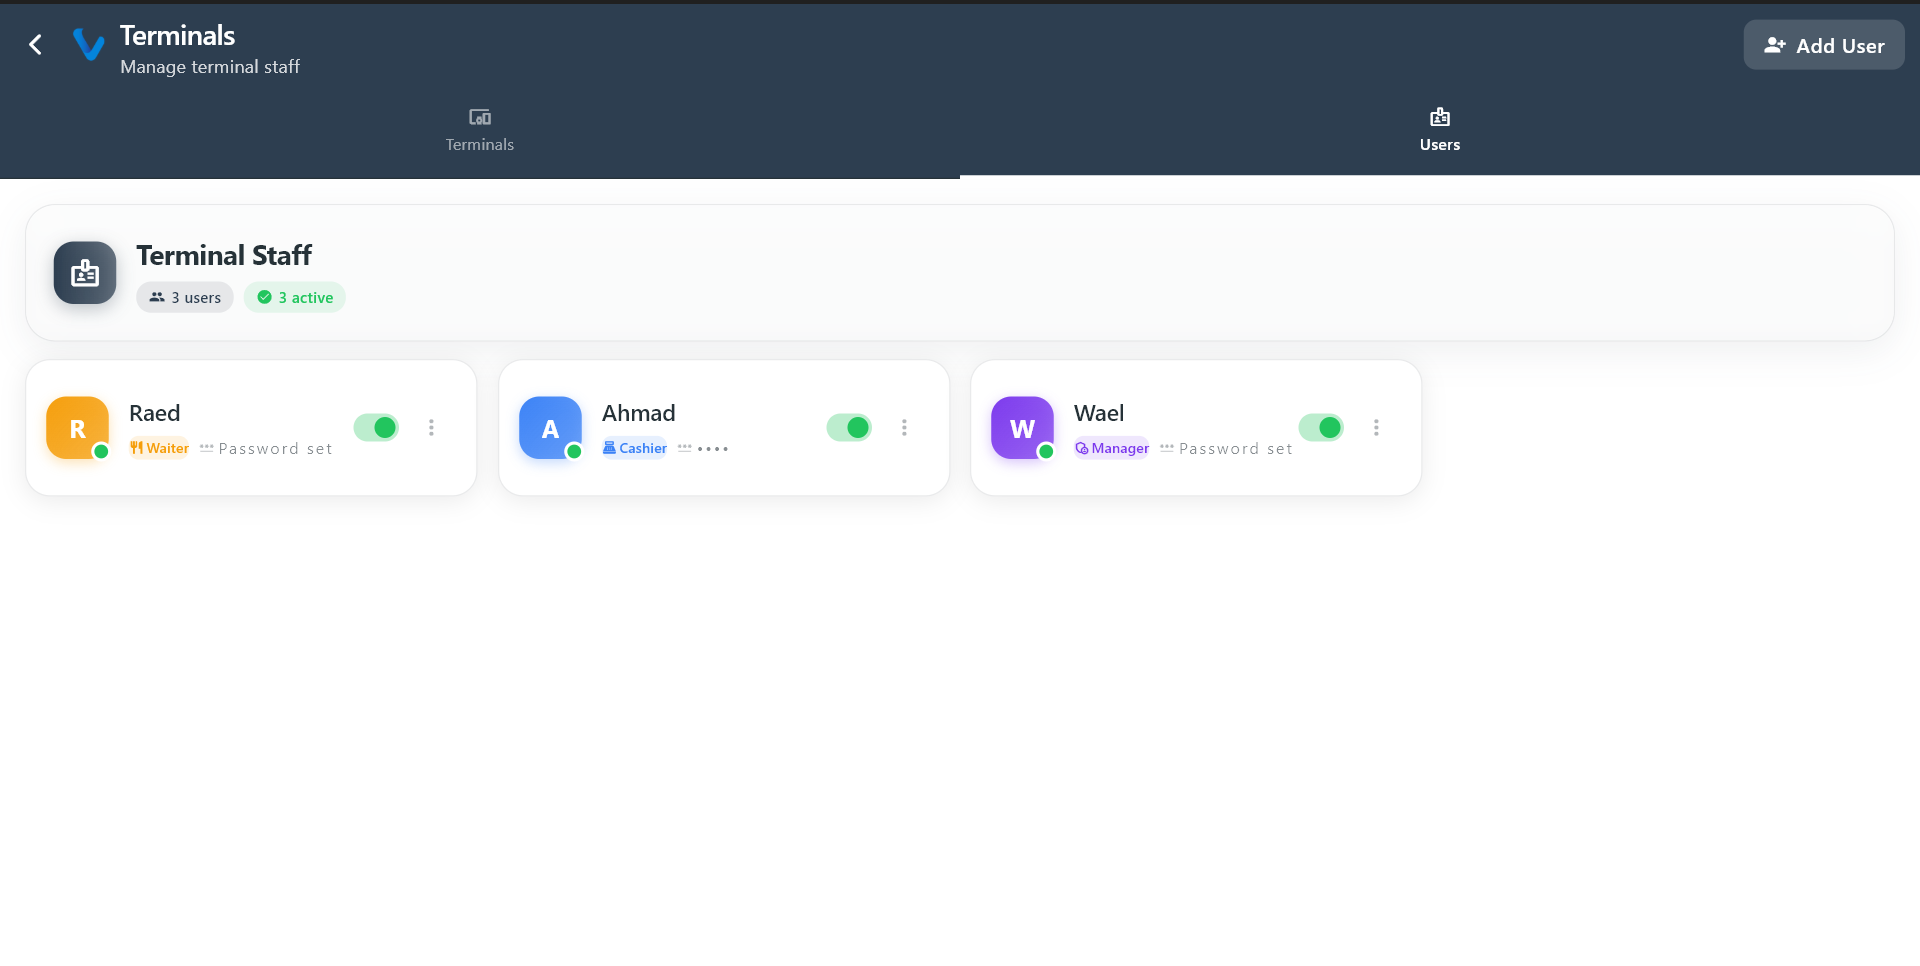
3.7.2 Terminal Users
Terminal Users are the staff accounts that can sign in on a Terminal device. Not every system user can log in on a Terminal — only those added here are permitted. This gives you control over which staff members can use which devices during service.
When you add a Terminal User, you set a name and a PIN. The staff member uses that PIN to log in on the Terminal quickly during a shift.
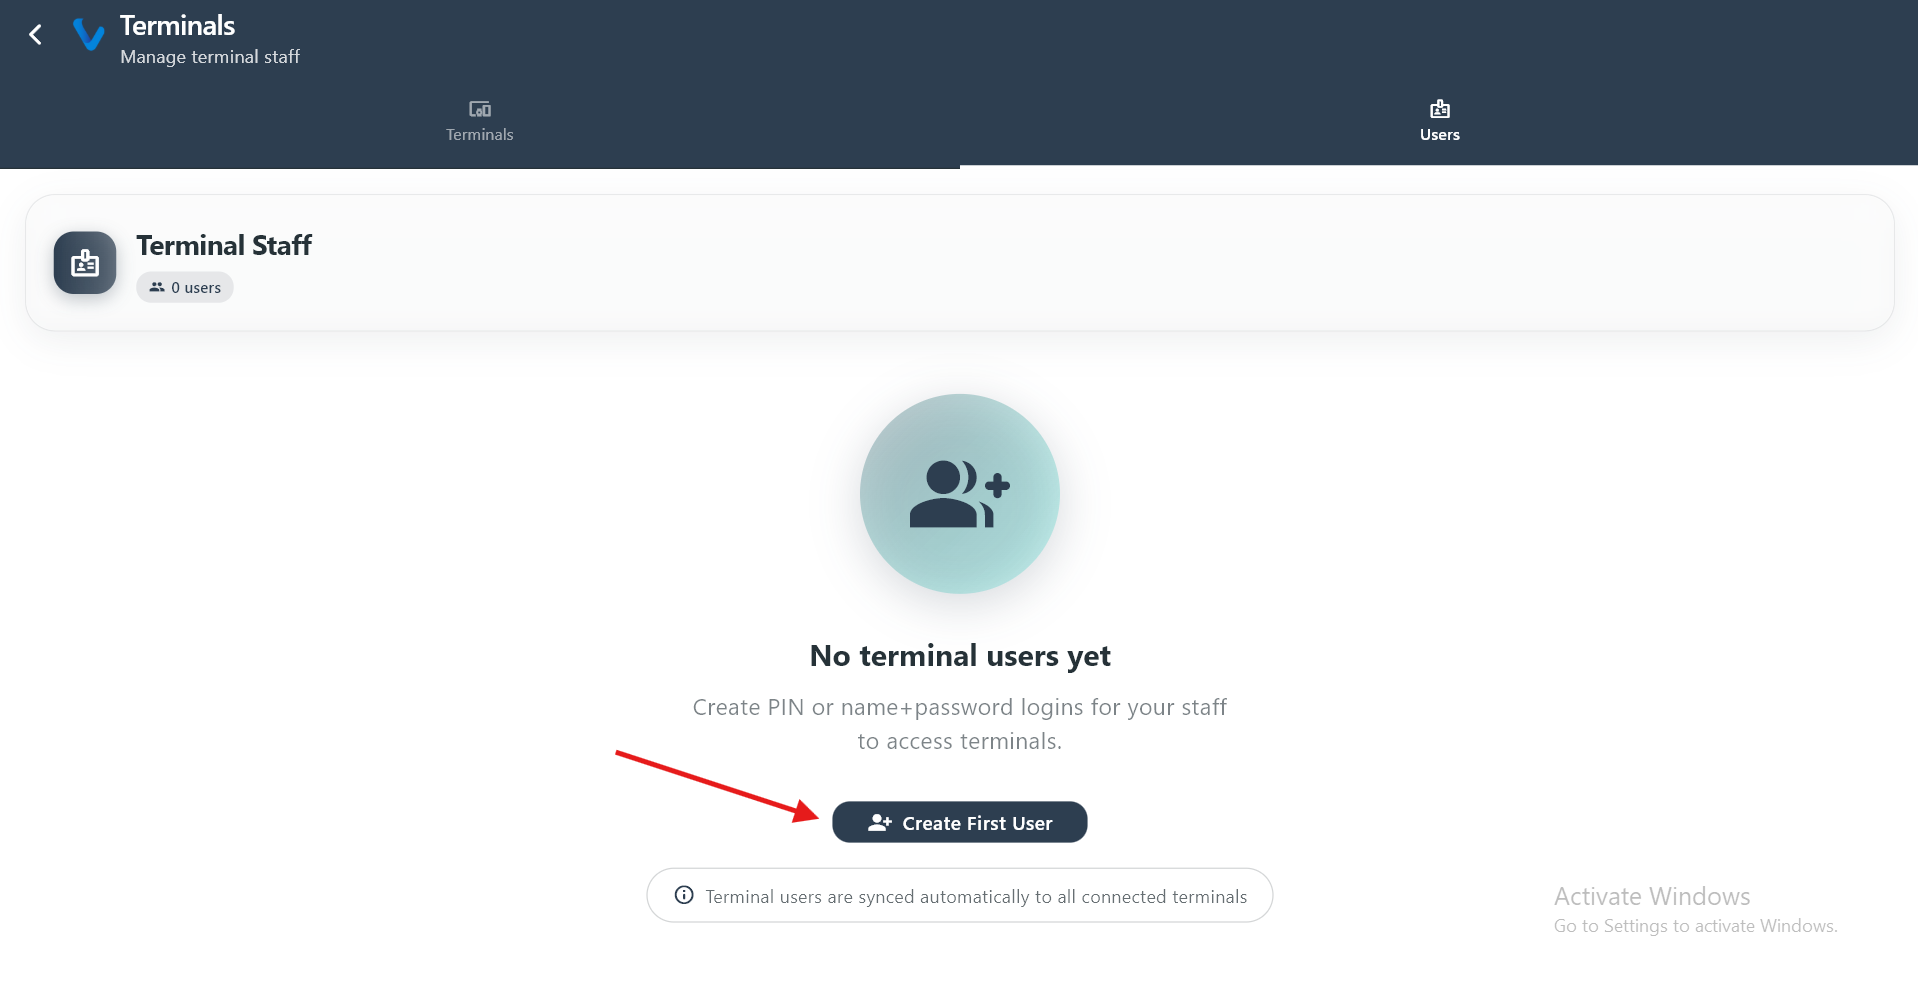 The list of staff accounts that are permitted to sign in on connected terminals.
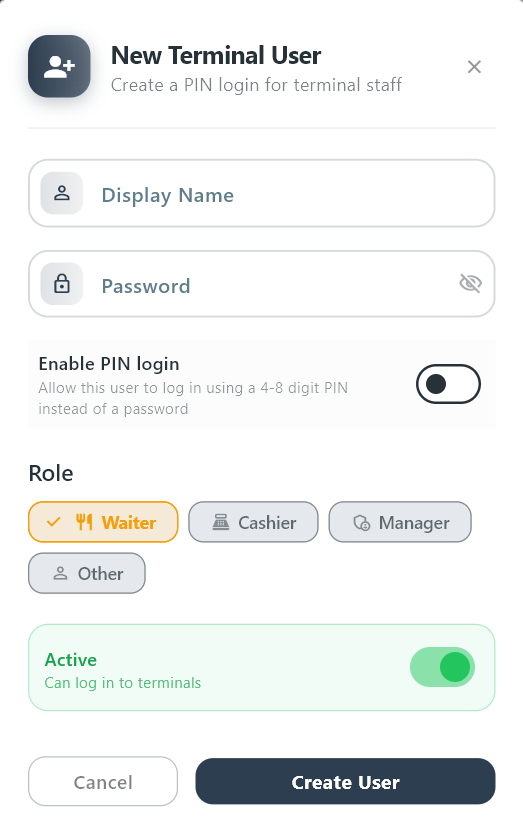 Create a new terminal user by entering their name and assigning a PIN for quick login.
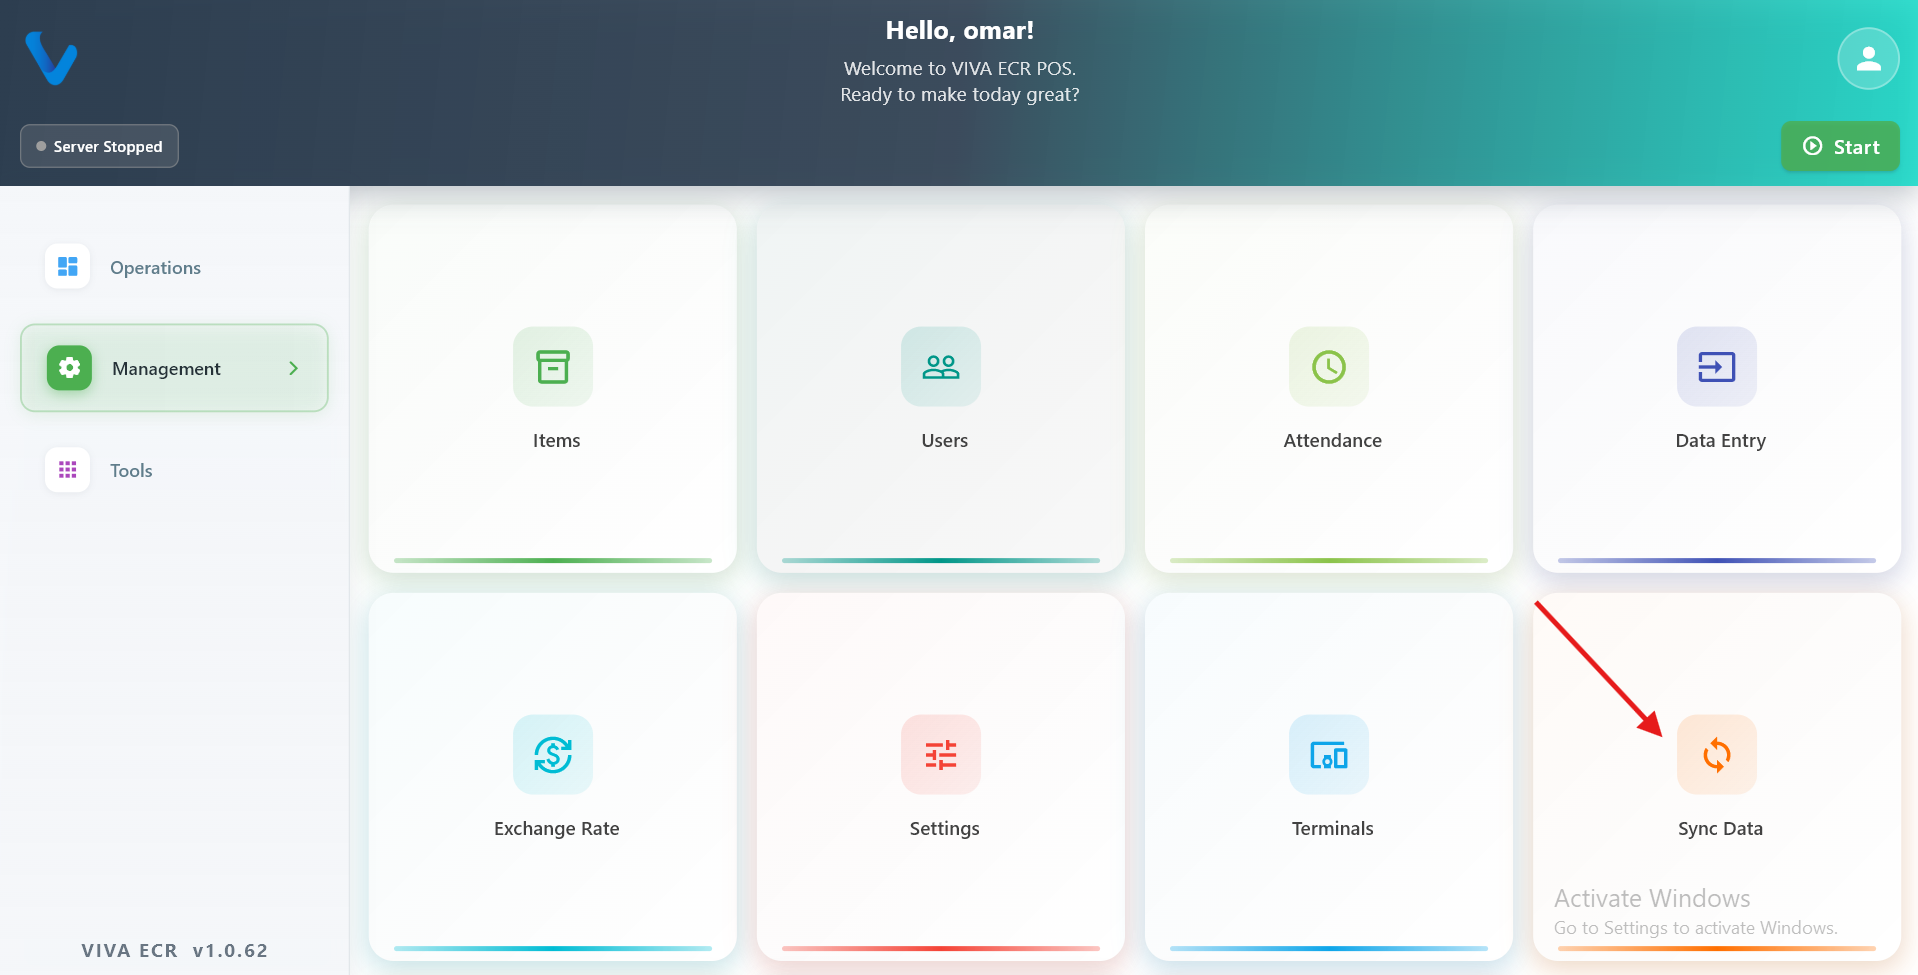
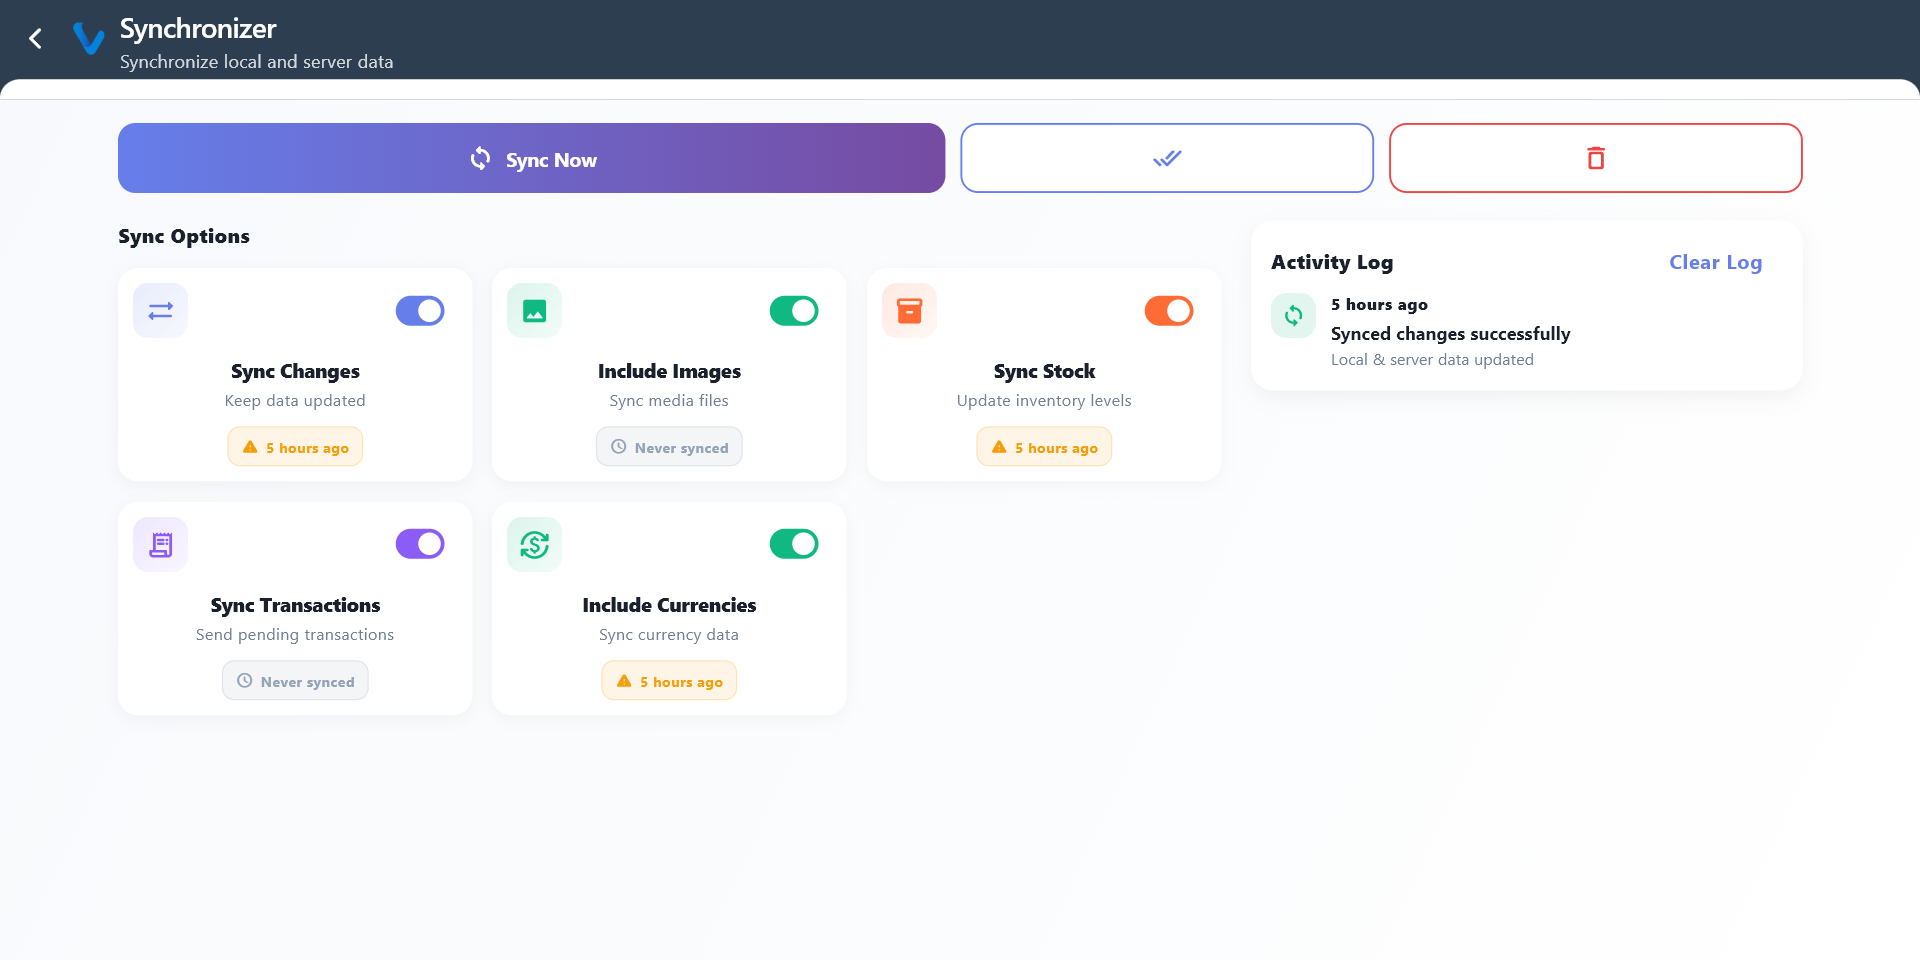
3.8 Sync Data
Sync Data is used to send and receive updates between the local device and the main data source.
What you can do:
- Run sync immediately
- Include stock, transactions, and currencies
- Review the activity log after syncing
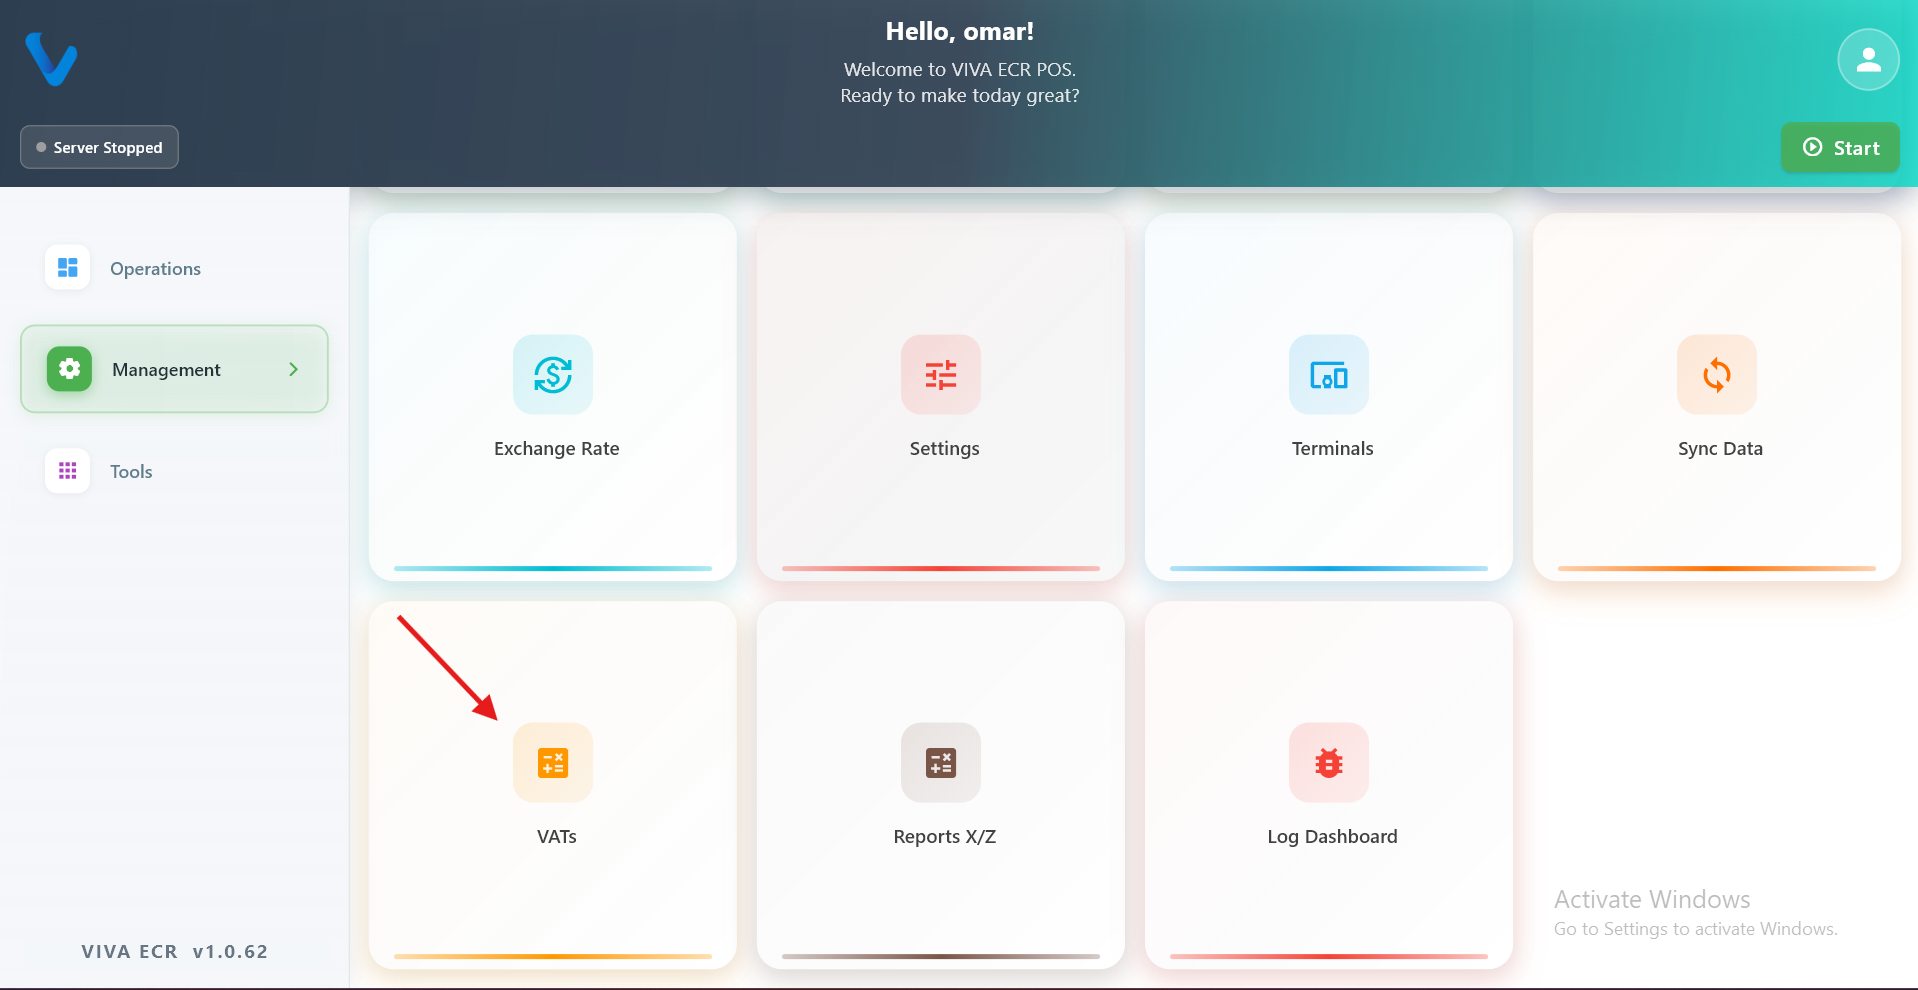
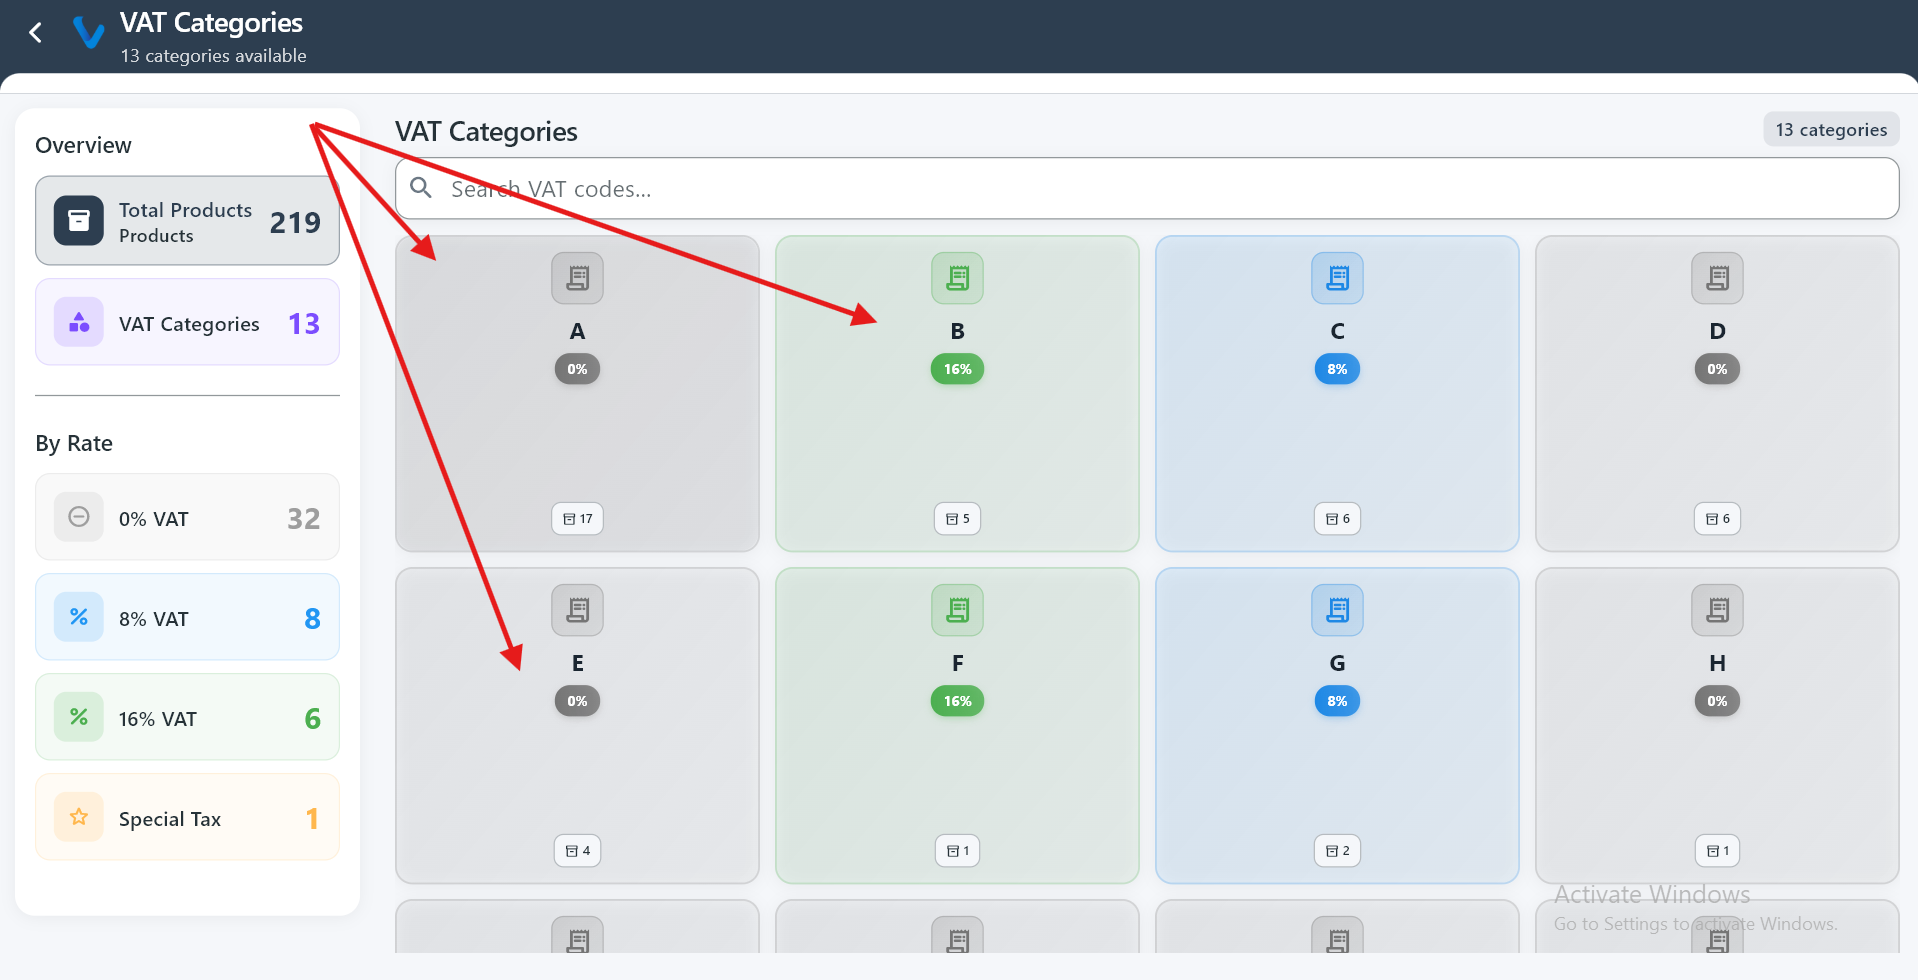
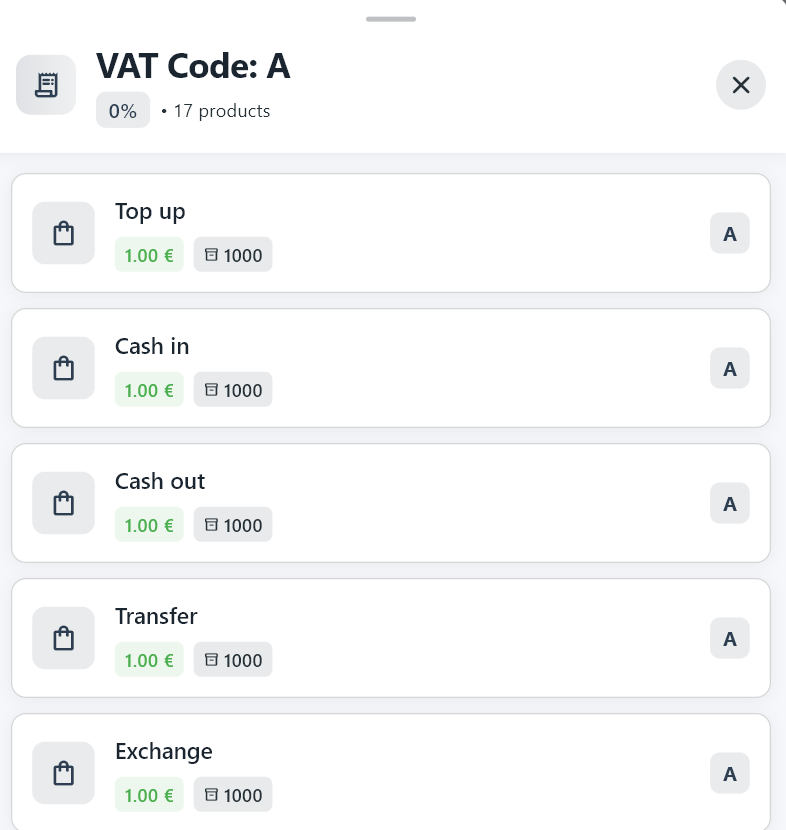
3.9 VATs
VATs section helps you review tax categories and the products linked to each tax code.
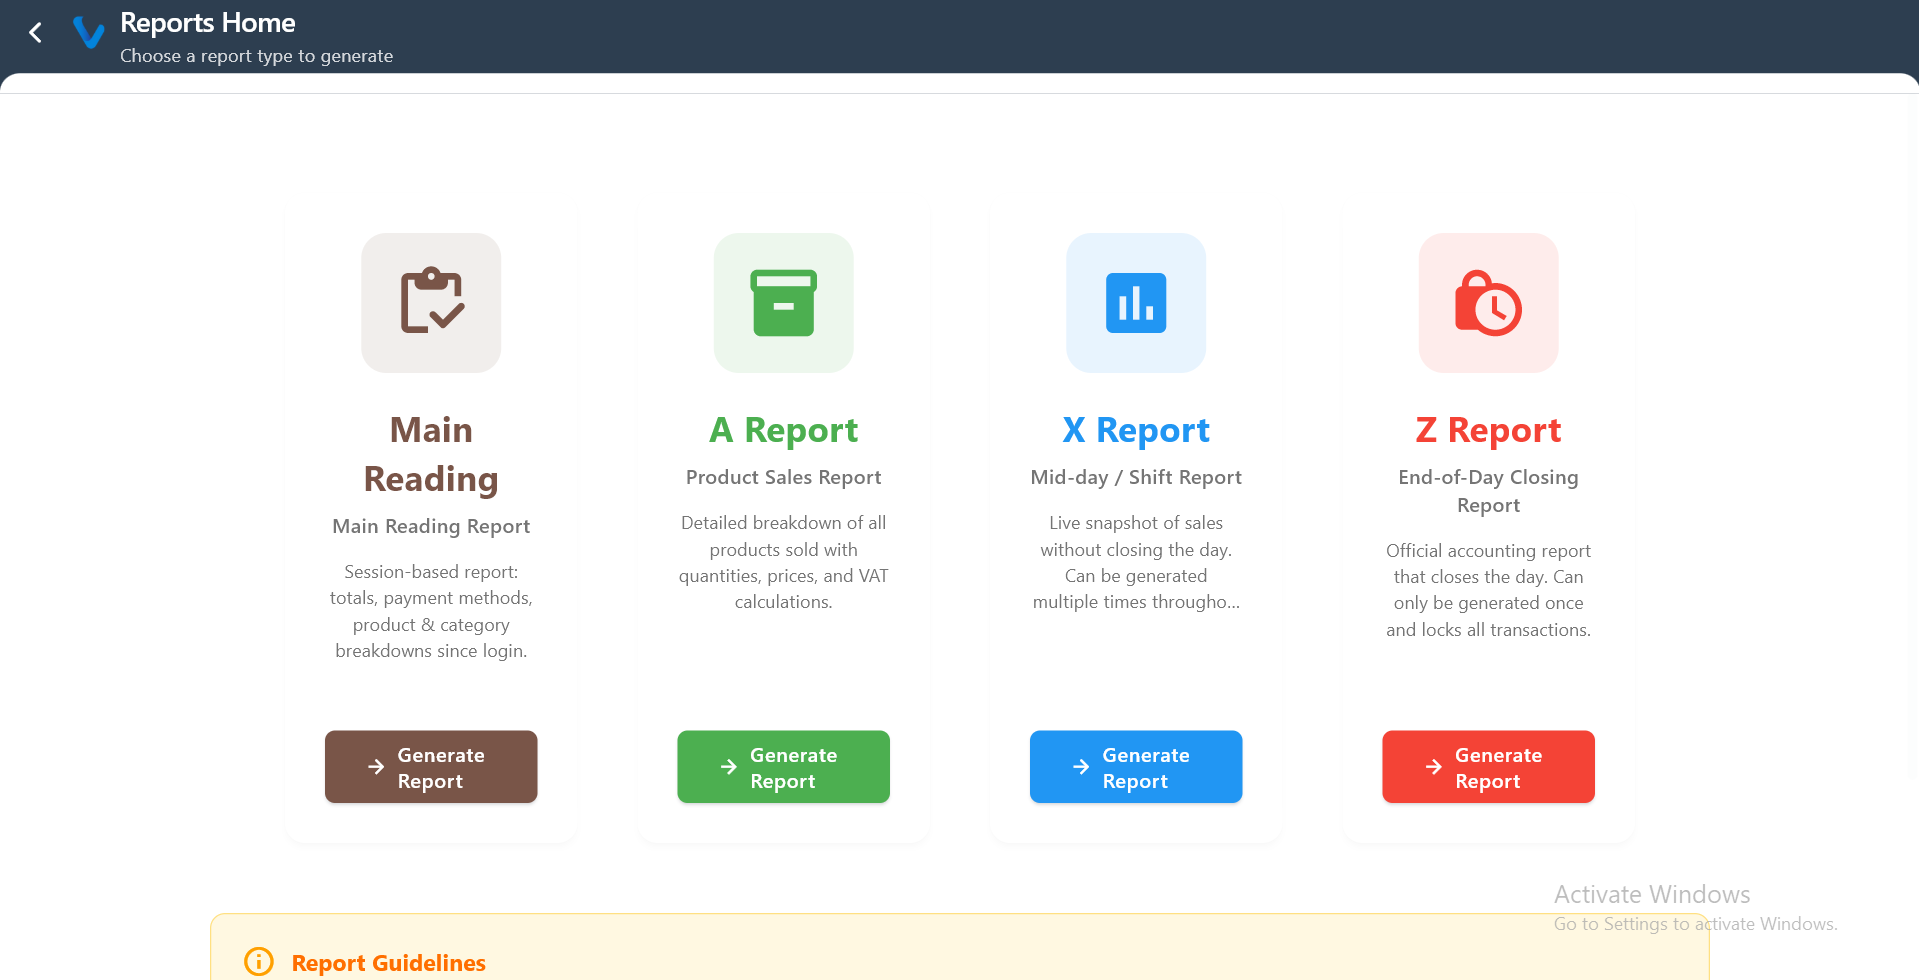
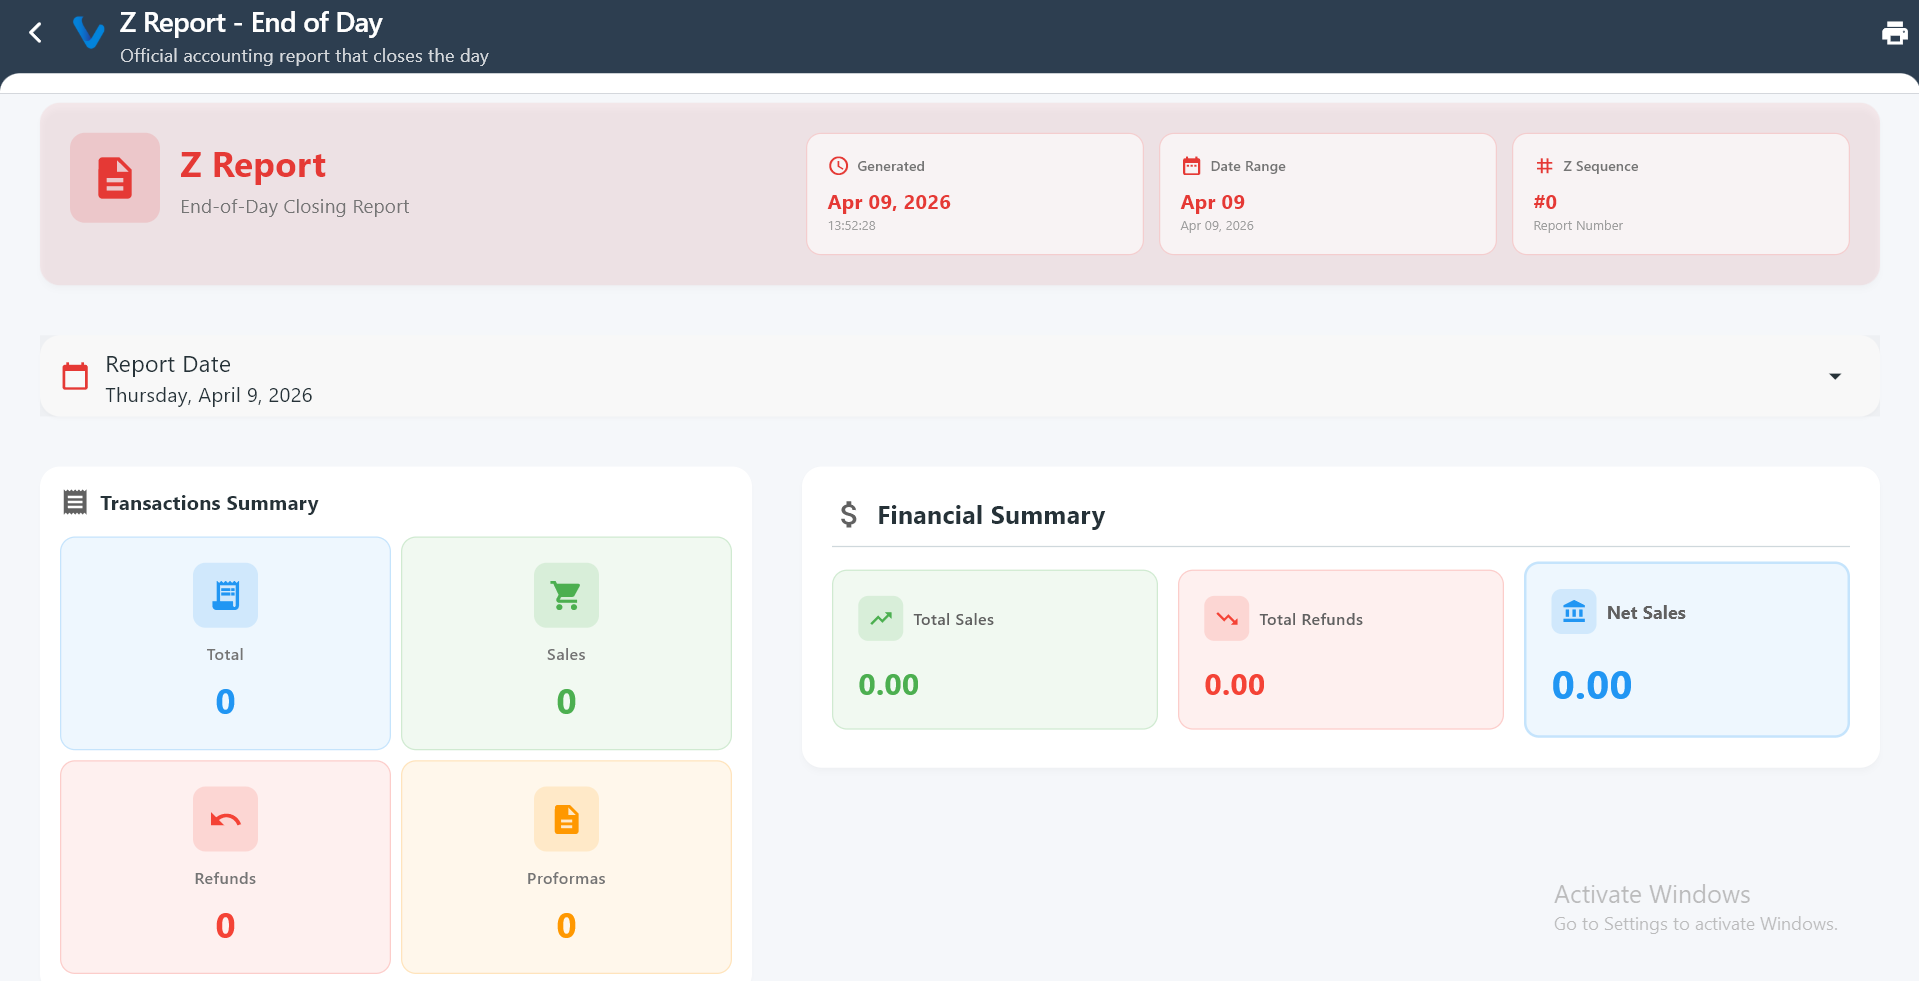
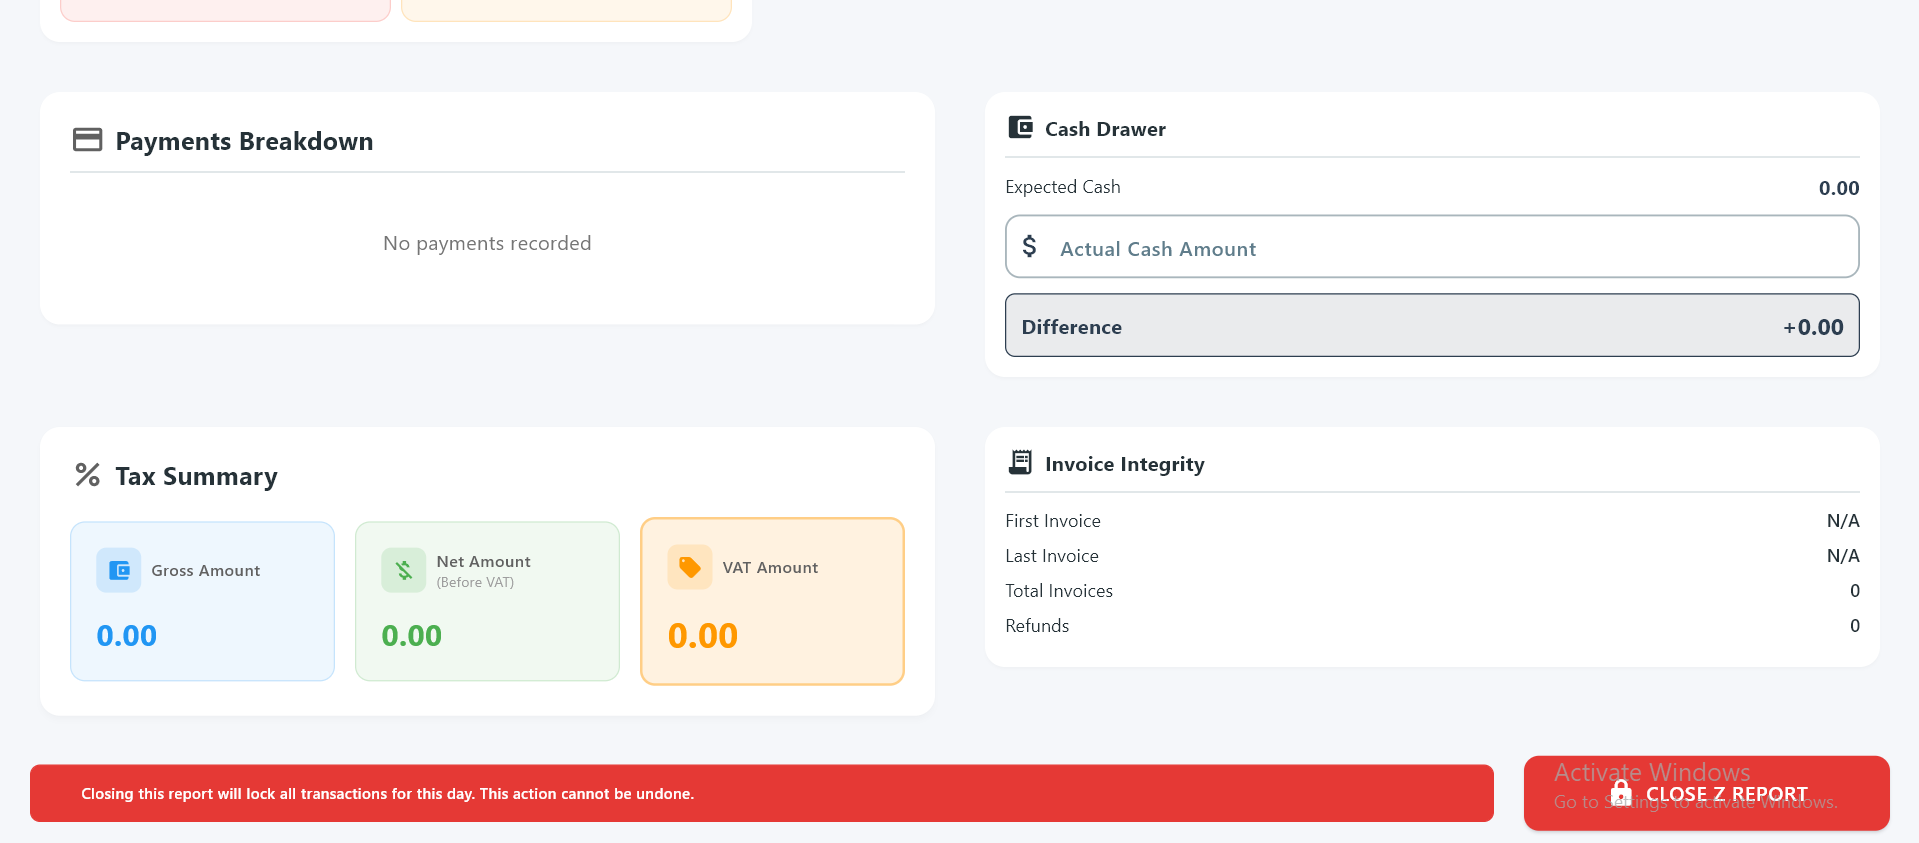
3.10 Reports
Reports section is used to generate daily, sales, and closing reports.
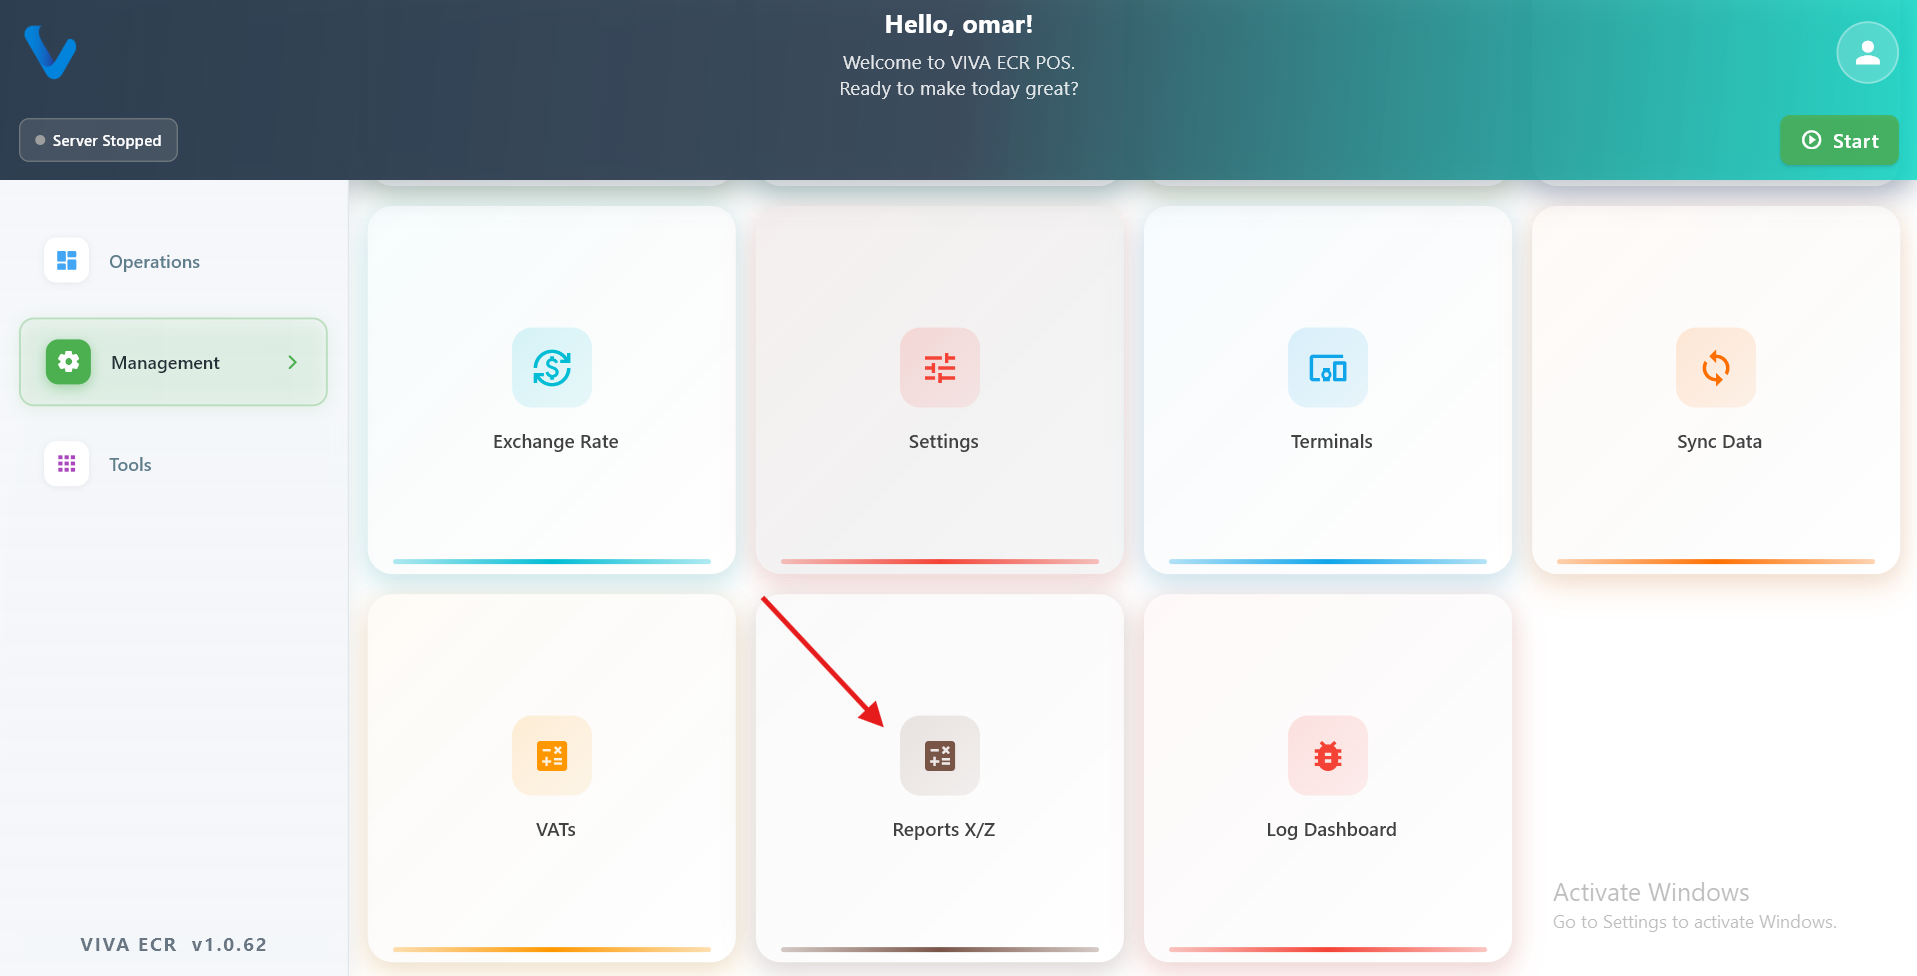
Available report types:
- Main Reading Report
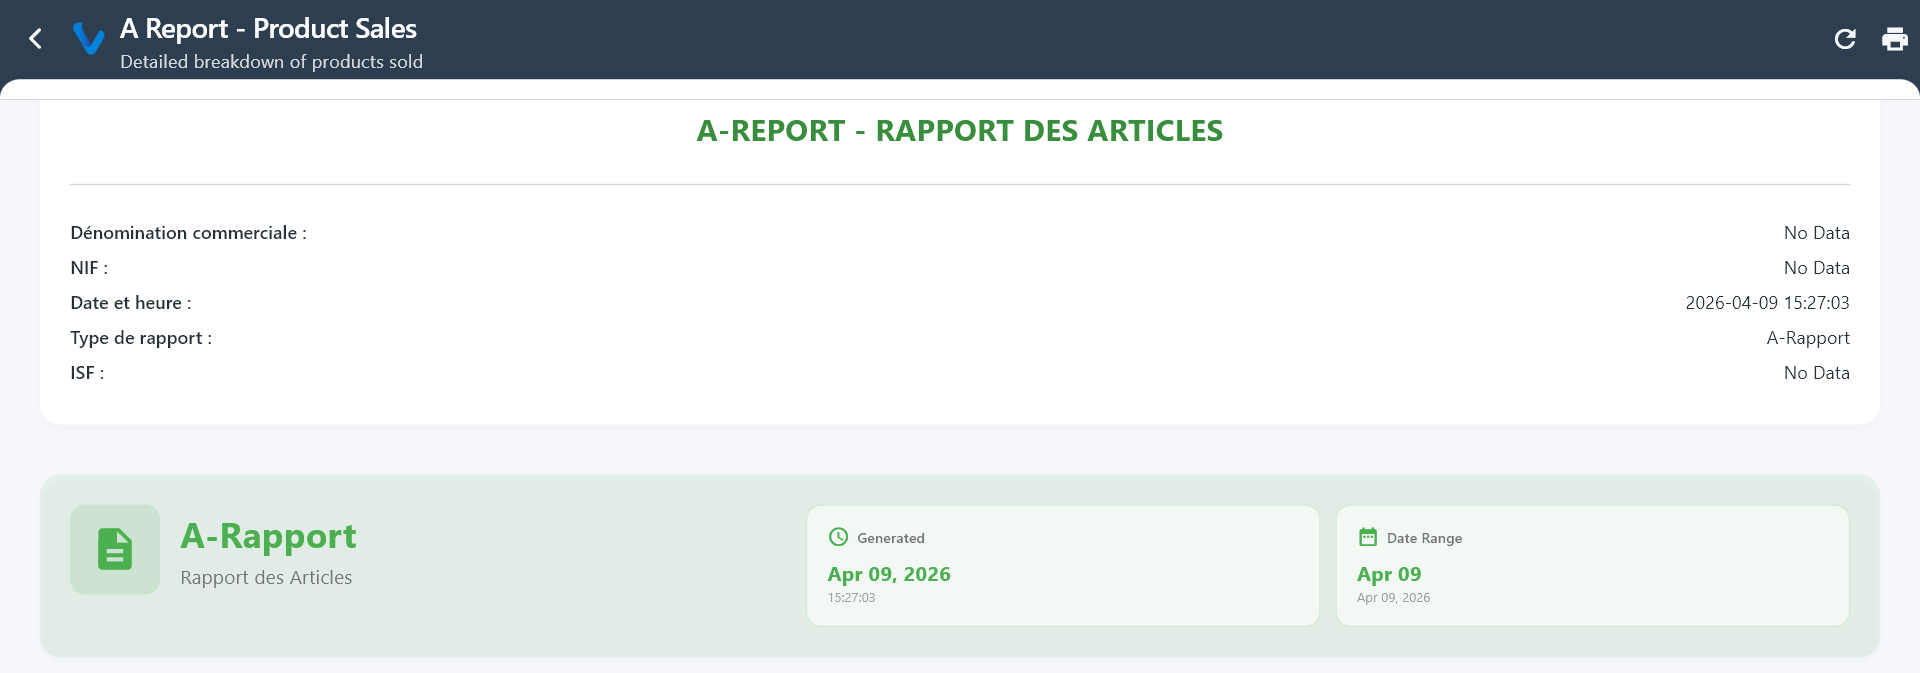
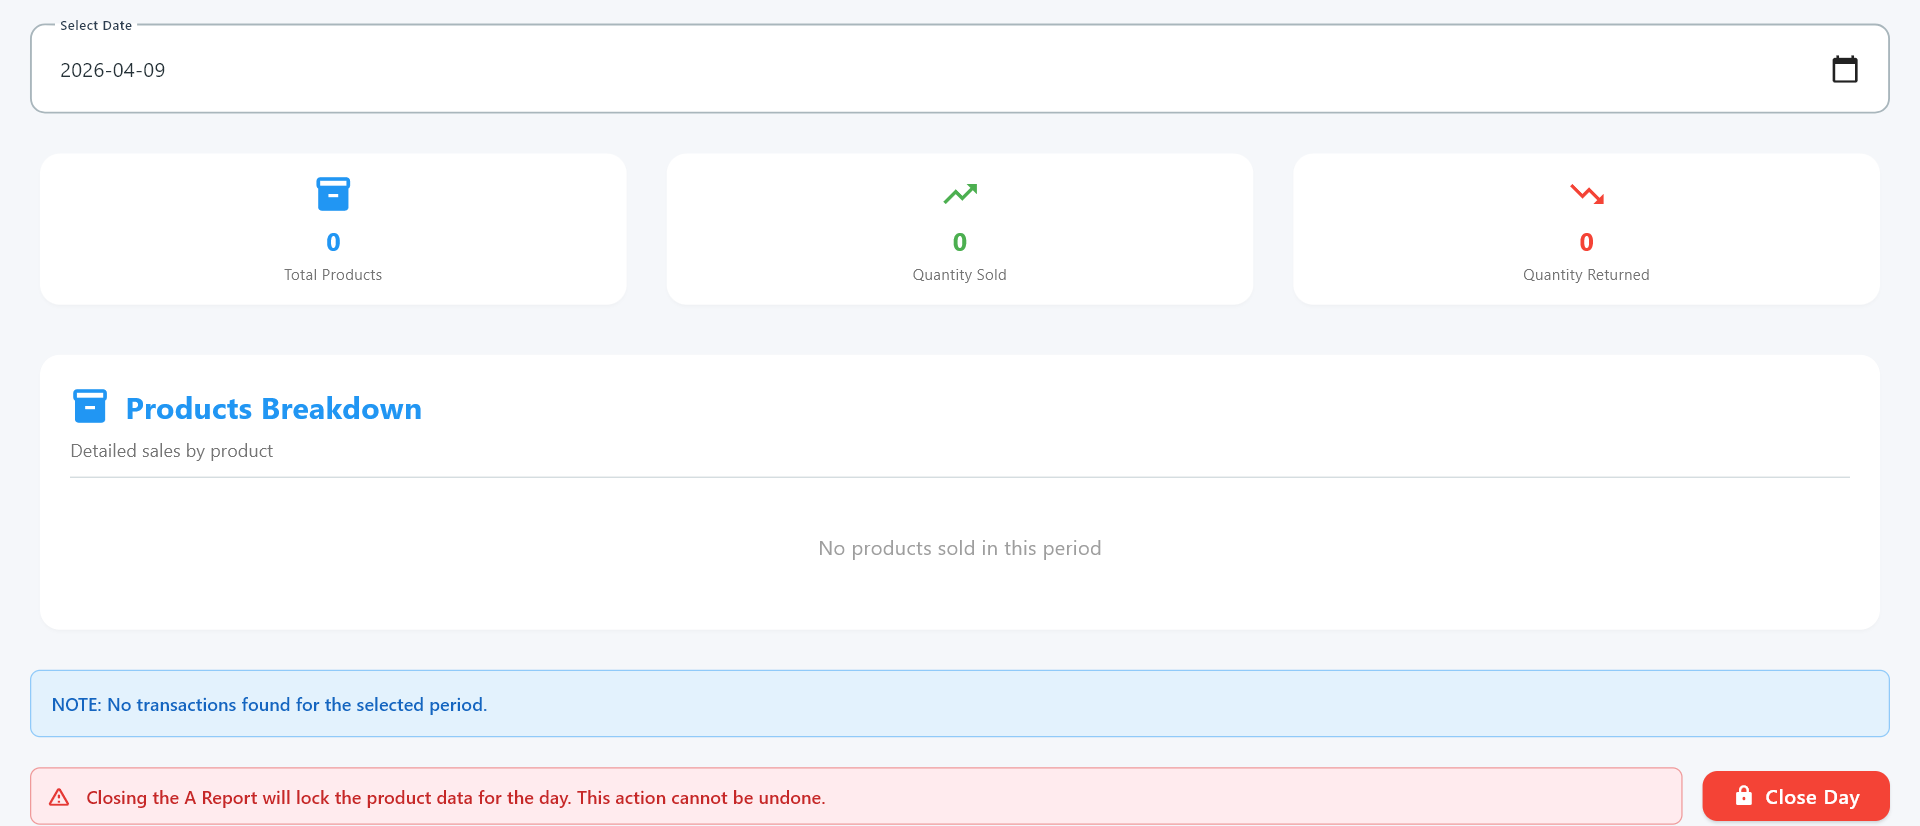
- A Report
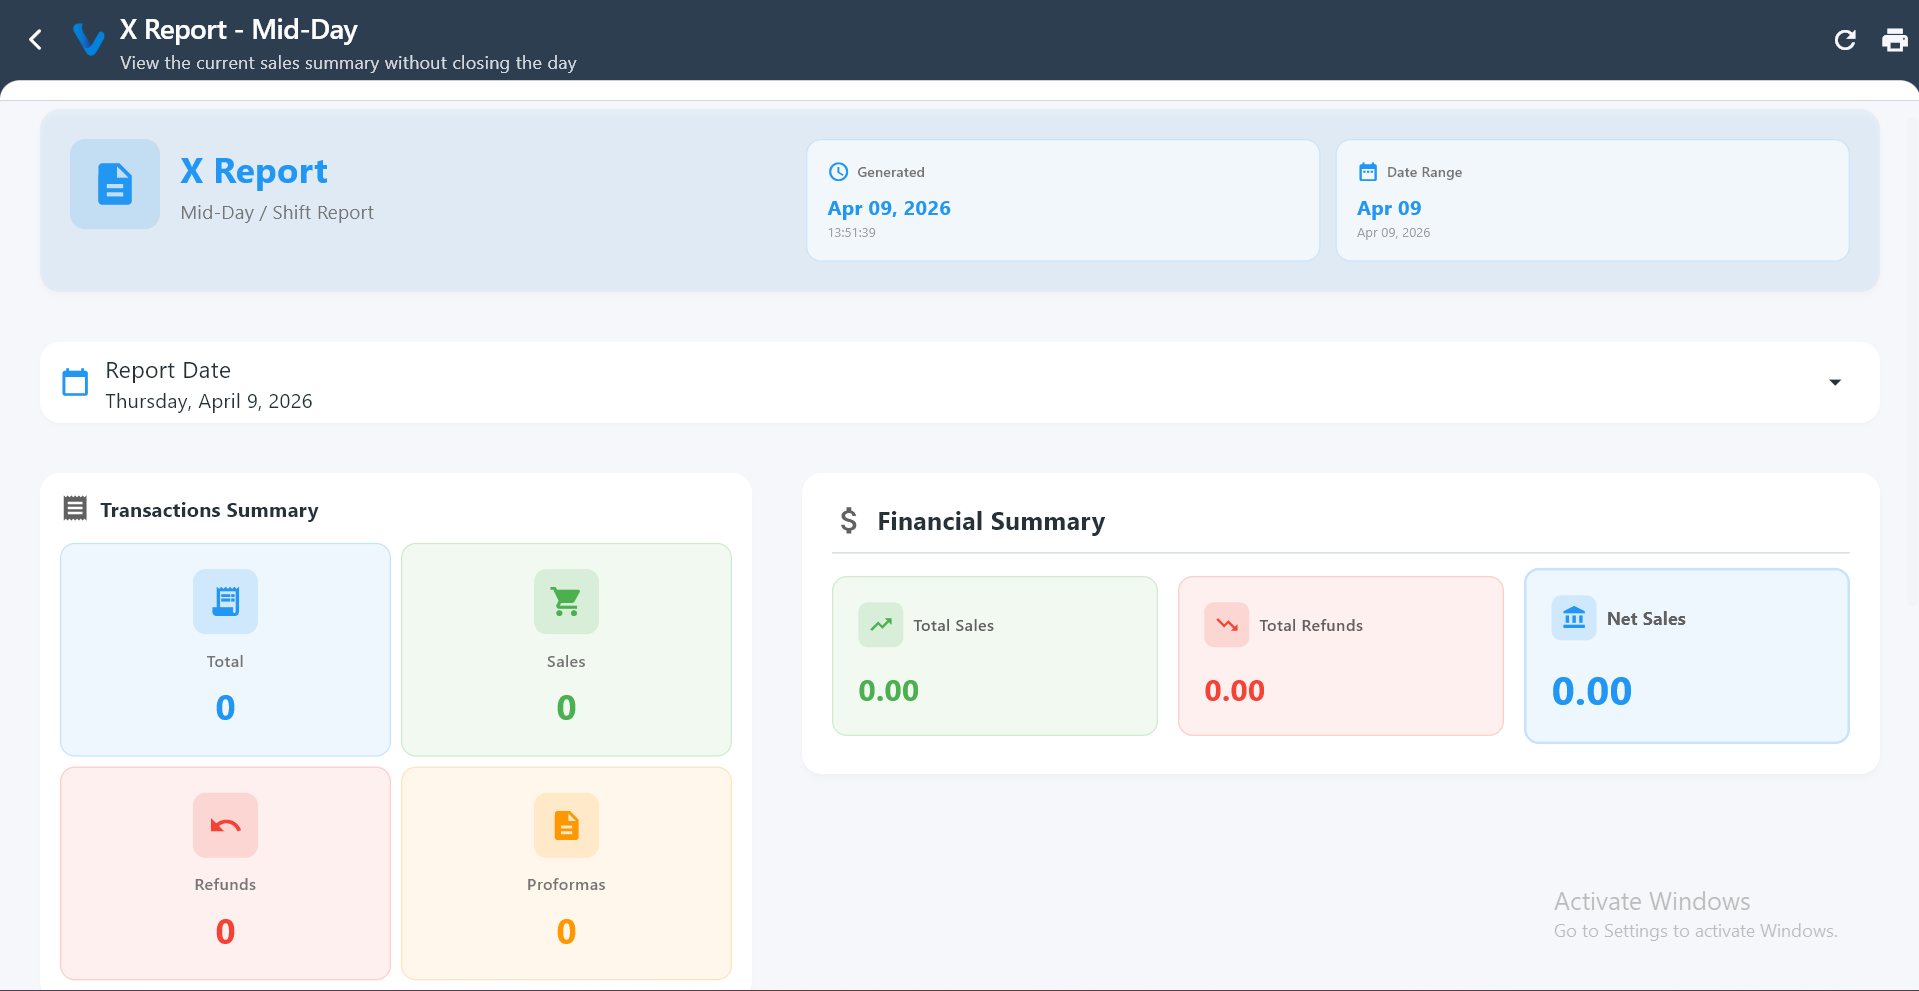
- X Report
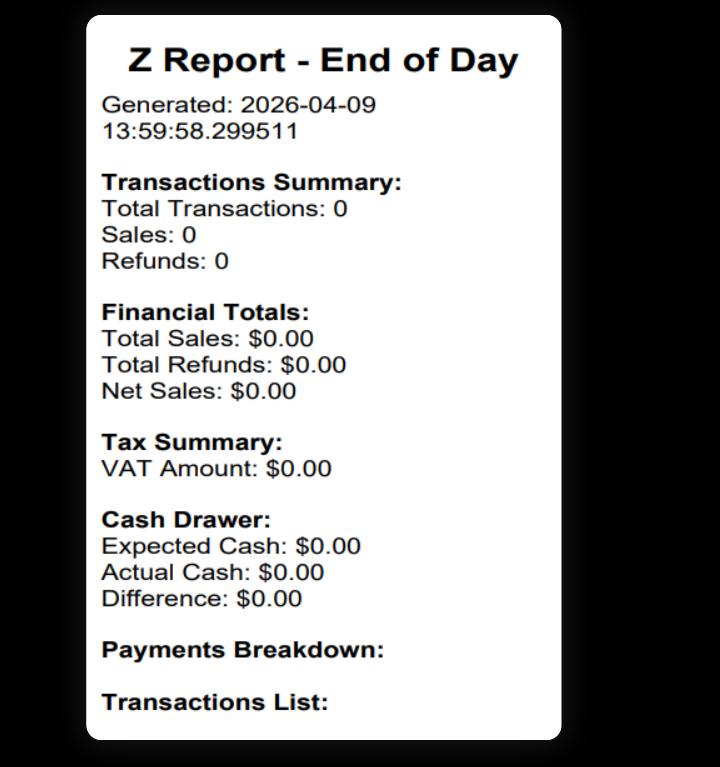
- Z Report

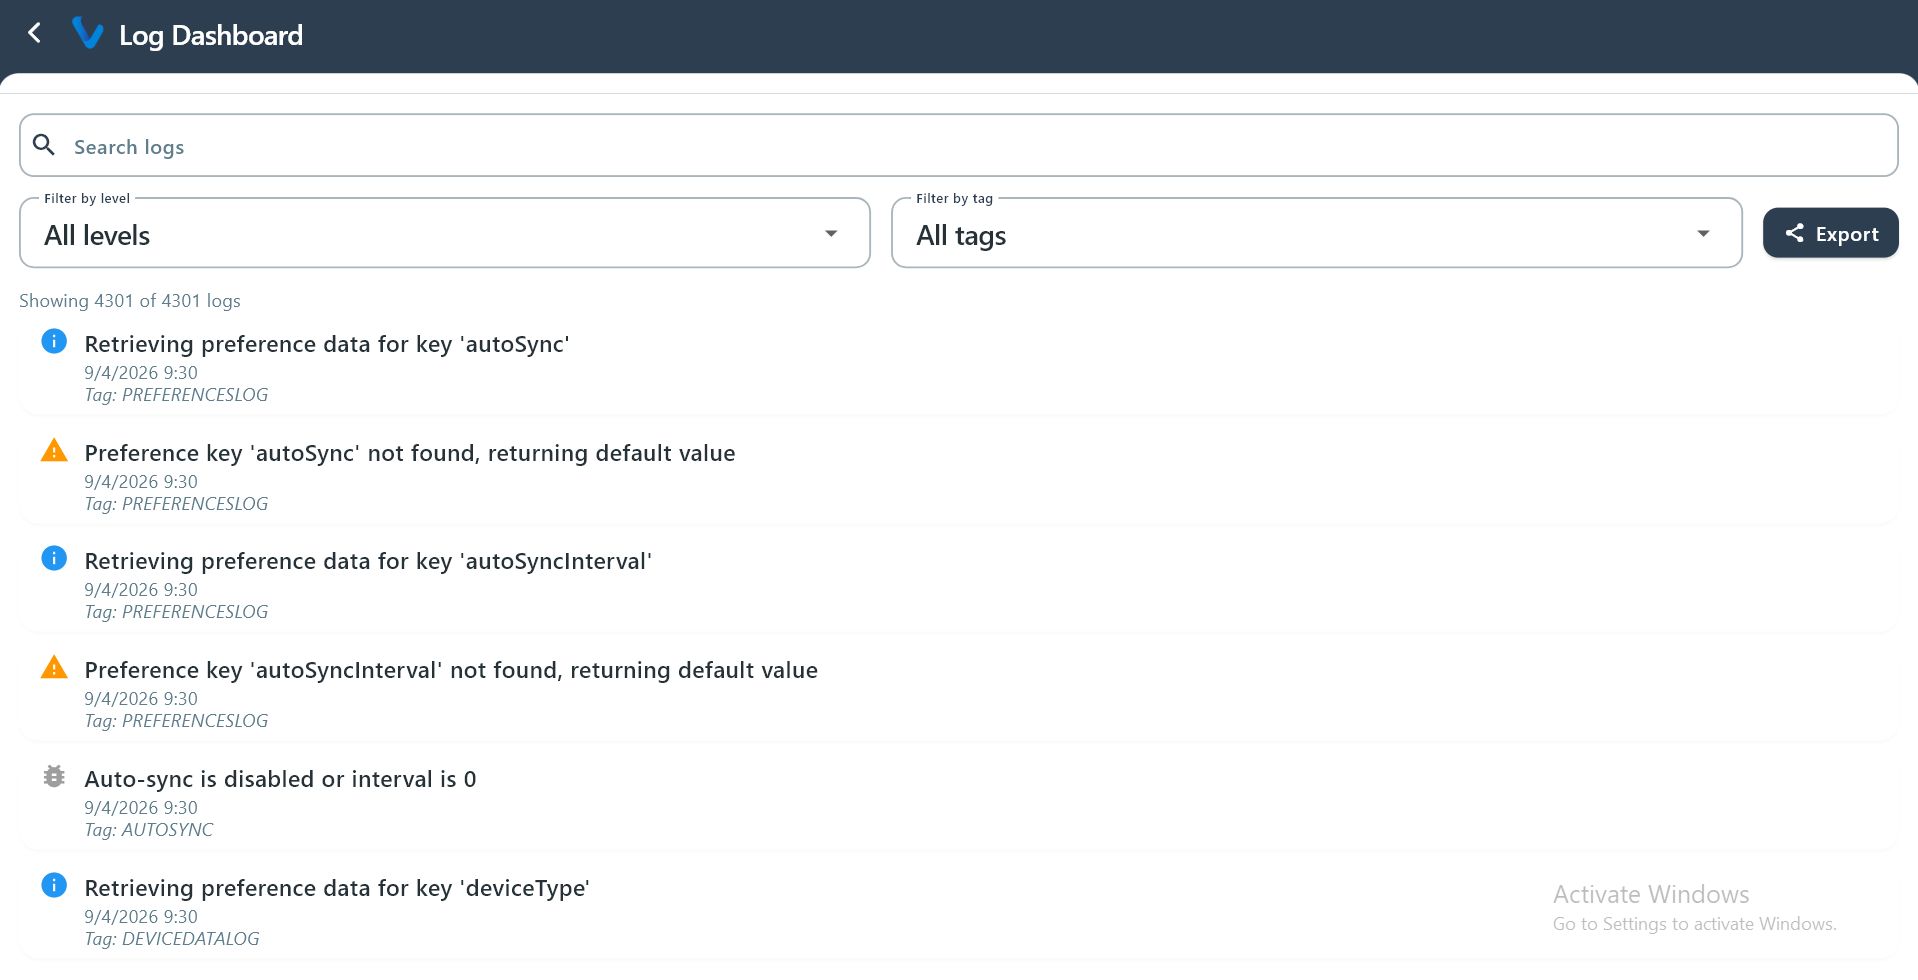
3.11 Log Dashboard
Log Dashboard is used to review app activity logs and help staff understand what happened during a session.
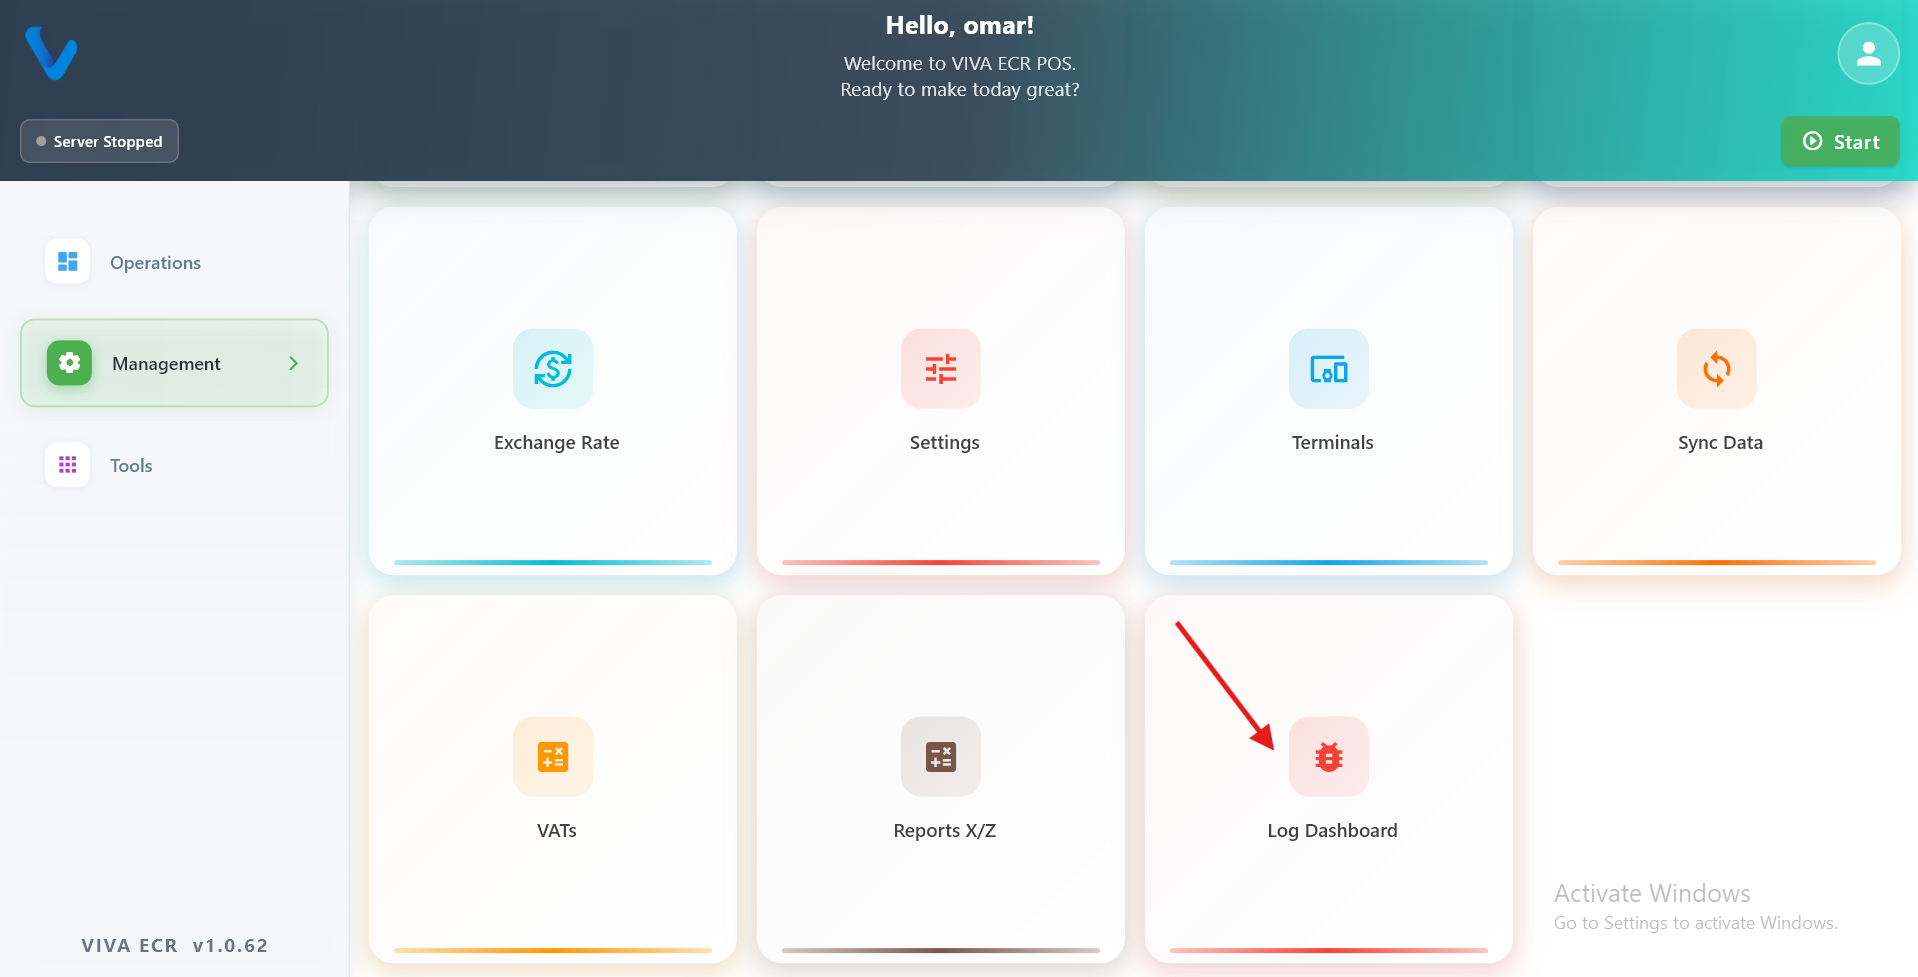
What you can do:
- Search log entries
- Filter by level and tag
- Export logs when needed
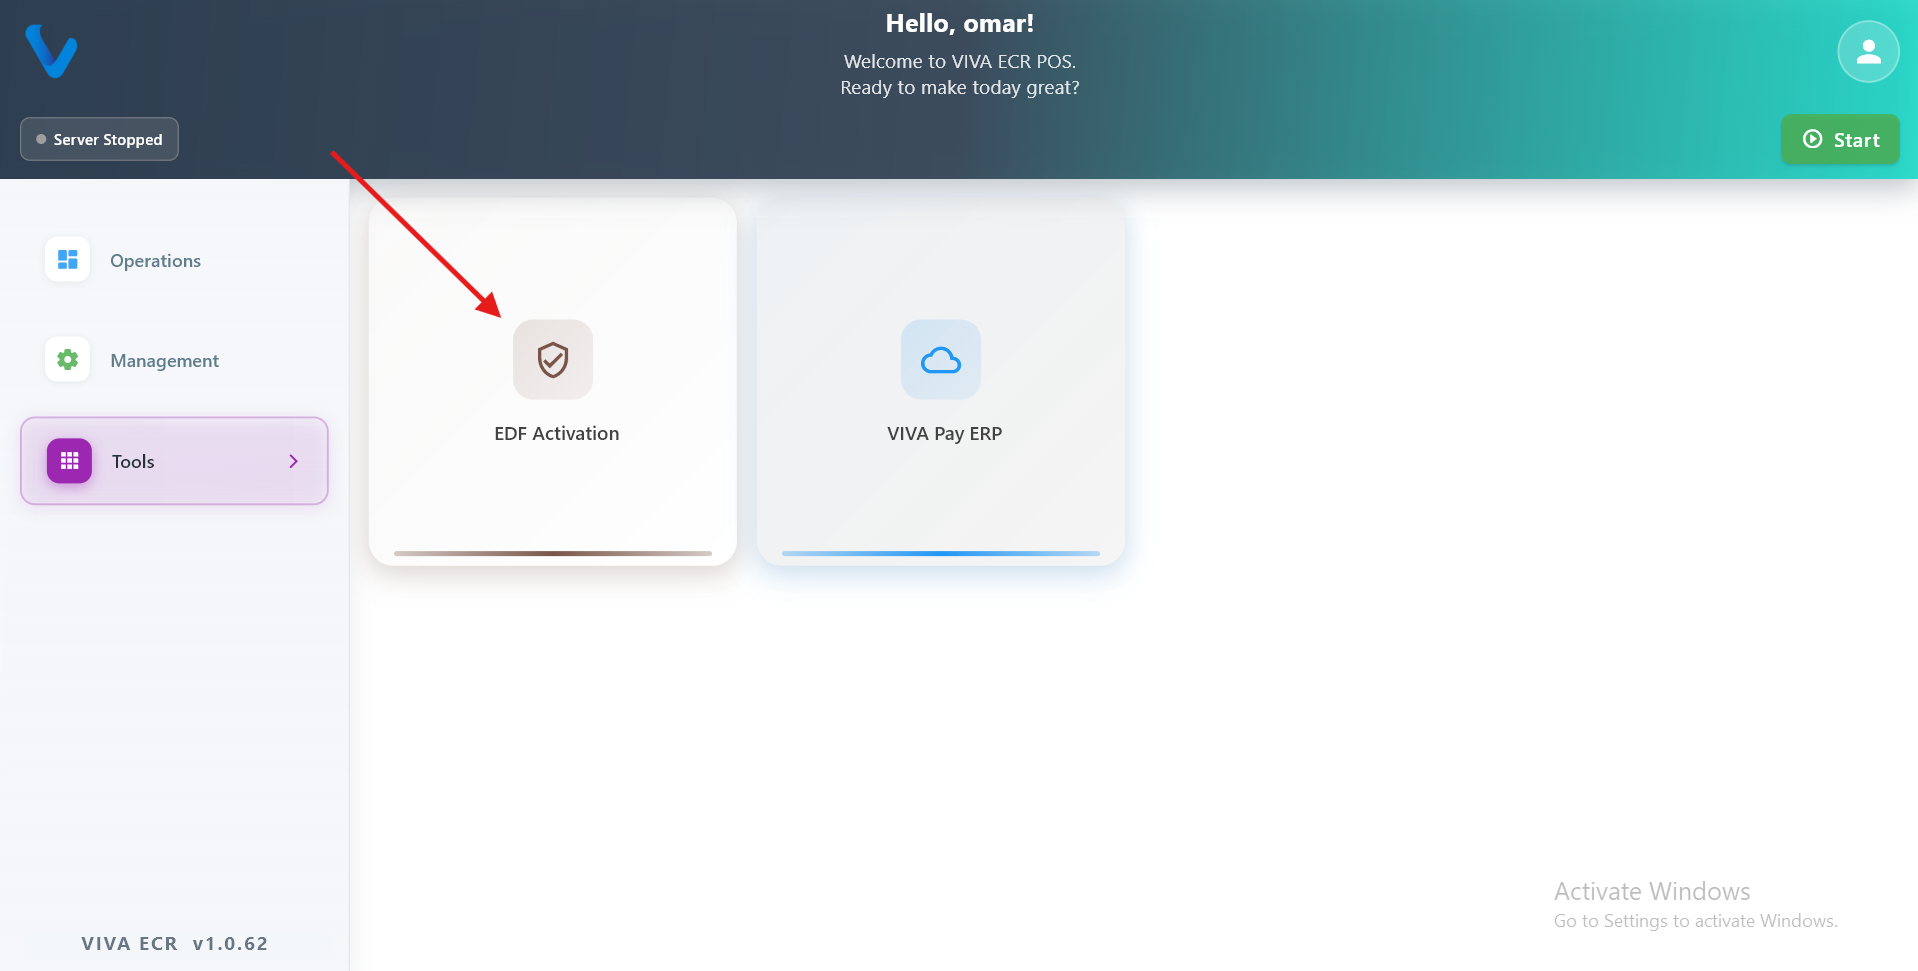
4. Tools
Tools groups two utility features that are used during setup and external access rather than daily sales work.
4.1 EDF Activation
EDF Activation is used to register and activate the fiscal hardware device (the Electronic Fiscal Device) that is physically connected to the POS system. This step is required before the app can sign and certify transactions in compliance with fiscal regulations.
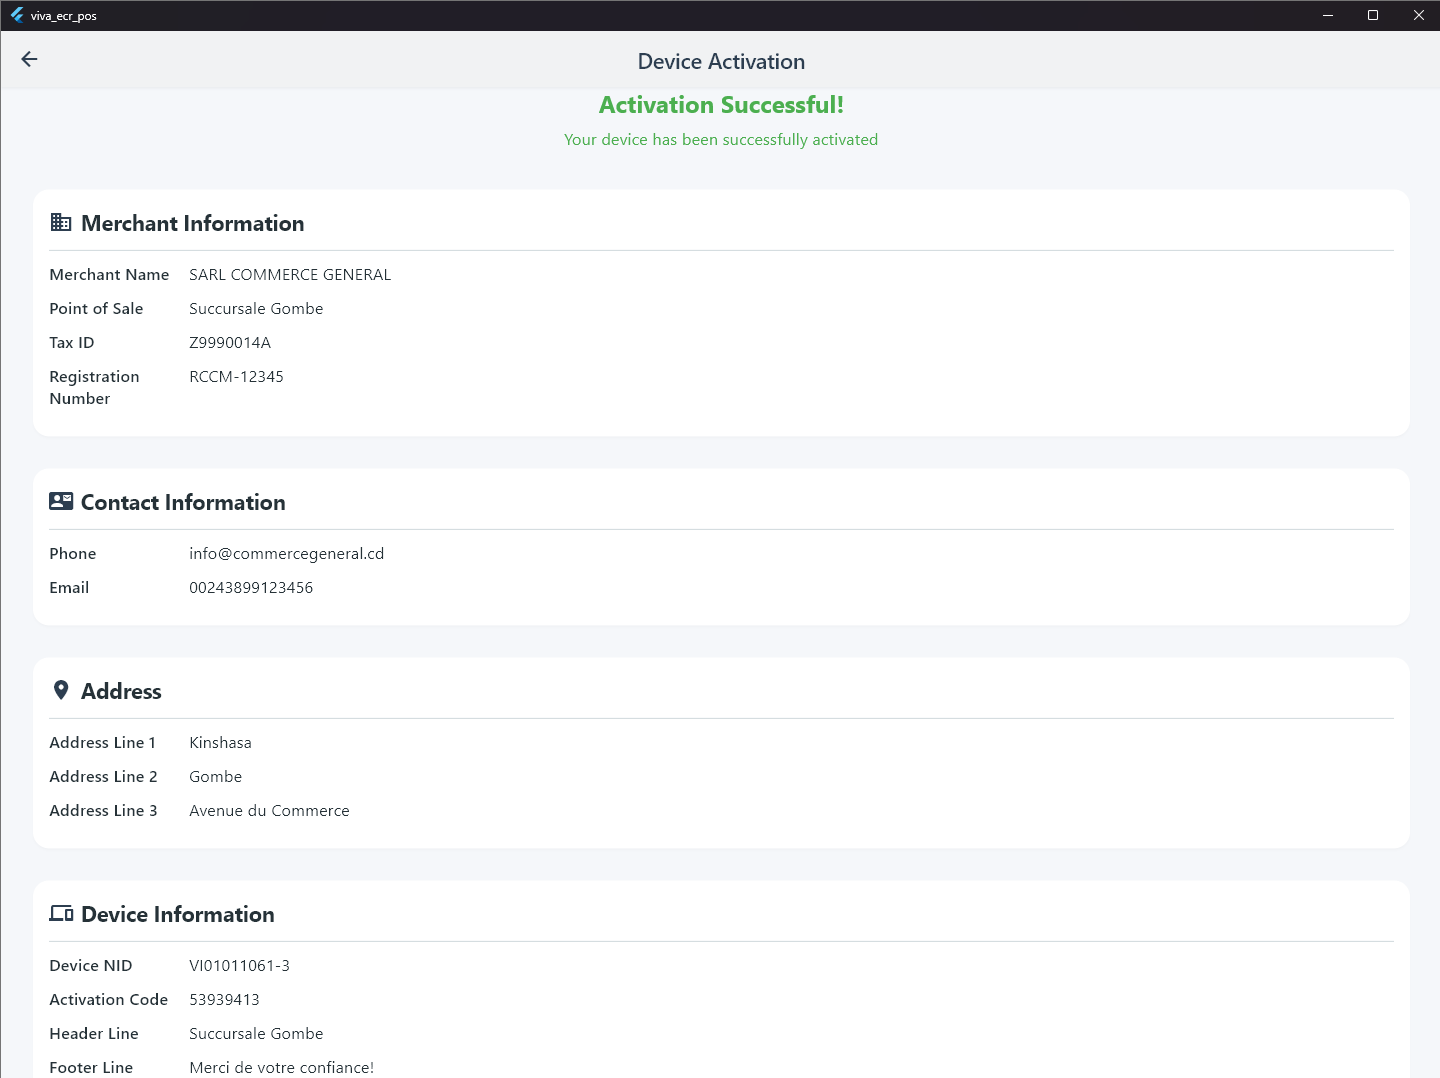
The app communicates with the fiscal device over the local network using the device IP configured in the setup. All communication is encrypted using an activation key. When activation completes successfully, the device returns a set of merchant data that is cached in the app and used to stamp every sale receipt.
What activation retrieves from the device:
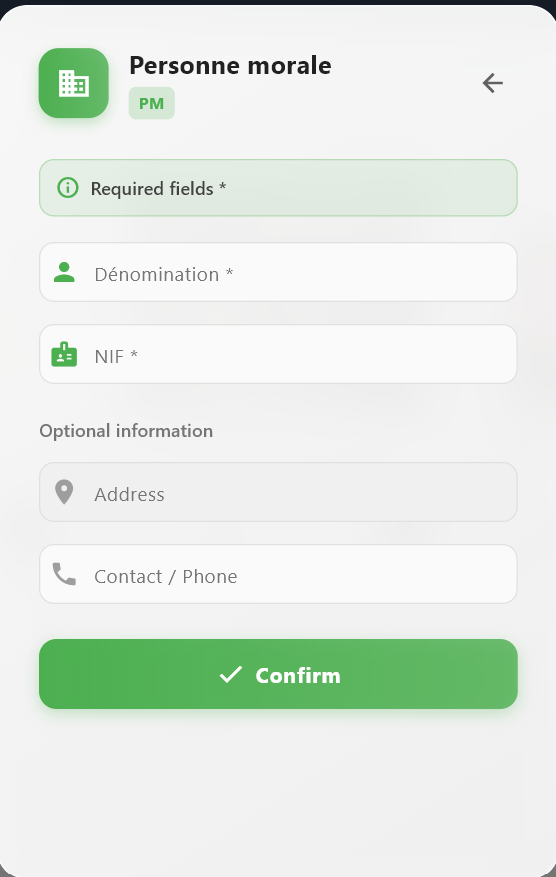
- Merchant name, point of sale, tax ID, and registration number
- Merchant address and contact details
- Device NID and activation code
- Receipt header and footer lines
- An encryption key used for signing subsequent transactions
After a successful activation, a Change Report action becomes available on the same screen. Running the Change Report fetches the tax rate table from the fiscal device and maps VAT categories (TA through TP) for use when signing sales.
How to use:
- Open Tools from the Management menu.
- Tap EDF Activation.
- Tap Activate Device to send the activation request to the connected fiscal device.
- Wait for the response. The app will show a success screen with the retrieved merchant data if activation is complete.
- After activation, tap Change Report to load the tax table from the device.
Activation response reference
| Scenario | success | isActivated | Error Code | Recommended action |
|---|---|---|---|---|
| Device activated, data retrieved | true | true | — | Data is cached; proceed normally |
| Device not yet activated | false | false | NOT_ACTIVATED | Show "device not activated" message to operator |
| Internal server error | false | false | INTERNAL_ERROR | Retry after a delay; contact support if the error persists |
| Network unreachable | HTTP error / timeout | — | — | Check device IP, cable, and Wi-Fi connection |
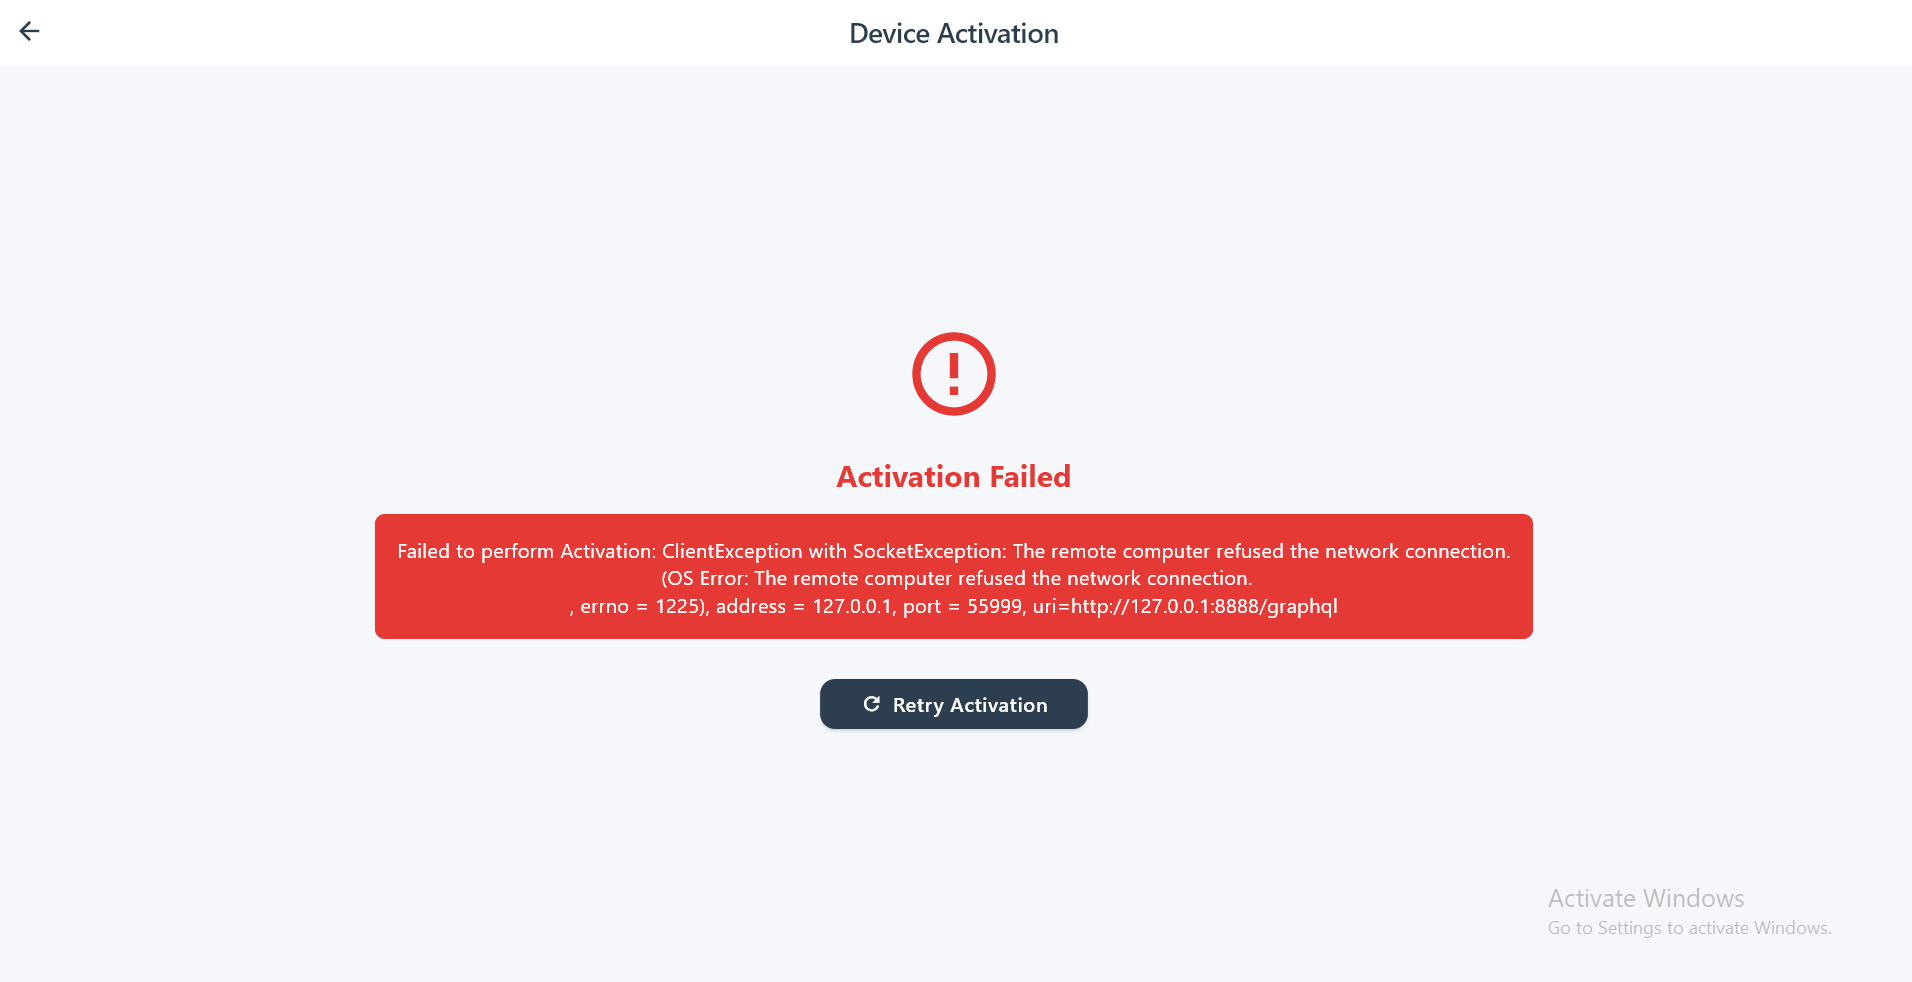
If activation fails, the error screen shows the reason and a Retry Activation button. The app will not be able to sign fiscal transactions until activation is completed successfully.
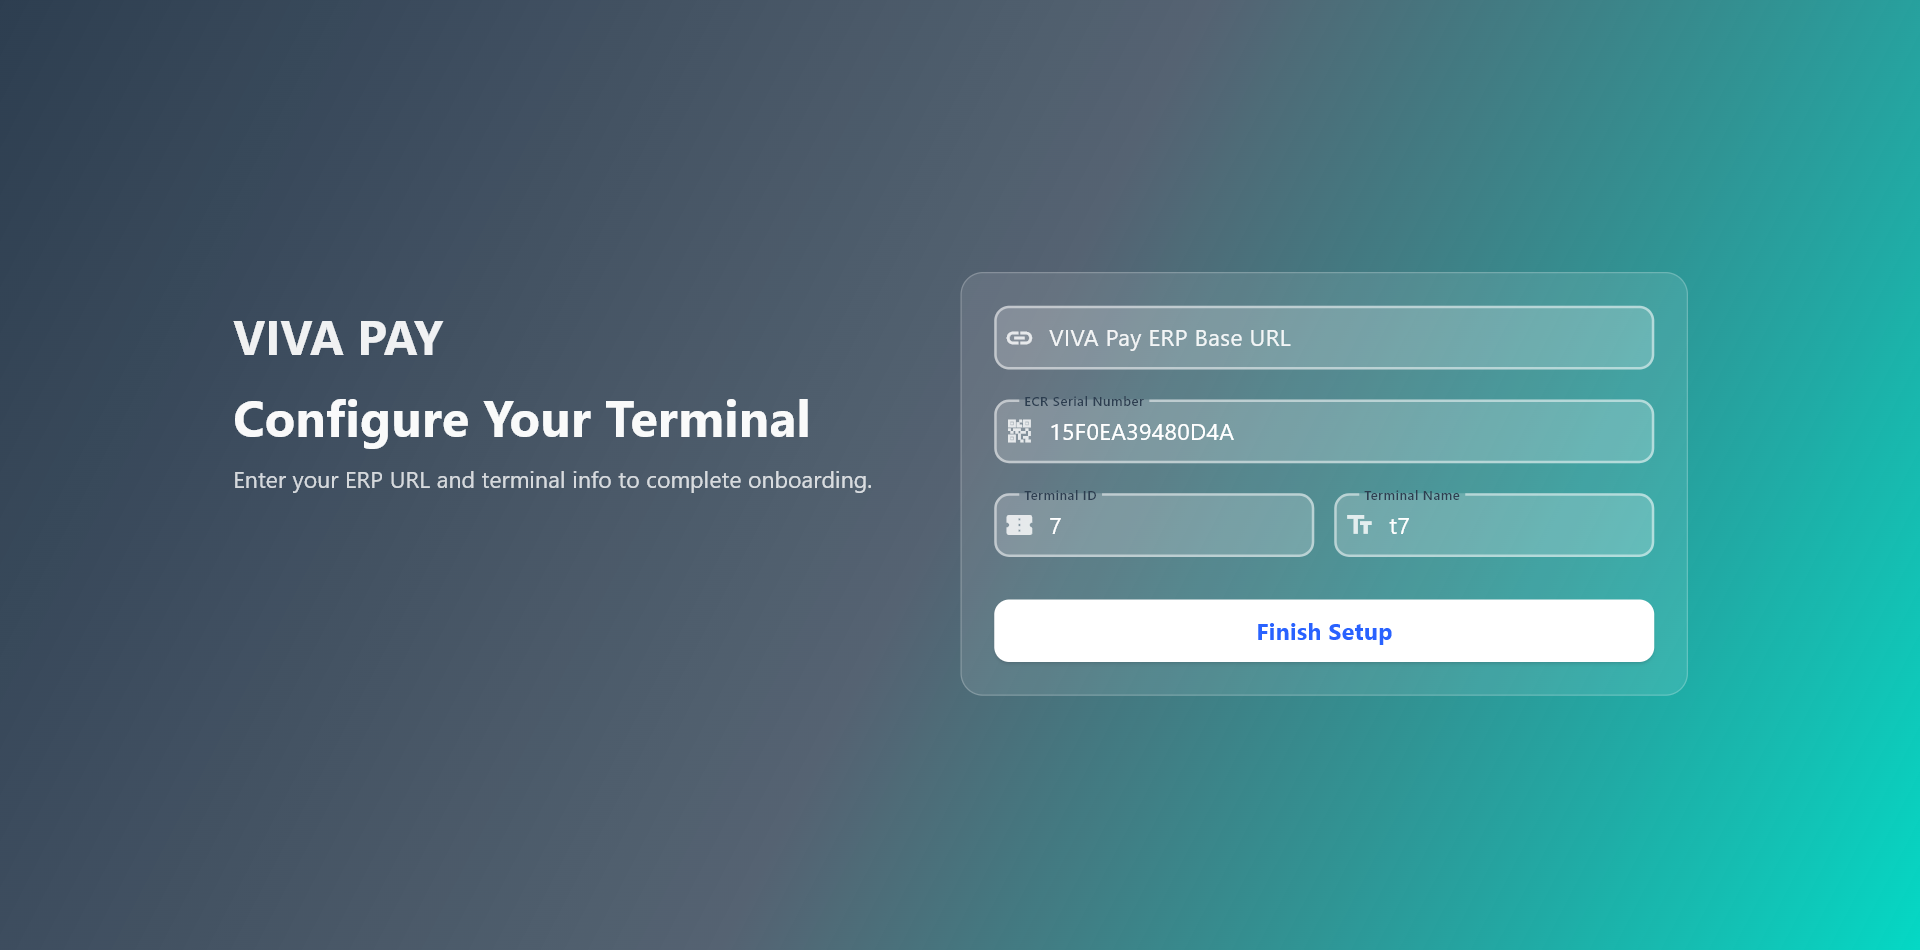
4.2 VIVA Pay ERP
VIVA Pay ERP opens the VIVA Pay web platform directly inside the app. It allows the operator to access the back-office system, review business data, and manage account settings without leaving the device.
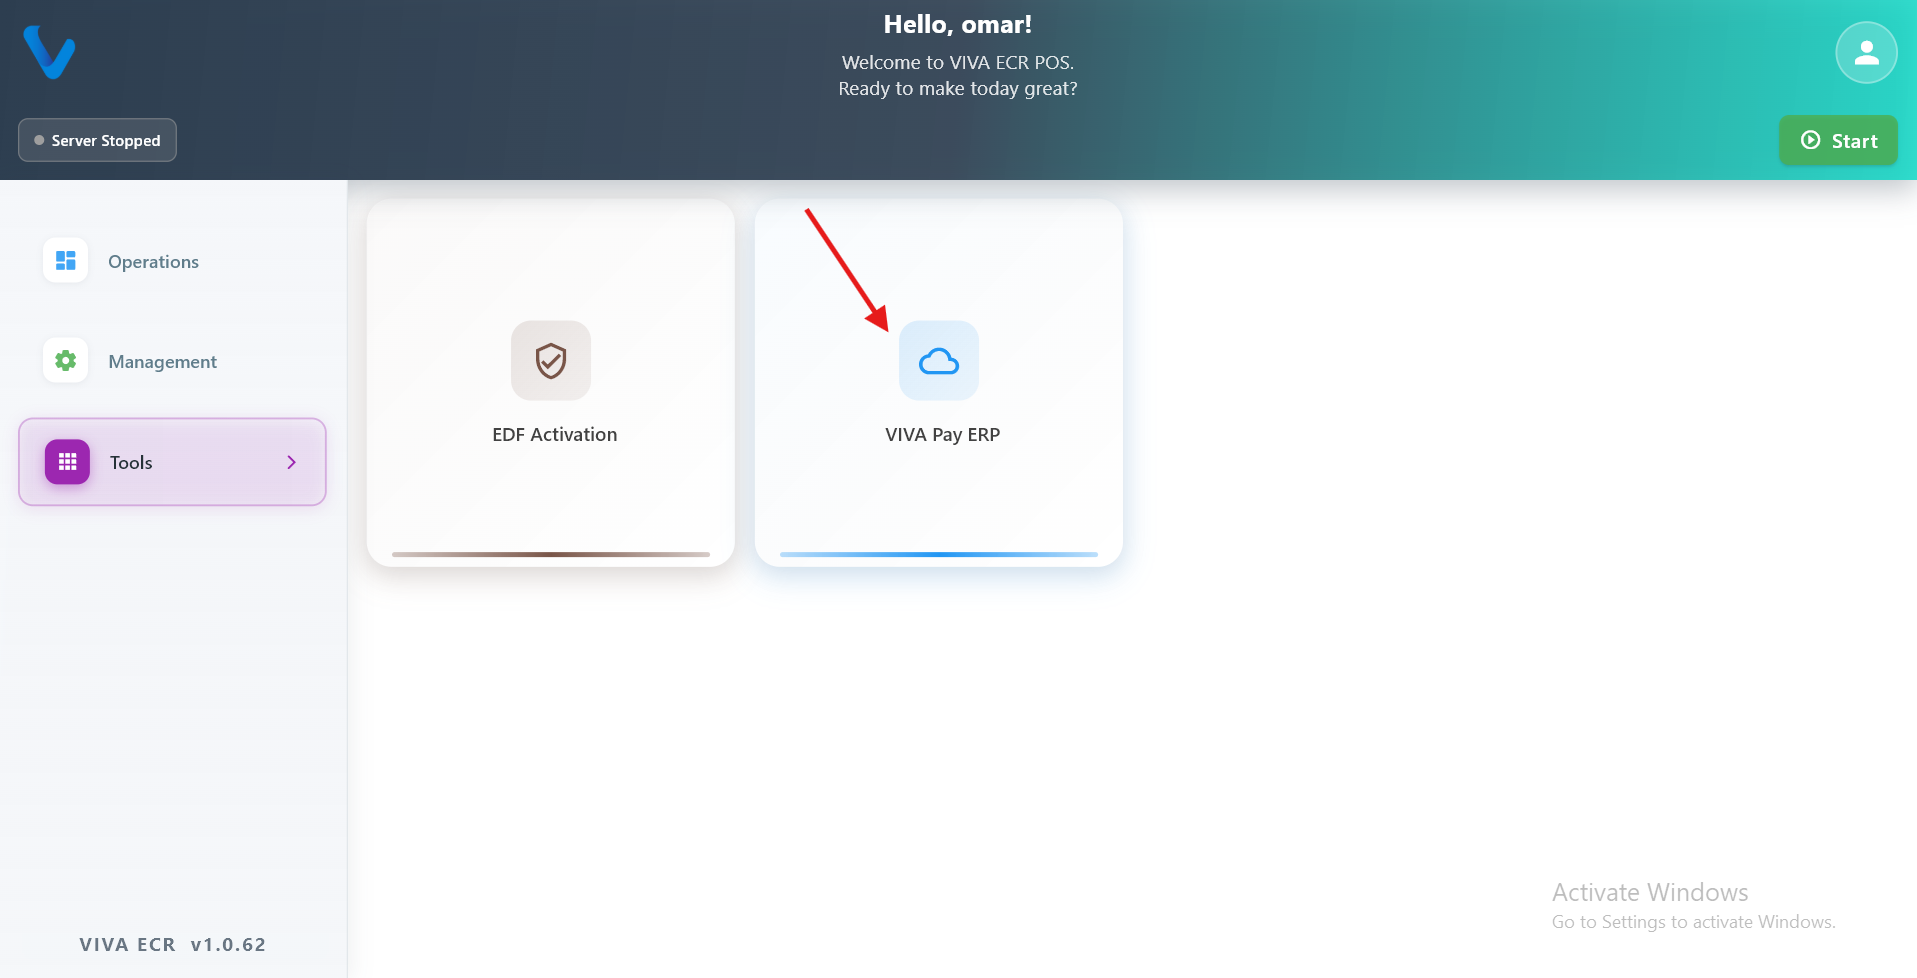
How to use:
- Open Tools from the Management menu.
- Tap VIVA Pay ERP.
- The web platform opens in a built-in browser view.
- Log in with your VIVA Pay credentials.
- Use the back navigation to return to the POS app when done.
5. Station and Terminal in Daily Use
The app can be used in two daily roles. Station is the main device, while Terminal is the connected waiter device.
5.1 How the use fields differ
In the use fields, Station and Terminal are not used the same way:
- Station is used for full control of the app and for managing the main work area.
- Terminal is used for fast staff access and daily service actions.
- Station usually shows more management options.
- Terminal usually shows a simpler workflow focused on taking orders and serving customers.
5.2 Station daily use
Use the Station when you need the broader control of the system.
Common Station tasks:
- Manage tables more fully
- Create or edit terminal records
- Review reports and settings
- Use the app as the main operational device
5.3 Terminal daily use
Use the Terminal when staff need to move quickly during service.
Common Terminal tasks:
- Log in as staff
- Open tables and take orders
- Work with the Station data already available on the network
- Focus on service actions instead of setup work
6. Quick Daily Navigation
Use this quick path during normal operation:
- First Step: Device Selection, Region, Authentication.
- Operations: POS, Tables, Payments, History.
- Management: data updates, users, settings, reports.
If you are on the Station, you usually have the full set of options. If you are on a Terminal, you usually work with the service-focused screens and the parts of the app assigned to staff use.
7. All In One
All In One is a self-contained deployment of the POS app where everything runs on a single device with no internet connection and no external server required. All data, users, products, transactions, and settings live entirely on the device itself using a local database.
This is not a setting the user can toggle in the app. It is a deployment variant that is configured at the build level. When you receive a device built in All In One, the app behaves differently from the start and is ready to use immediately without any network setup.
7.1 What is different
In All In One, the app skips the setup steps that normally require a server connection:
- No device detection screen
- No region selection screen
- No online login or API authentication
- No station or terminal pairing
Instead, the app boots directly to the local login screen. A default user account and a base currency are automatically created the first time the app launches so the device is ready to use out of the box.
7.2 How data works
All data is stored locally on the device using an embedded database (ObjectBox). Nothing is sent to or received from an external server.
What this means in practice:
- Products and categories you add are saved on the device only
- Transactions are recorded locally and stay on the device
- Users and roles are managed locally
- Currency settings are stored locally and default to CDF on first run
- There is no automatic background sync with a remote system
The Data Entry screen clearly labels itself as Local storage only when running in All In One so there is no confusion about where data is going.
7.3 Who this is for
All In One is suited for:
- Businesses that operate without a stable internet connection
- Single-device setups where a dedicated station or separate terminals are not needed
- Environments where simplicity and offline reliability are more important than multi-device coordination
- Trial or demo setups where the app needs to run standalone
7.4 What stays the same
The full Operations and Management sections work exactly as in the standard deployment:
- POS, Tables, Payments, History, and Analytics all work as normal
- Items, Users, Attendance, Data Entry, Reports, and all Settings work as normal
- Reports (X Report, Z Report, A Report) are generated from the local transaction data
- The Log Dashboard works as normal