2. Operations Section
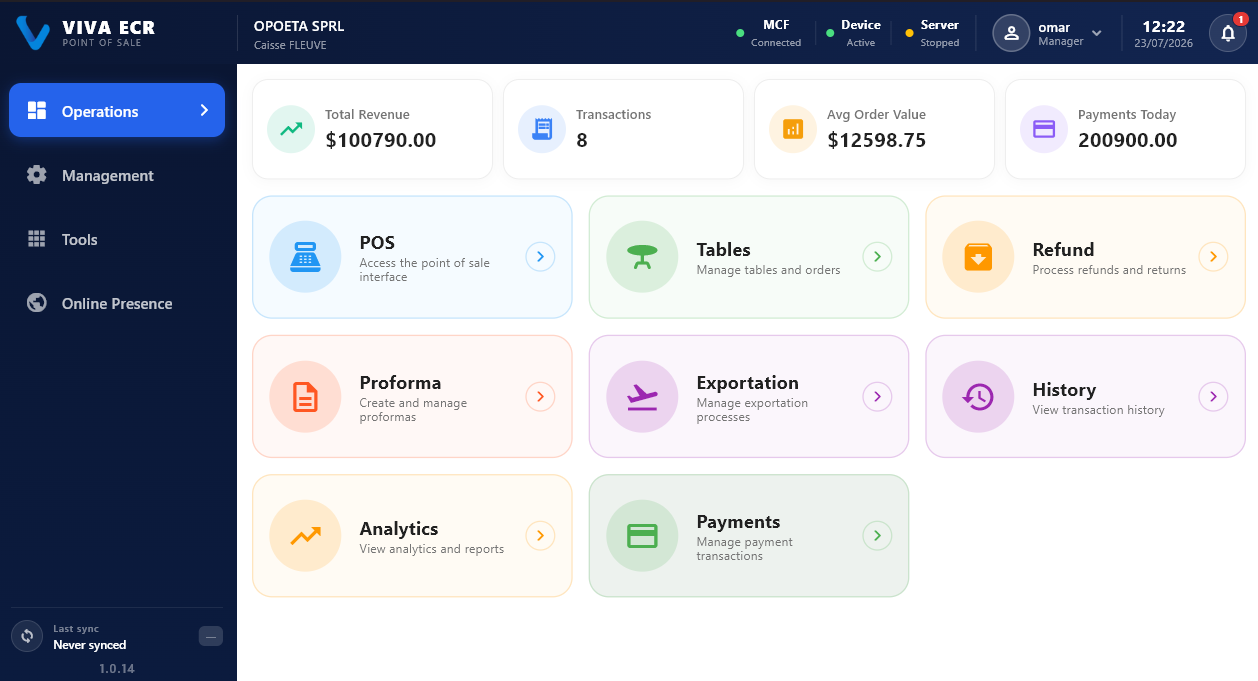
This section is used during sales and daily front-of-house work.
2.1 POS
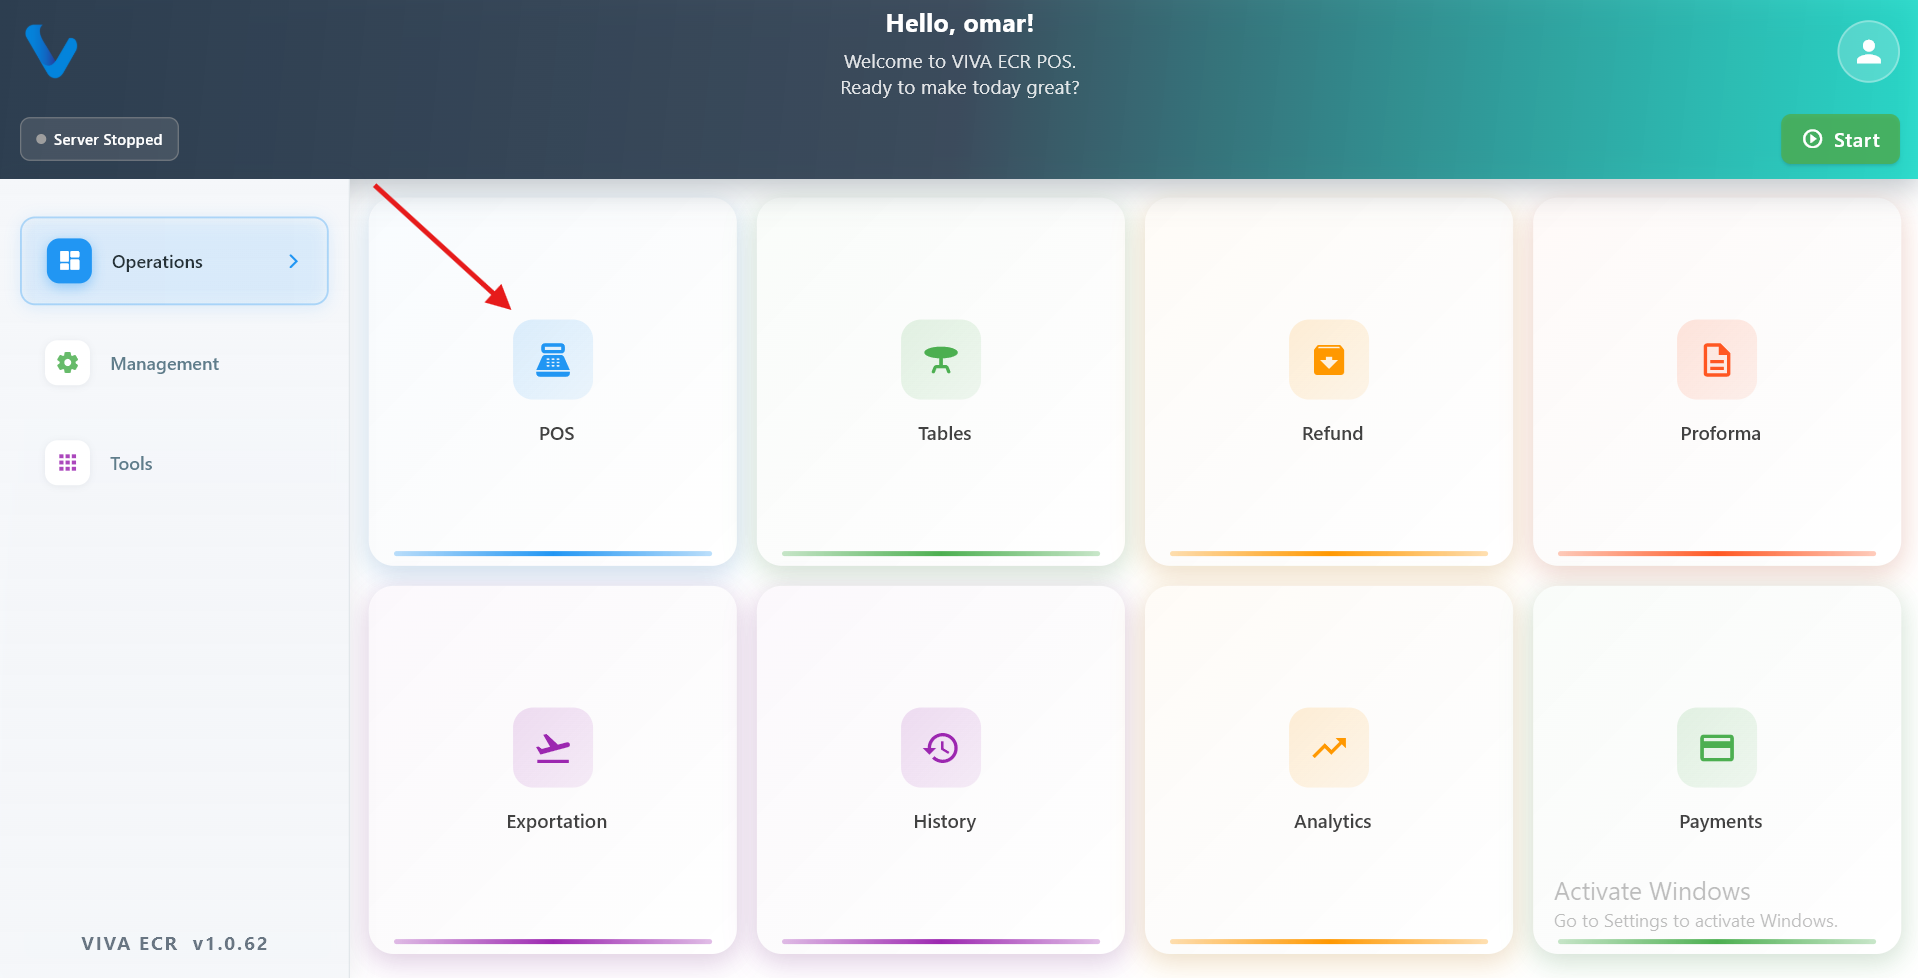
The POS screen is where staff build orders, review the cart, and complete the sale.
What you can do:
- Browse products by category
- Add and remove items from the cart
- Review subtotal, VAT, and total
- Proceed to payment when the order is ready
Typical flow:
- Select a category.
- Add products to the cart.
- Review the totals.
- Continue to payment.
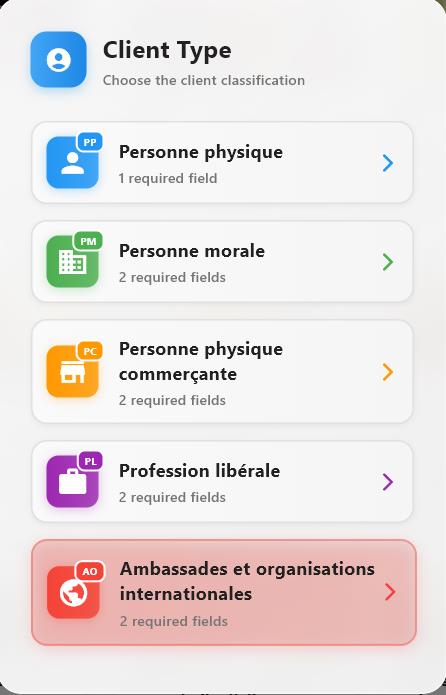
Client type selection screen: choose the customer classification before continuing with account or profile setup.
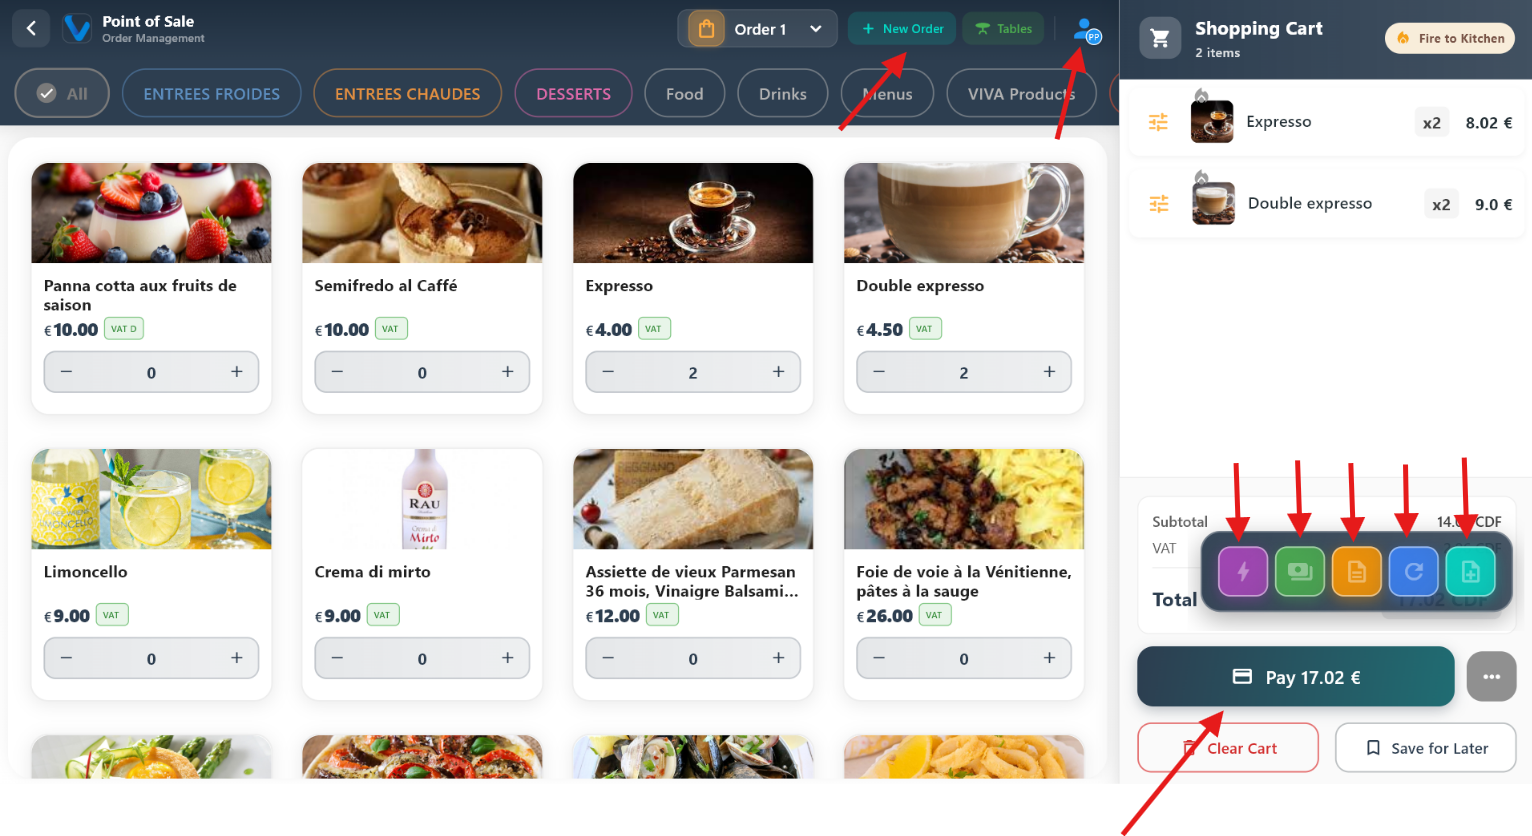
Main POS layout: pick categories and products, build the cart on the side, and see totals update as you go.
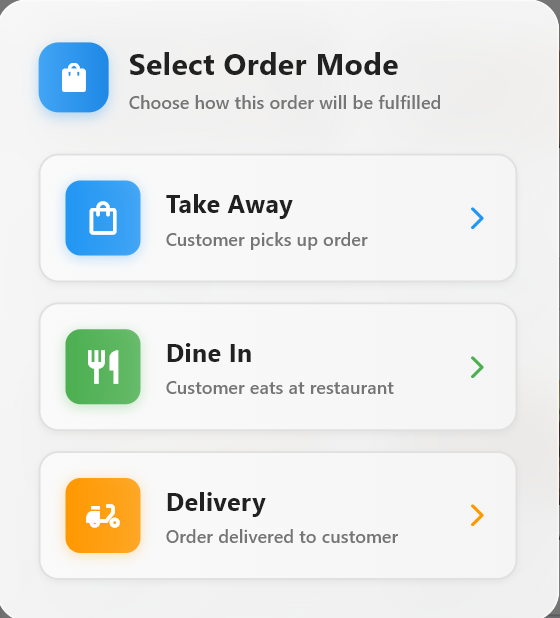
Start a fresh sale: clear the current cart and begin a new order for the next customer.
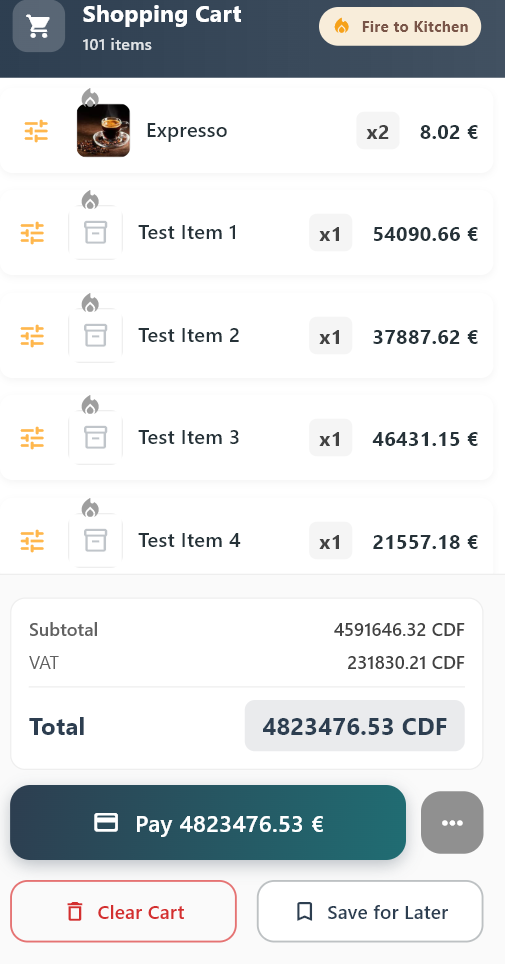
Example of a full cart with many lines — shows how the list and totals scale when the order is large.
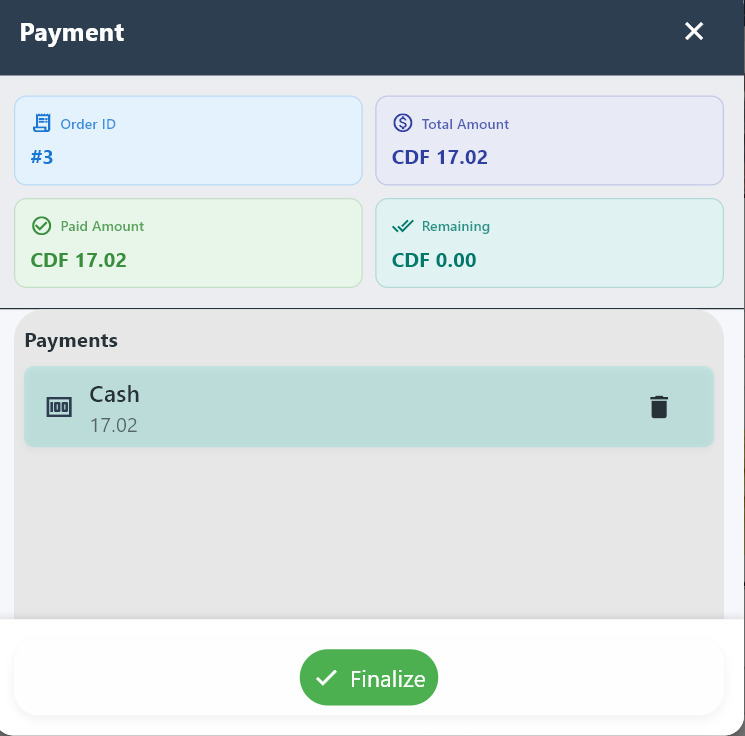
Entering or confirming a cash payment: amount received, change, and closing the sale in cash.
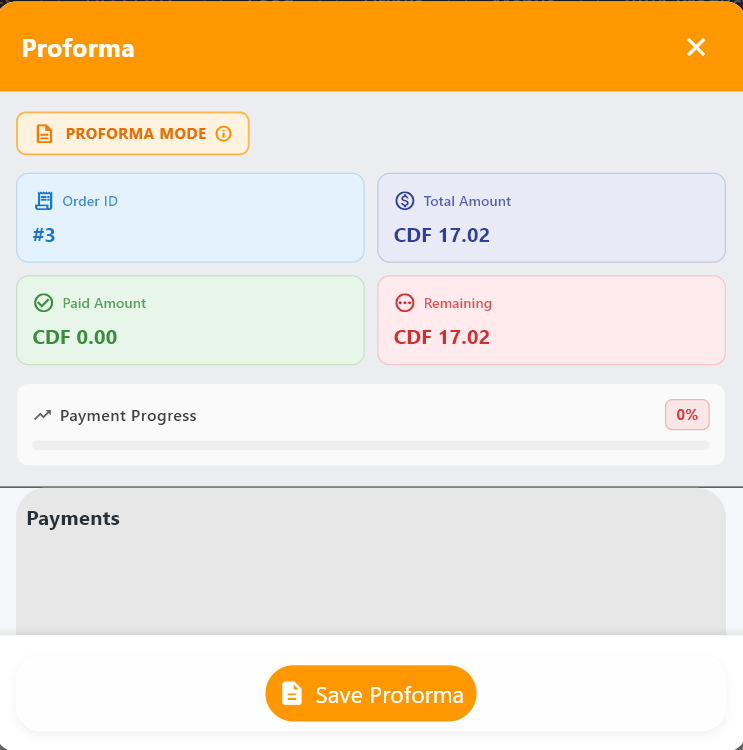
Generate a proforma (preview bill) from the current cart so the customer can review before paying.
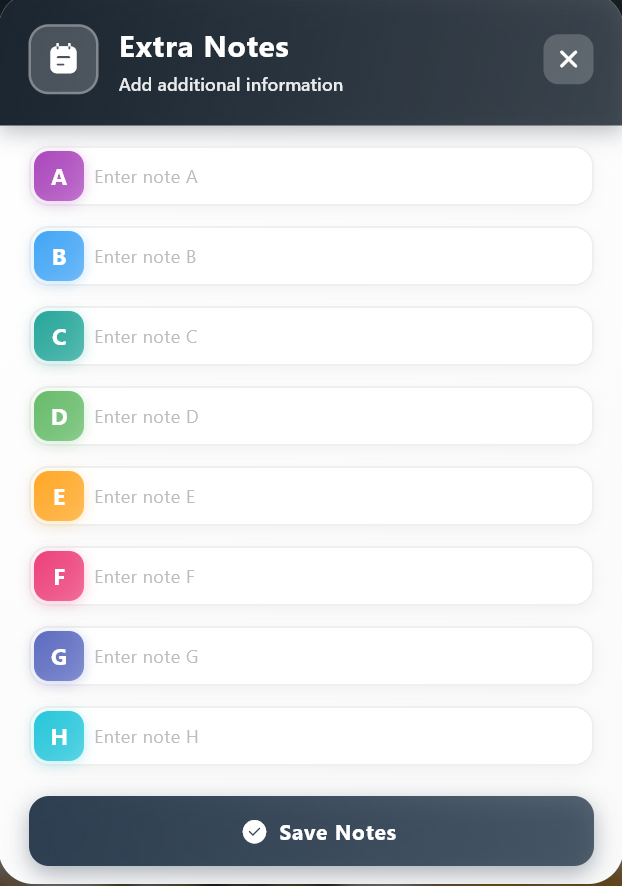
Add notes to a specific product line for the kitchen or for the receipt (e.g. “no onions”, “extra sauce”).
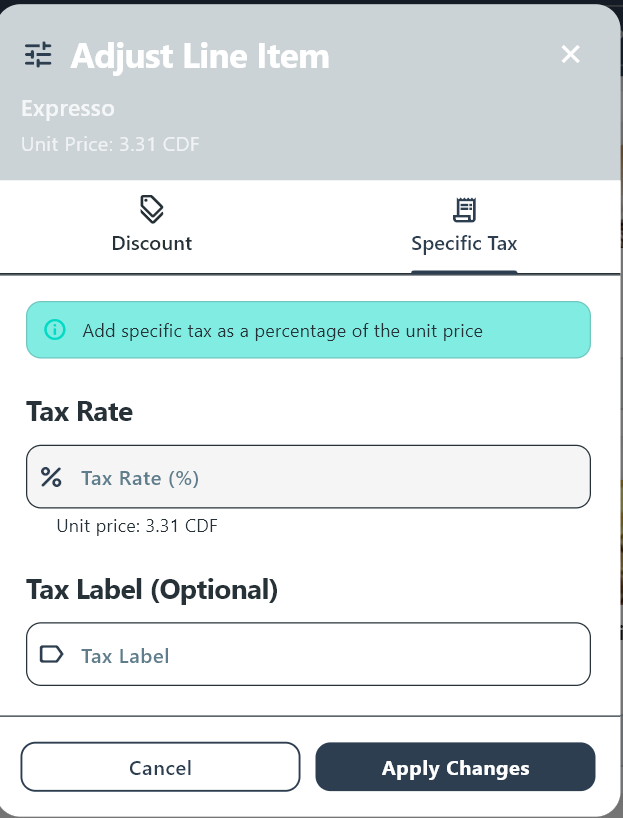
Adjust tax on one product in the cart when your permissions allow per-line tax corrections.
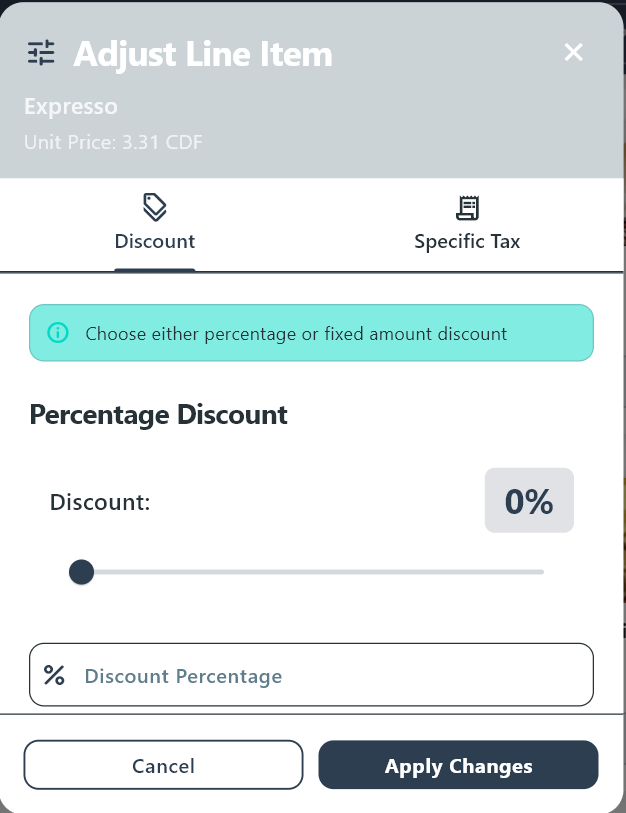
Apply a discount to a single product instead of discounting the whole order.
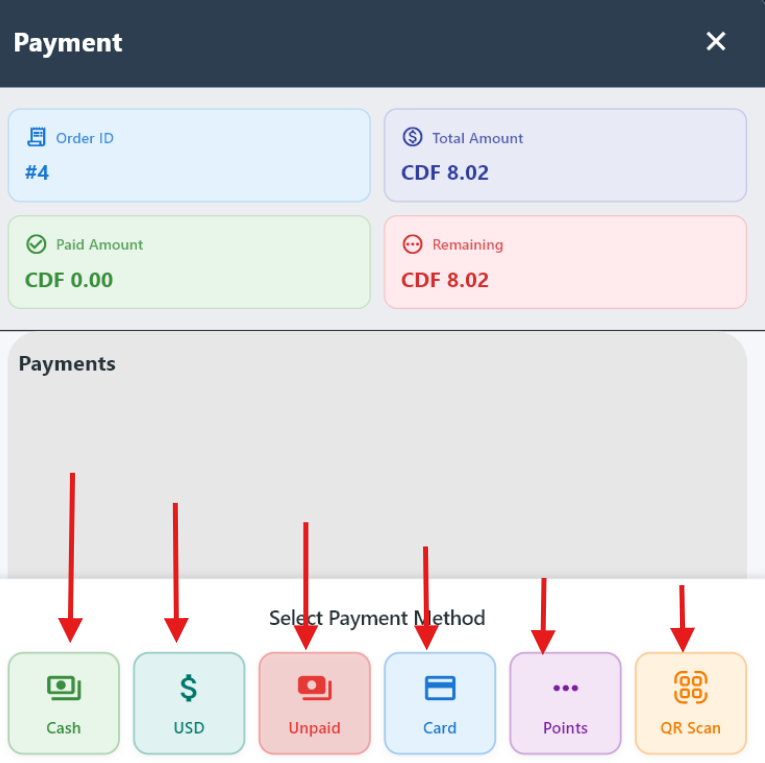
Payment screen: choose how the customer pays and complete the transaction.
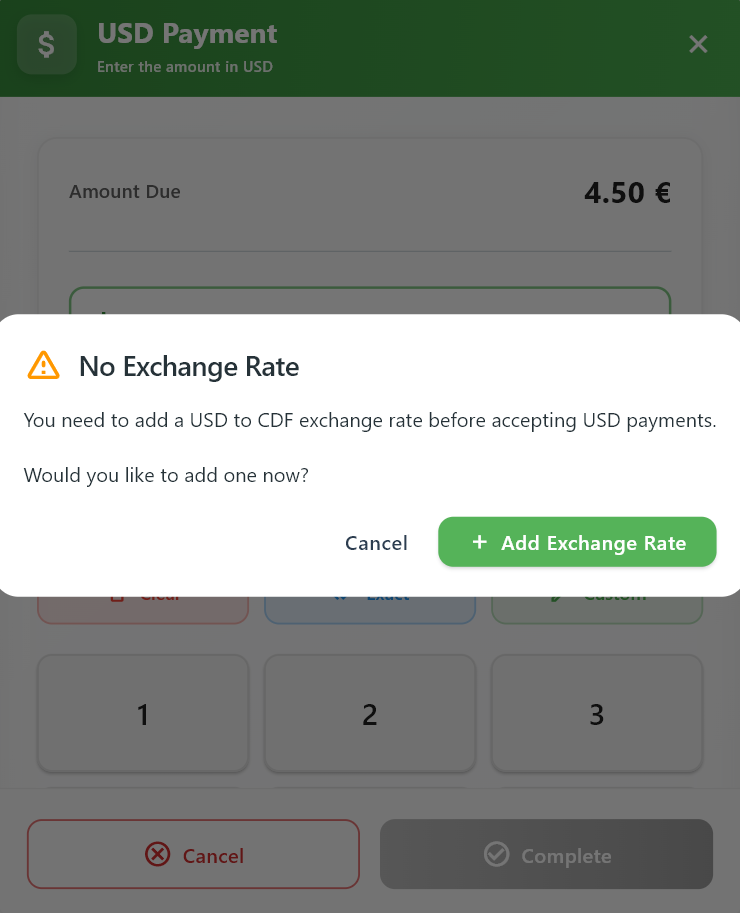
No exchange rate warning: prompts the user to add a USD to CDF rate before proceeding with USD payment.
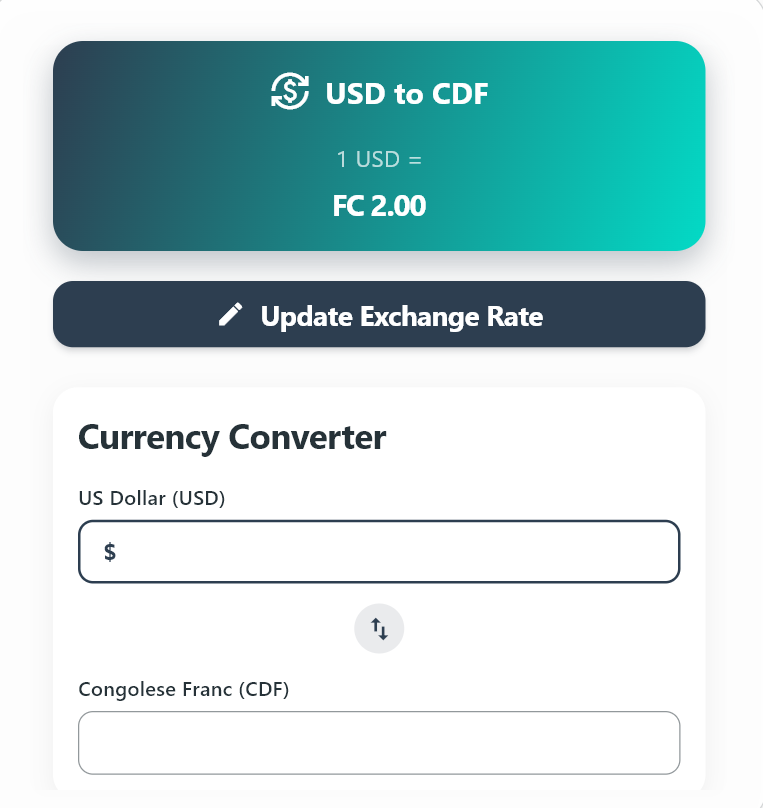
Exchange rate setup screen: define or update the USD to CDF conversion and use the currency converter.
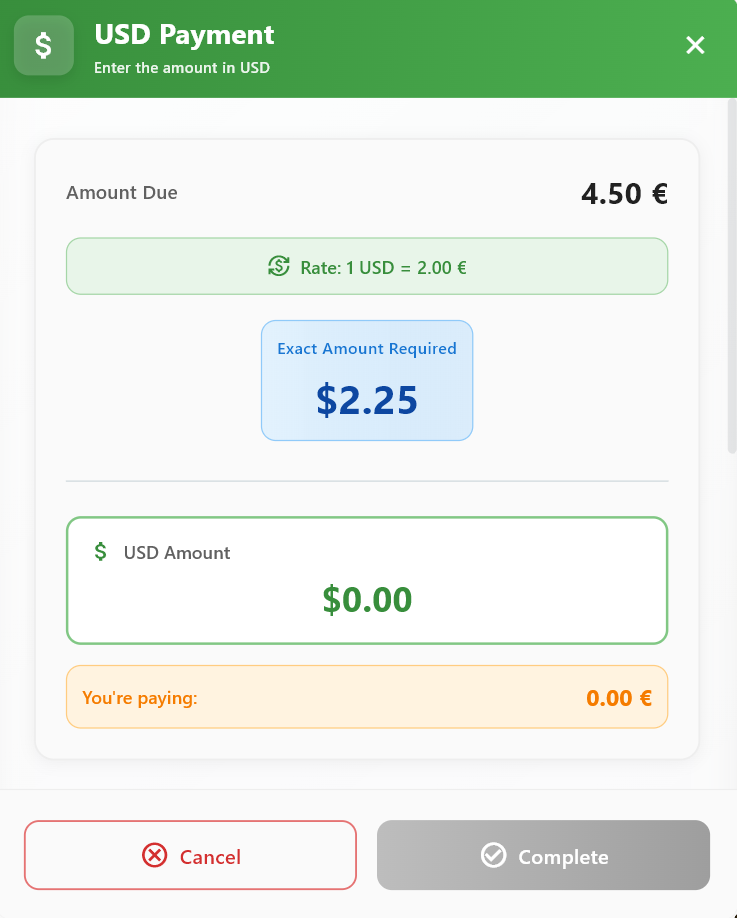
USD payment screen: applies the exchange rate to calculate the required USD amount and complete the payment.
2.2 Table
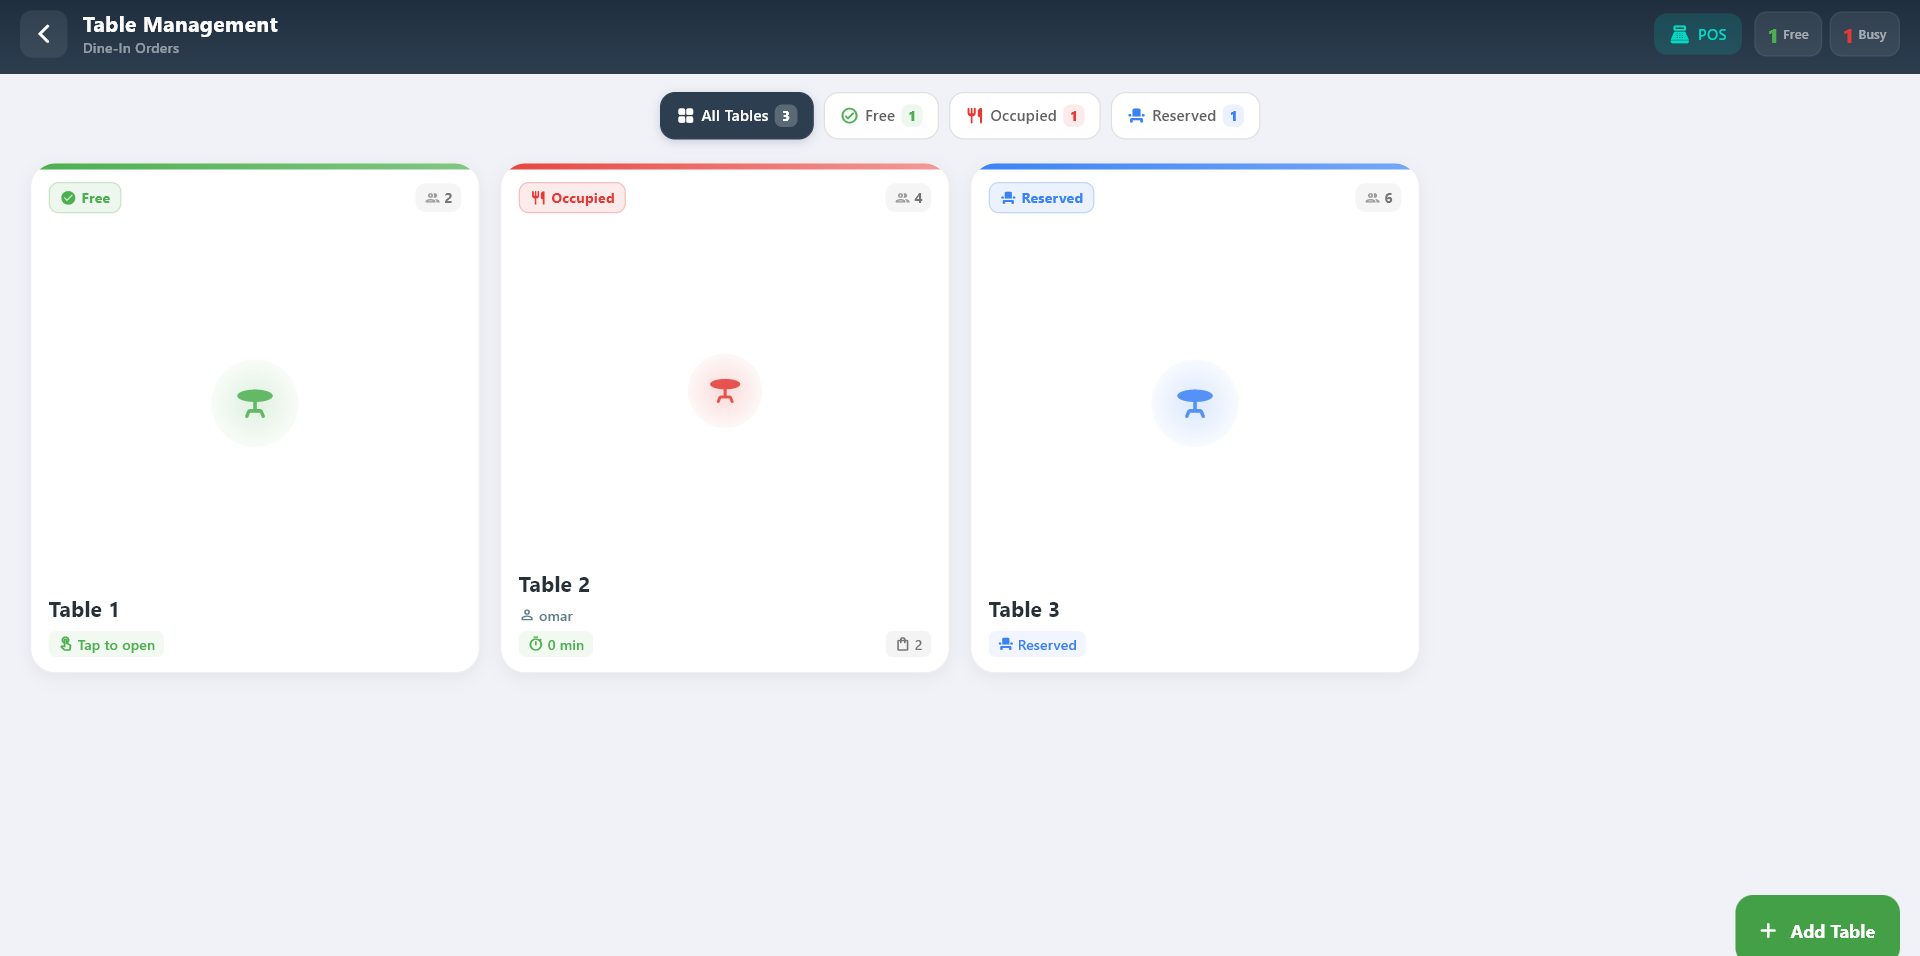
Table Management is used for dine-in service and helps staff handle orders linked to a table.
What you can do:
- View free, occupied, and reserved tables
- Open table orders directly in POS
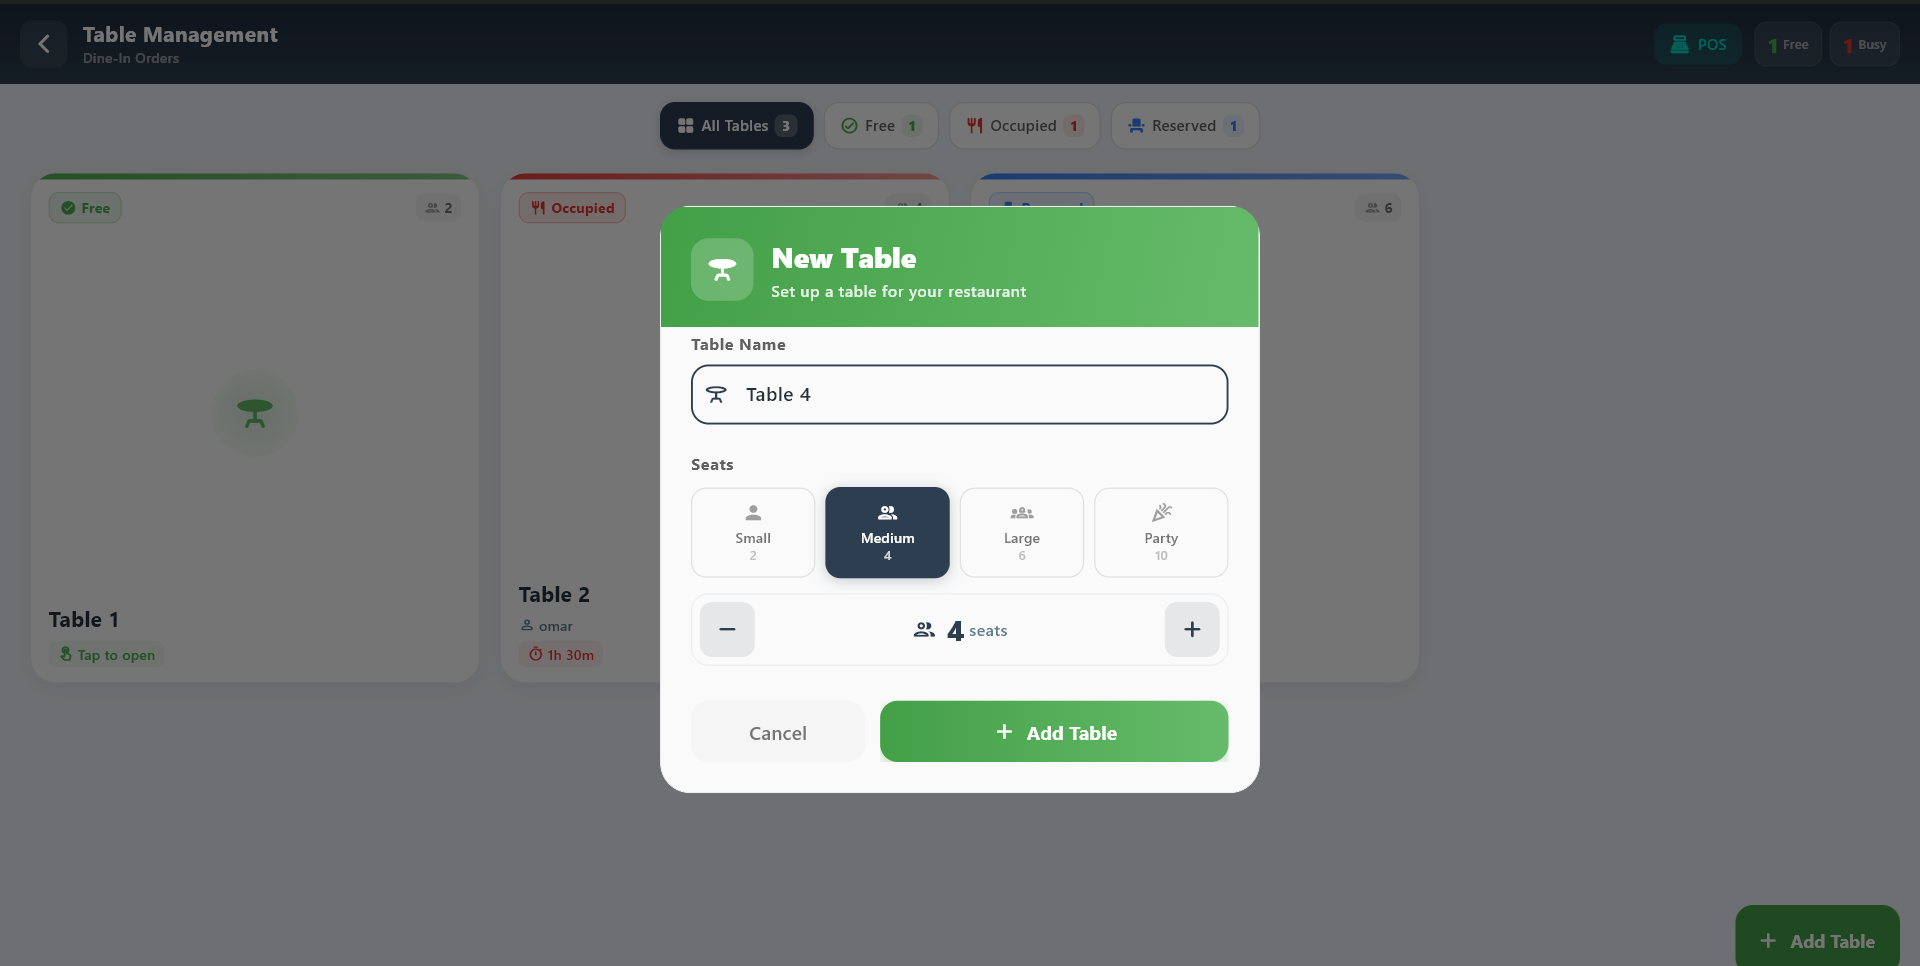
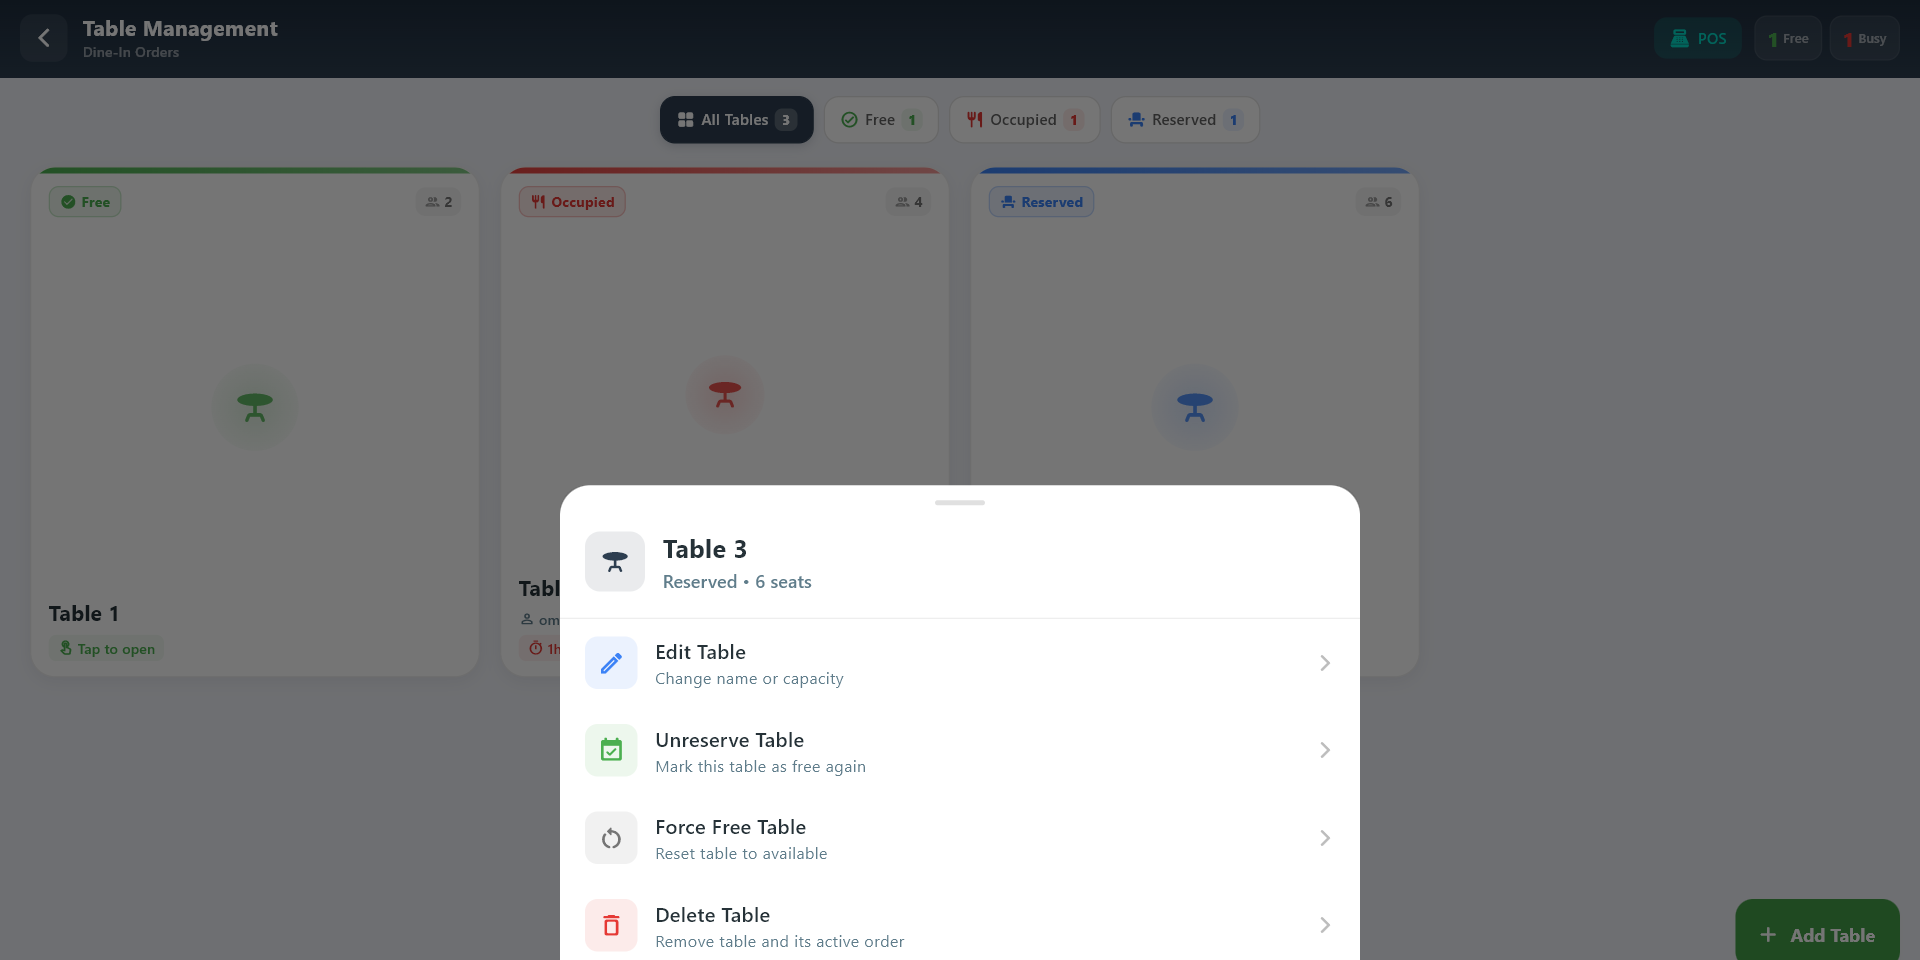
- Add and edit tables when your role allows it
Typical flow:
- Open Tables.
- Choose the correct table.
- Continue the order in POS.
2.3 Refund
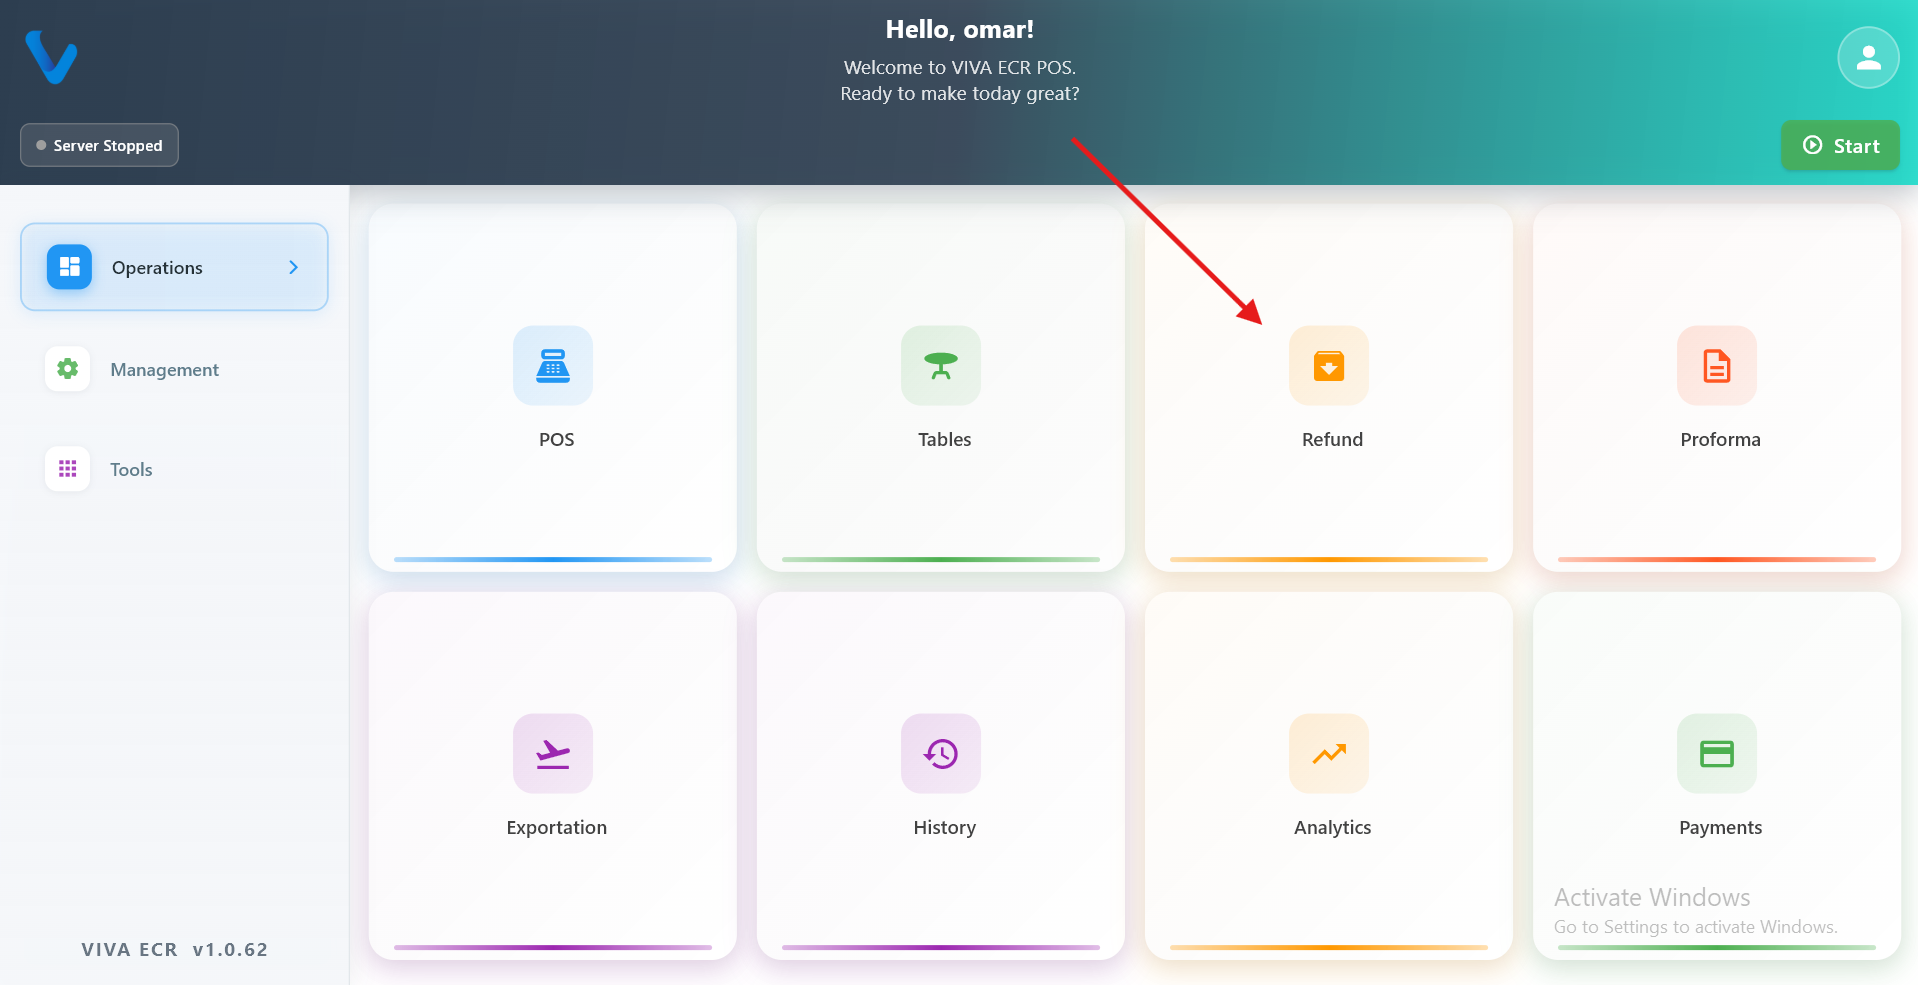
Refund is used to return money for an eligible transaction when store rules allow it.
Use it when:
- A customer was charged incorrectly
- A transaction must be reversed
- Store policy allows the refund
Typical flow:
- Find the original transaction.
- Review the refund details.
- Complete the refund.
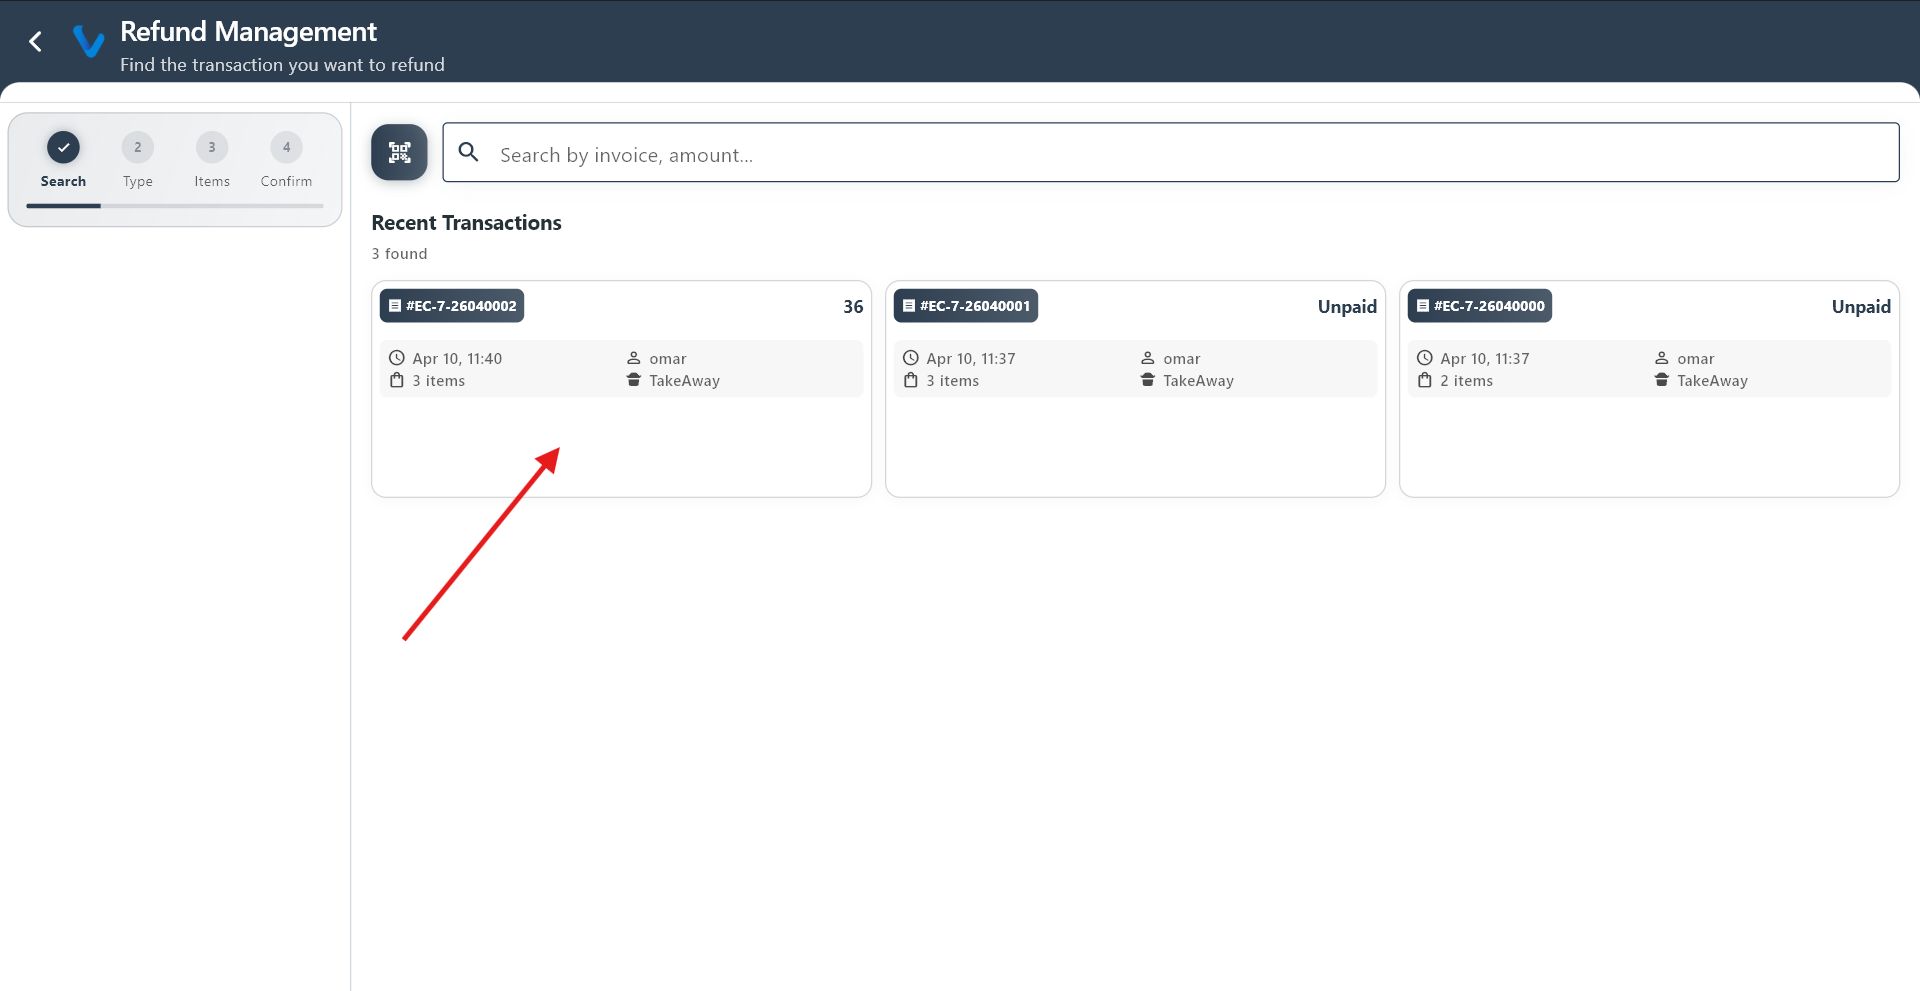 Search for the original transaction by reference number or date before starting the refund.
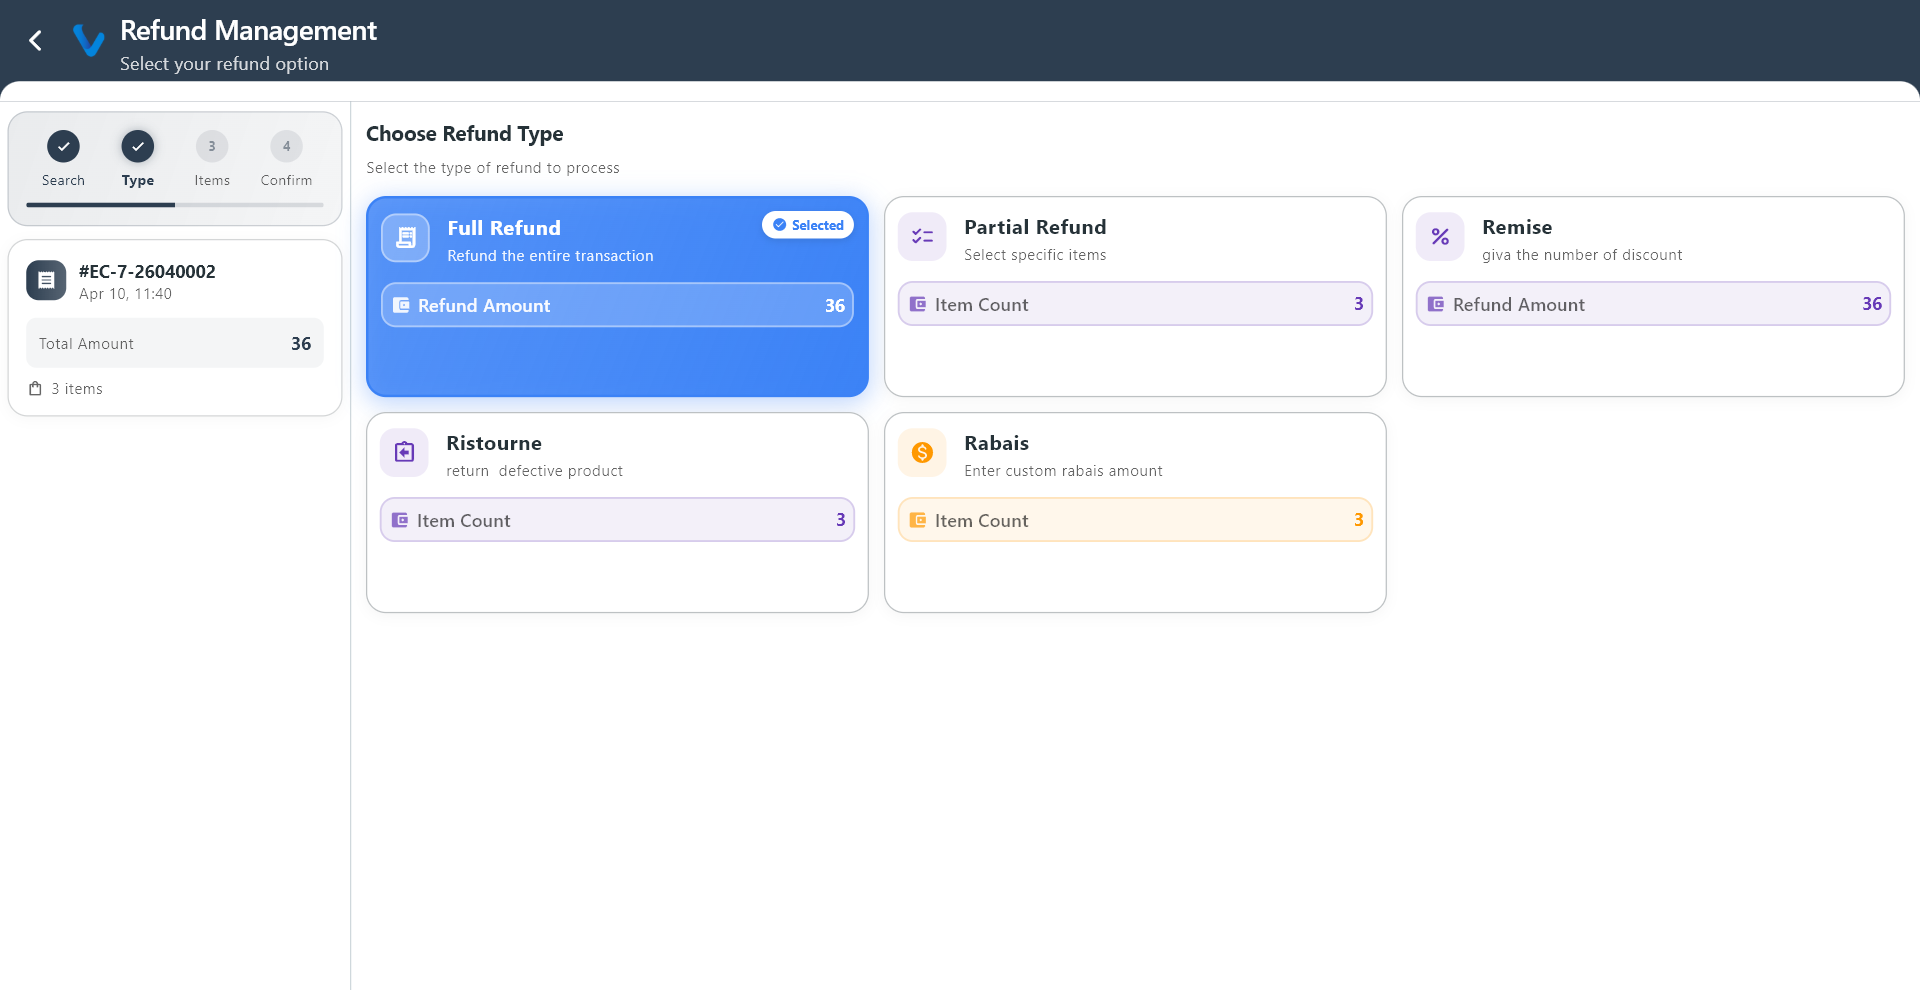 Choose the type of refund to apply: full, partial, discount, or damage.
 Full refund returns the entire amount of the original transaction to the customer.
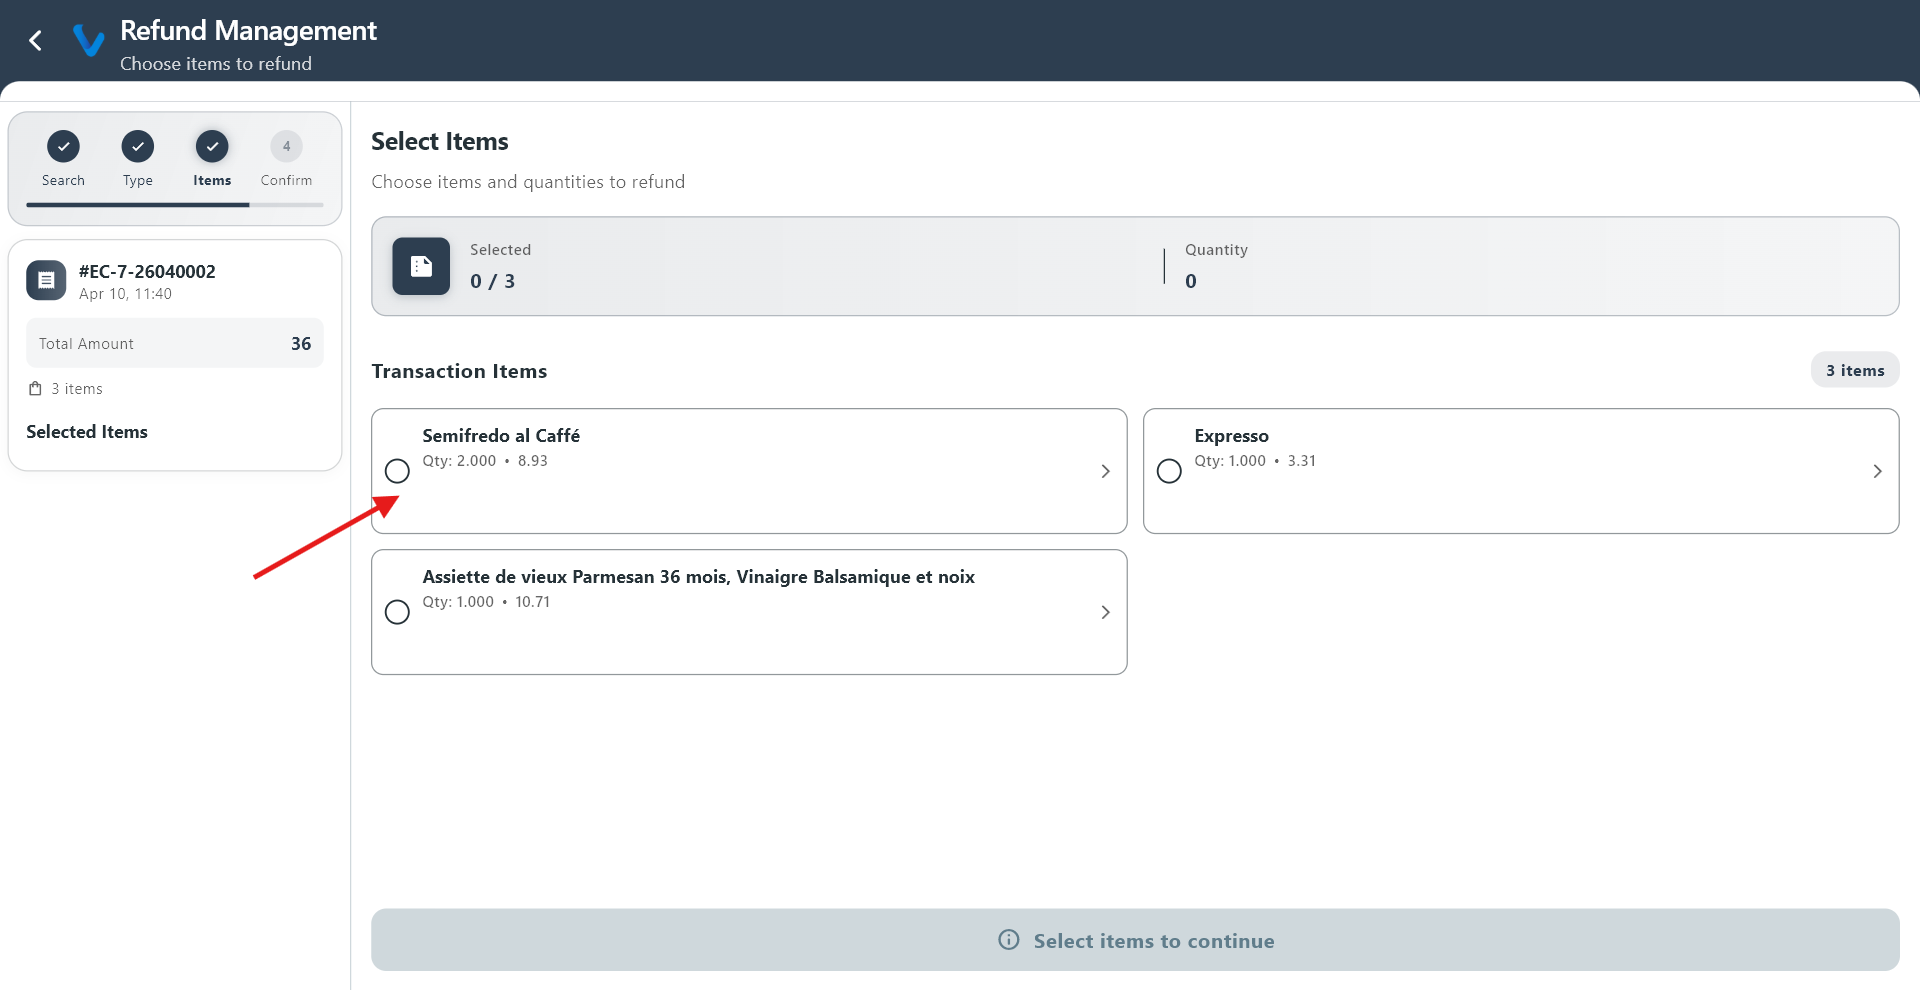 Choose which items or quantities to include in the partial refund.
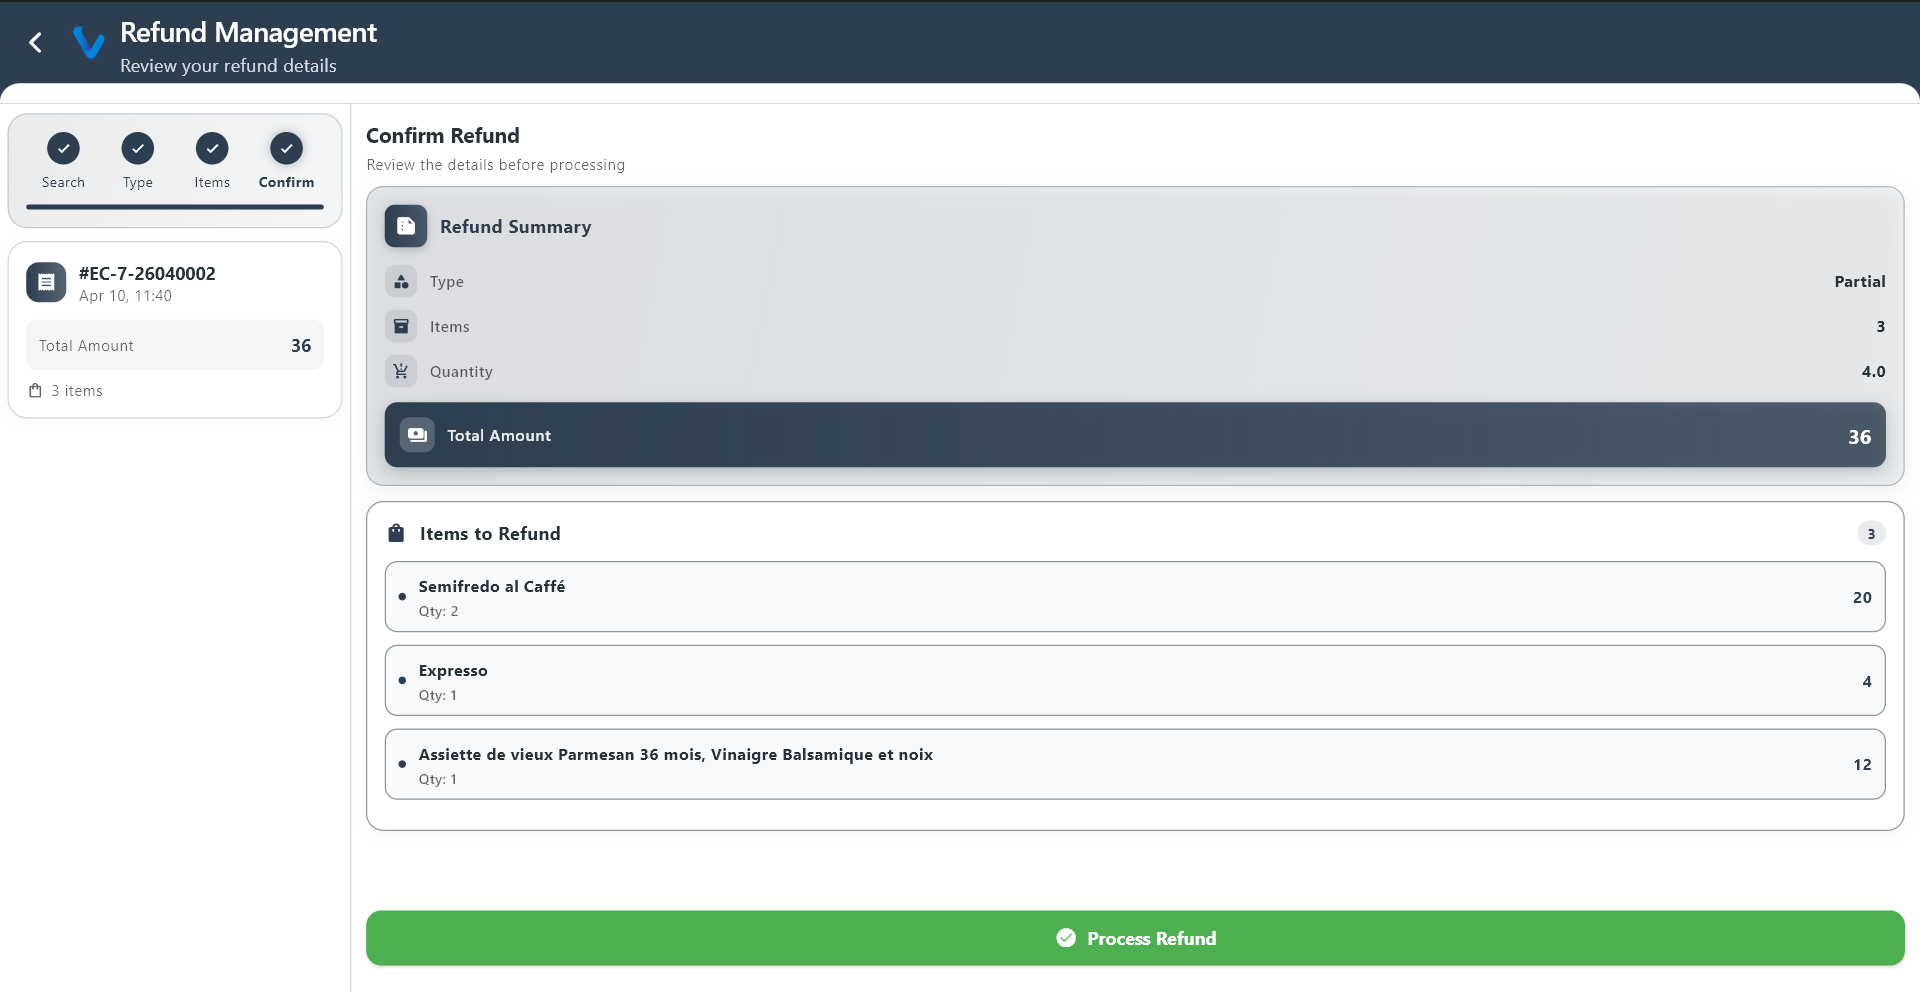
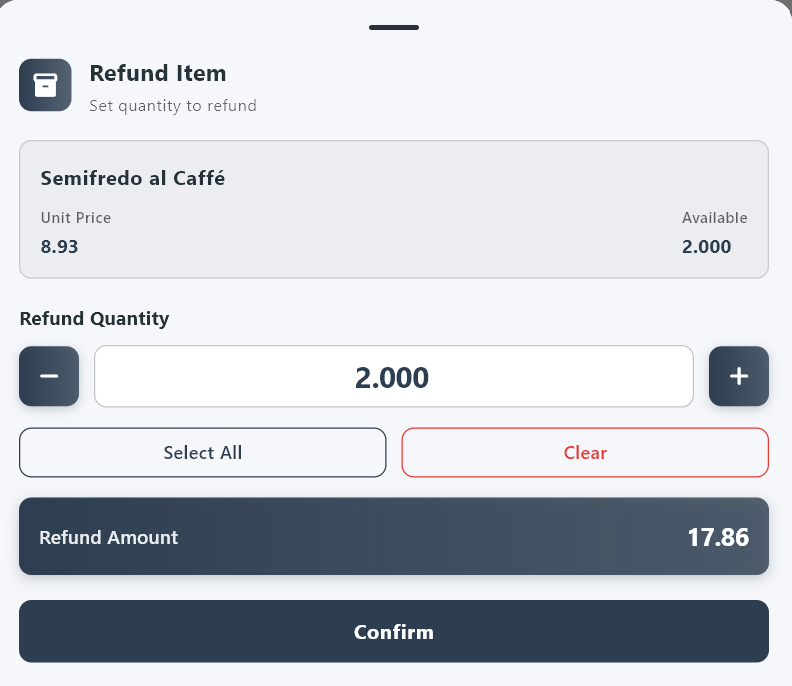 Review the selected items and the refund total before confirming.
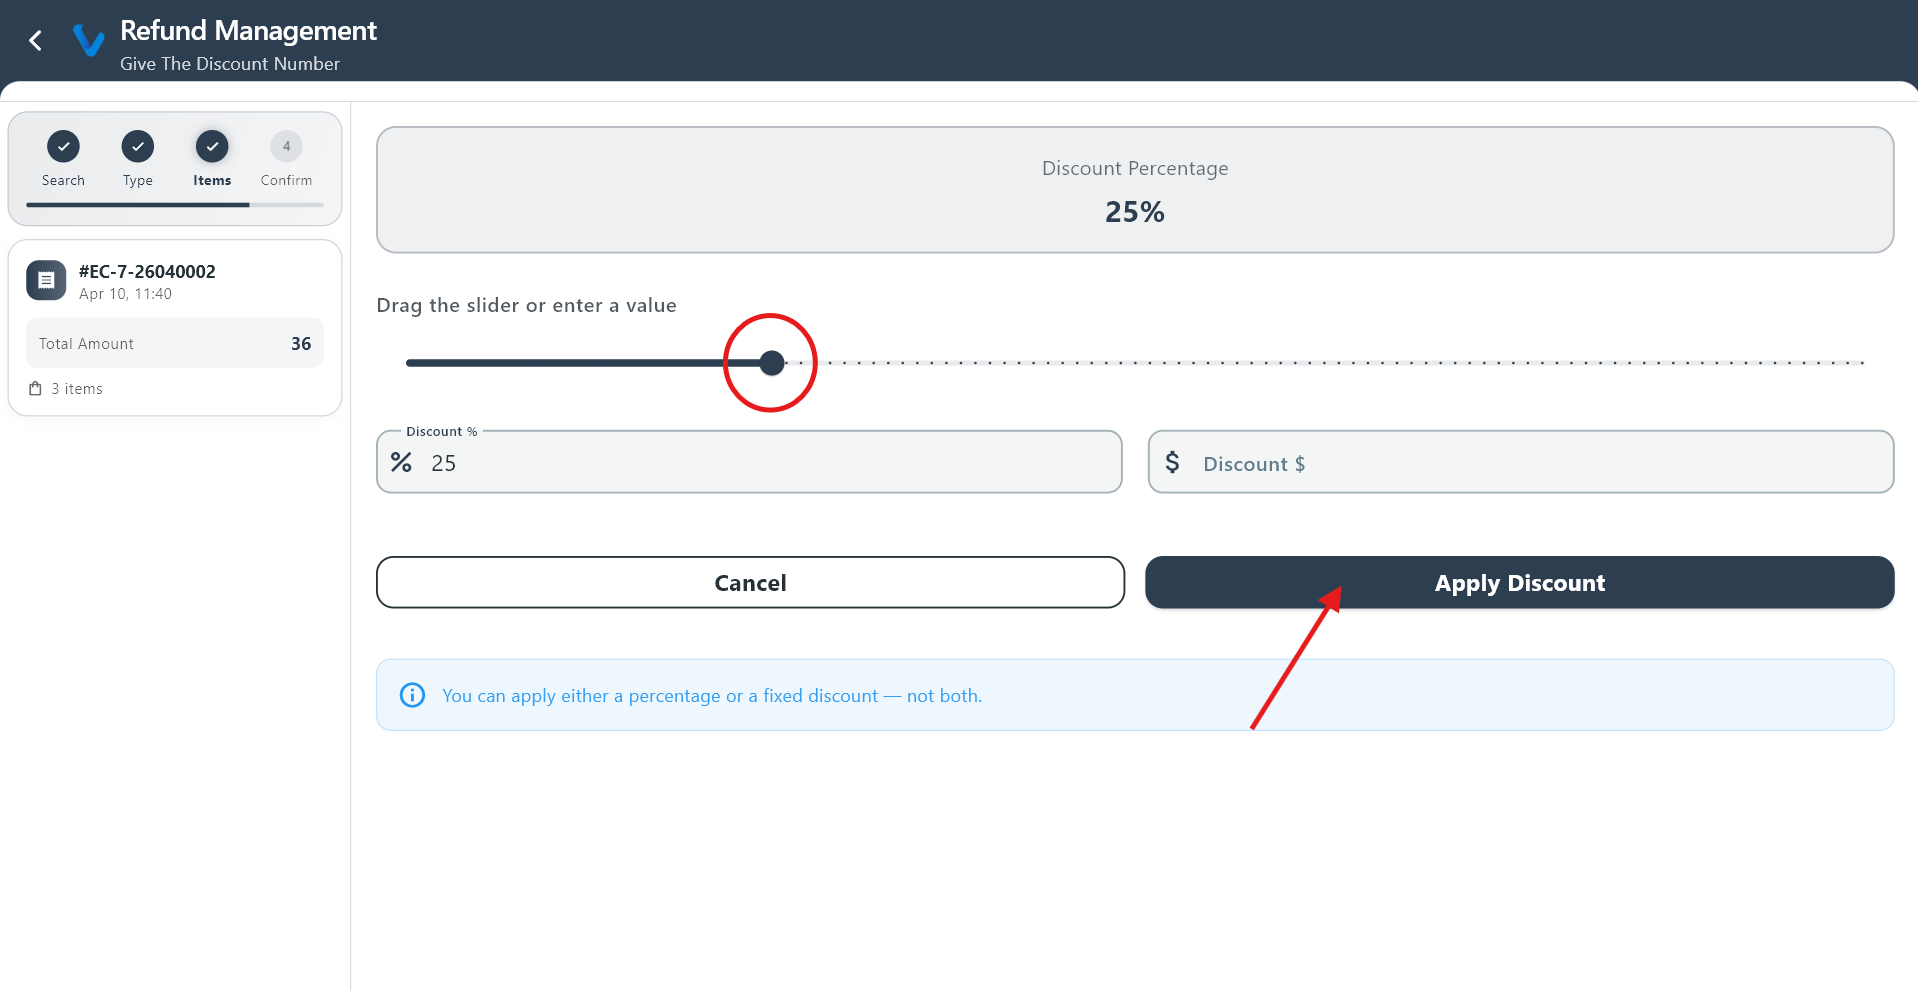 Discount refund is used when the refund is applied as a price correction rather than a full return.
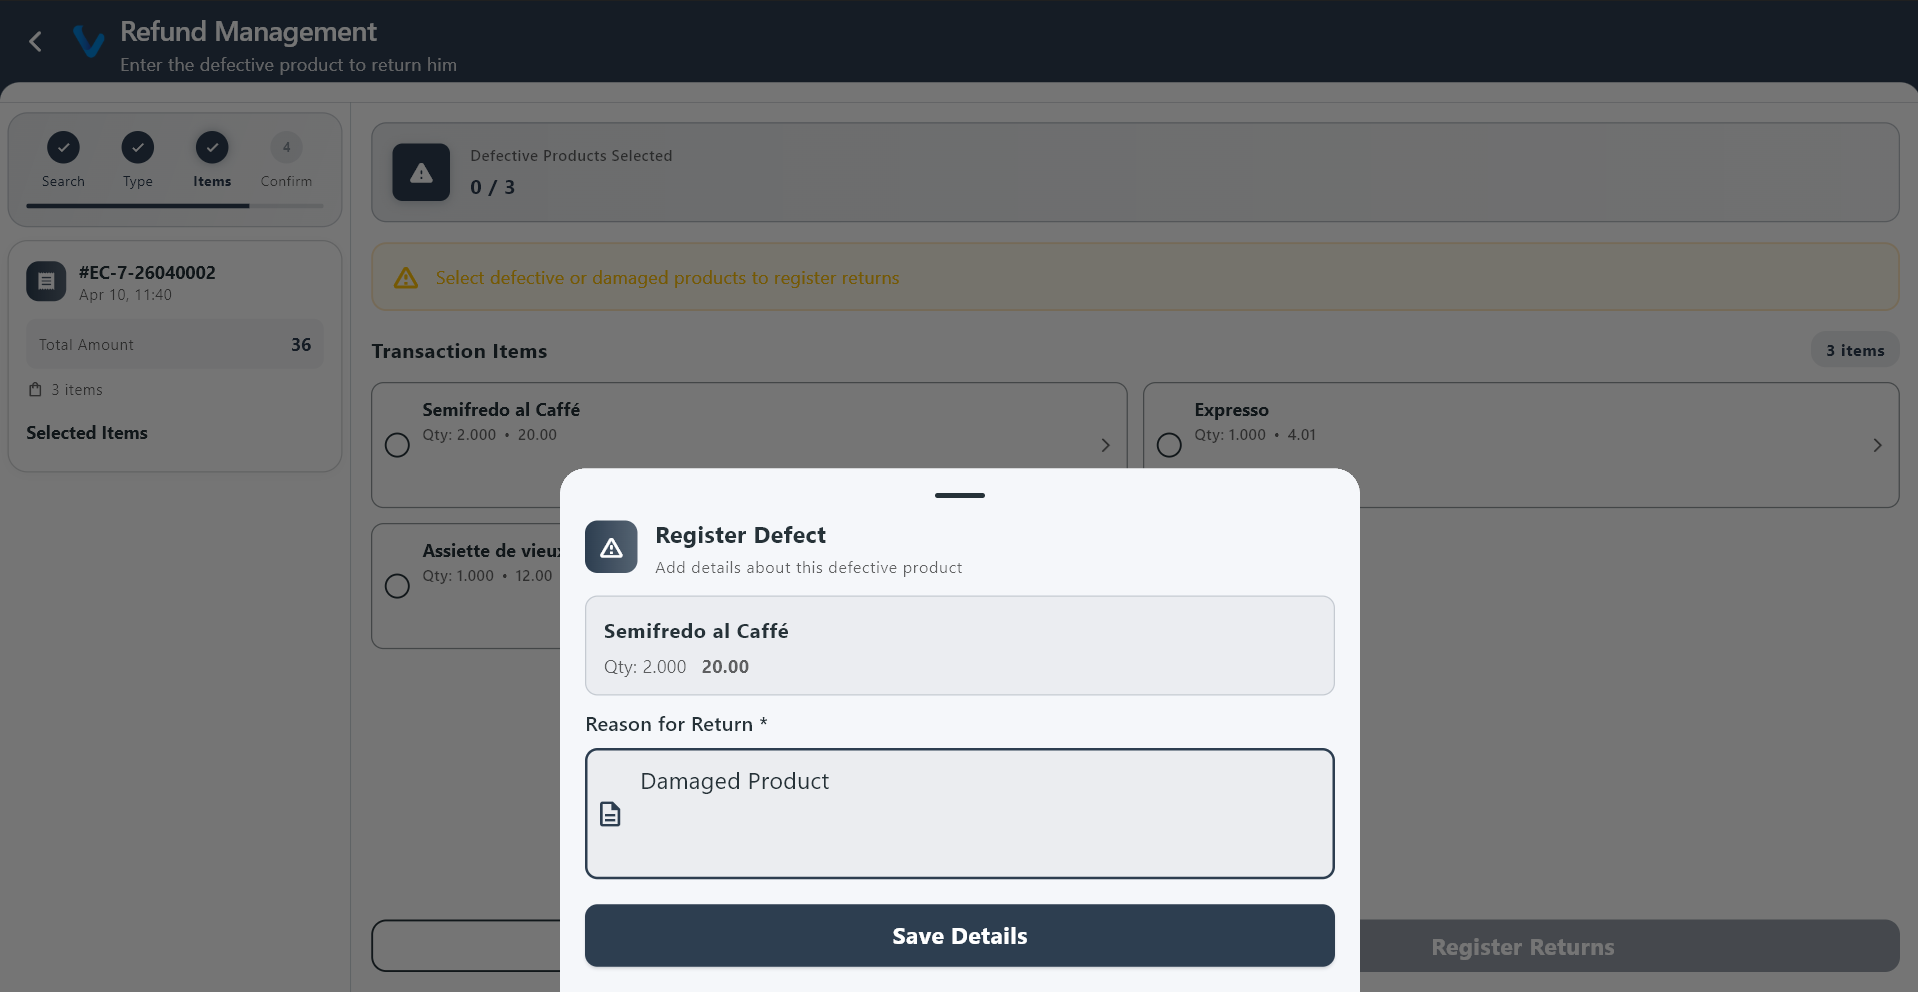 Damage refund is used when goods were returned due to damage or quality issues.
2.4 Proforma
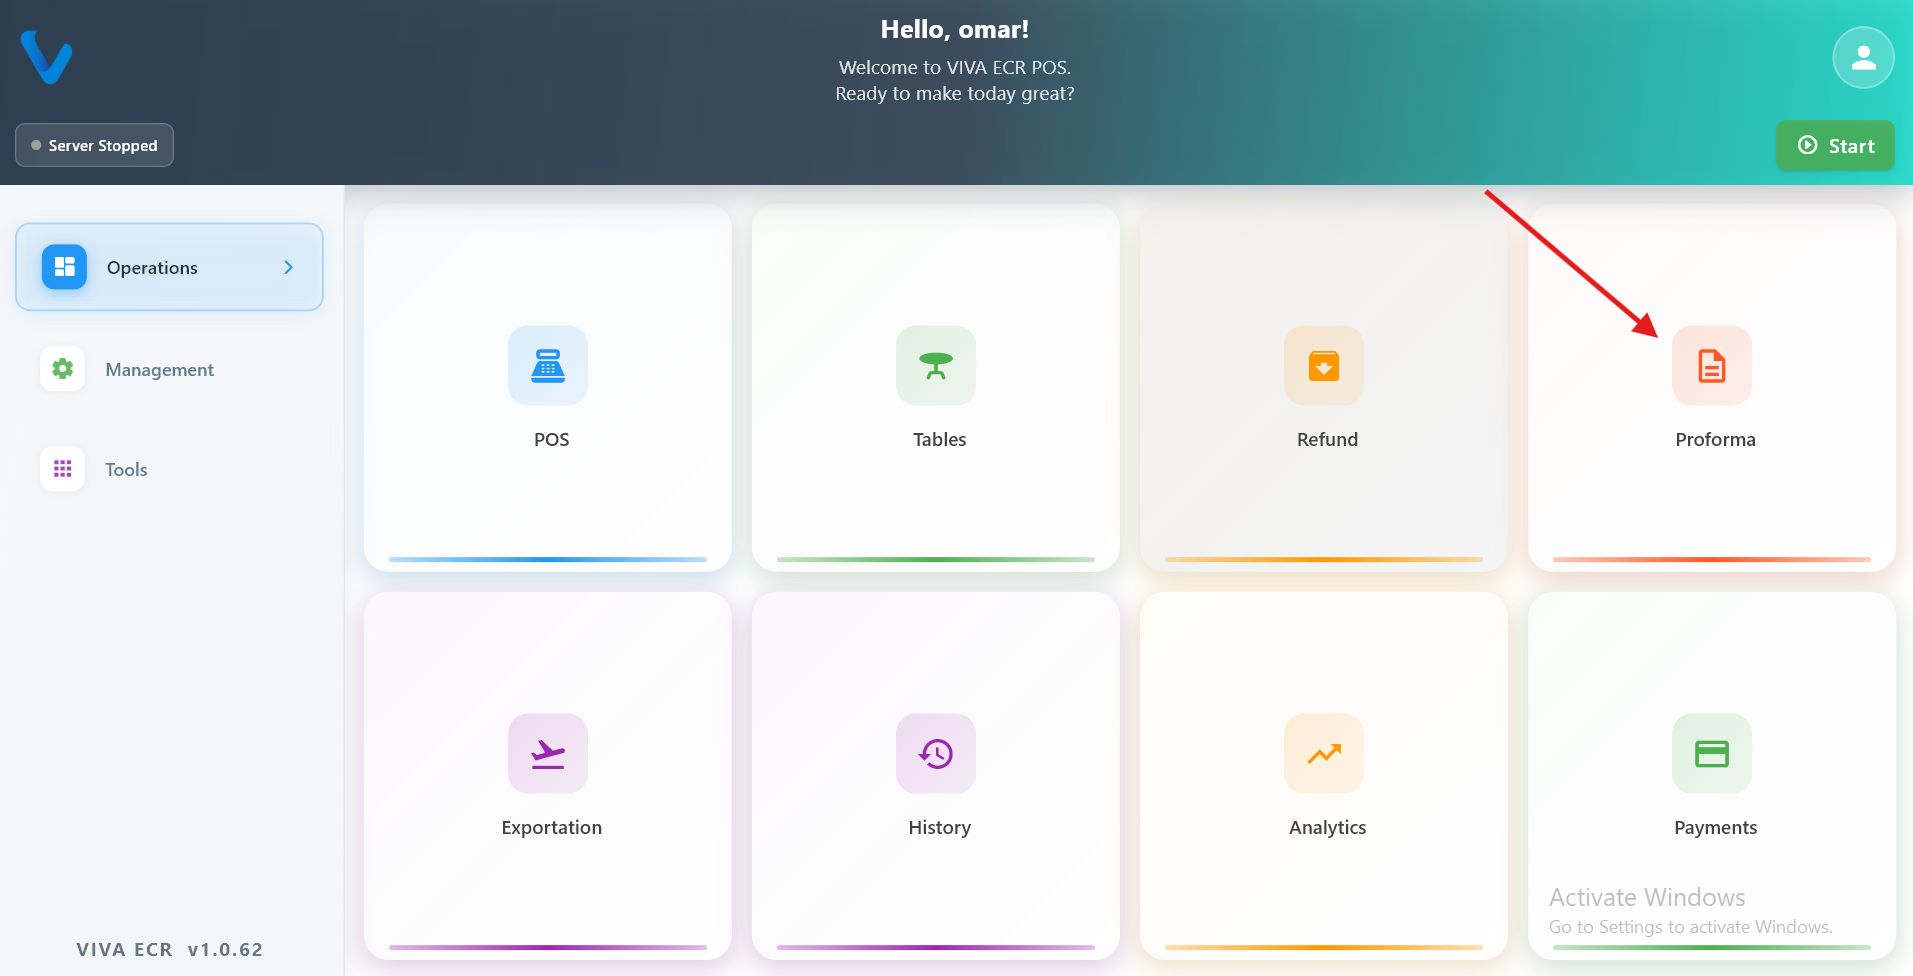
Proforma is used to prepare a temporary bill for review before the final payment is made.
Use it when:
- The customer wants to check the order first
- The bill should not be finalized yet
- You want to show the current order before payment
Typical flow:
- Build the order in POS.
- Generate the proforma.
- Show it to the customer.
- Continue or adjust the order if needed.
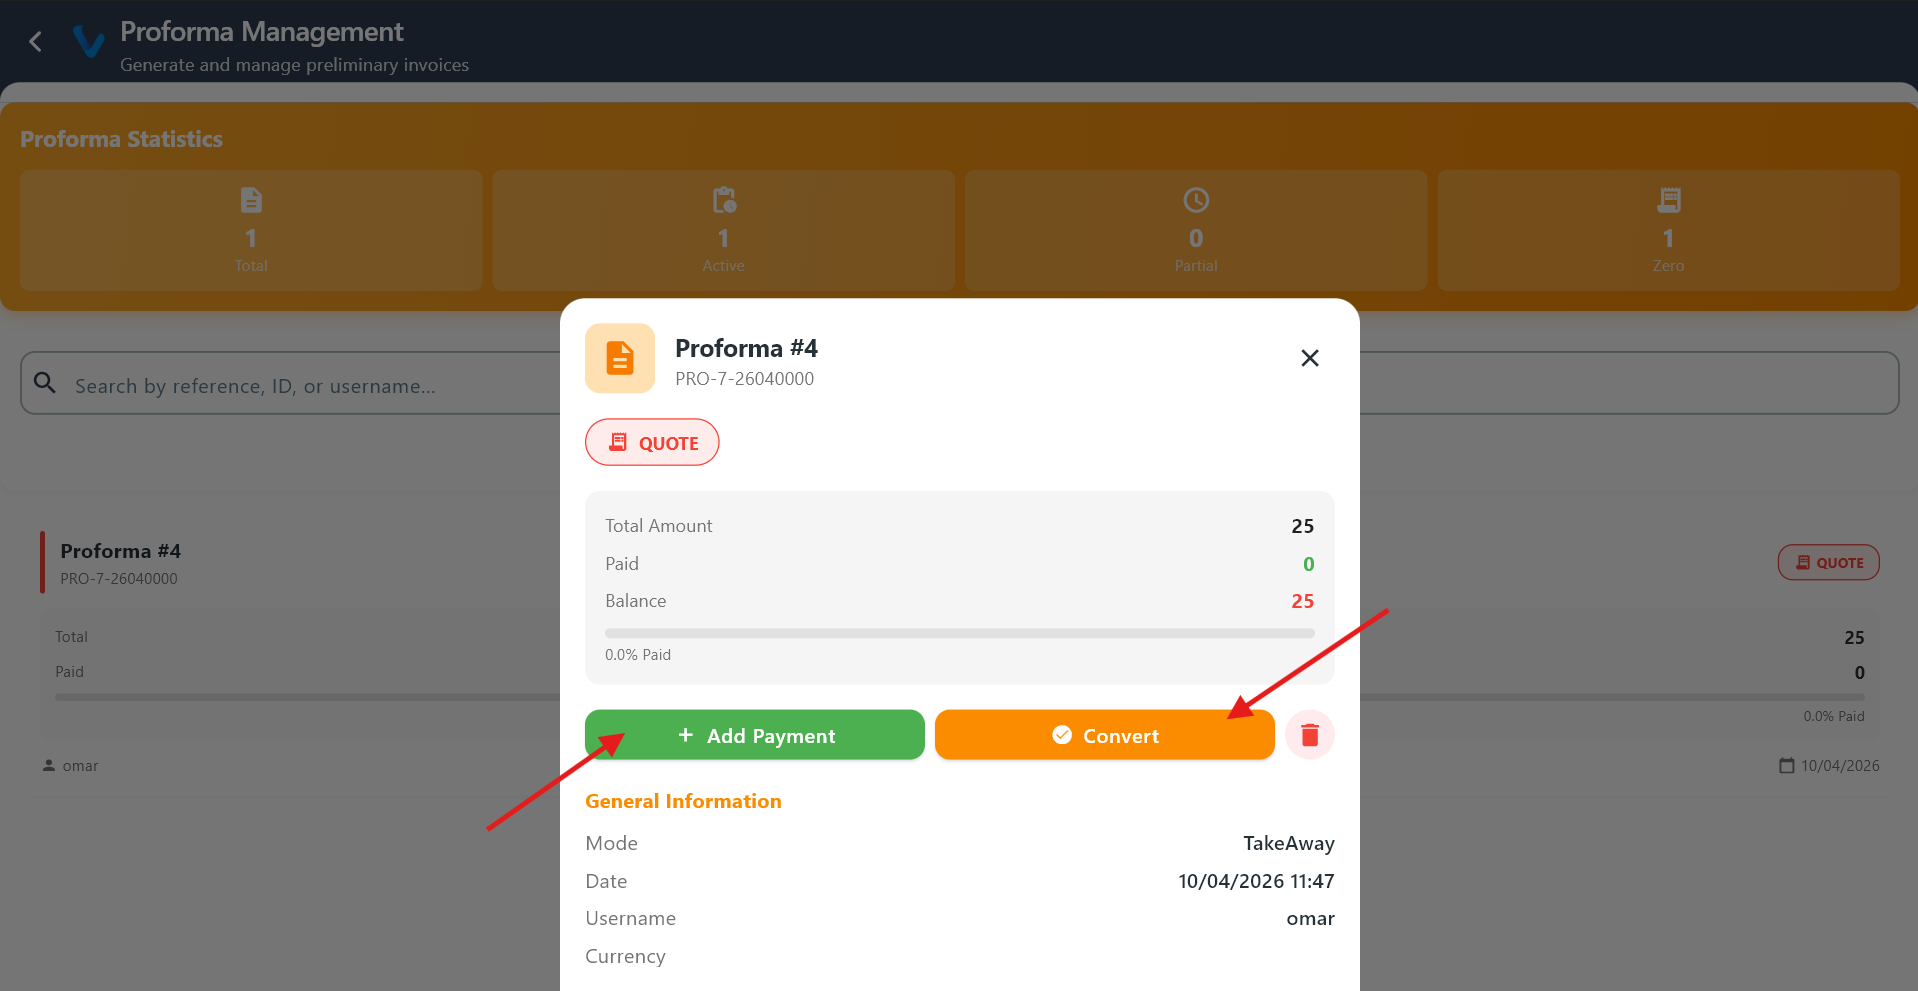 The proforma screen shows the current order as a temporary bill, not yet finalized or recorded as a transaction.
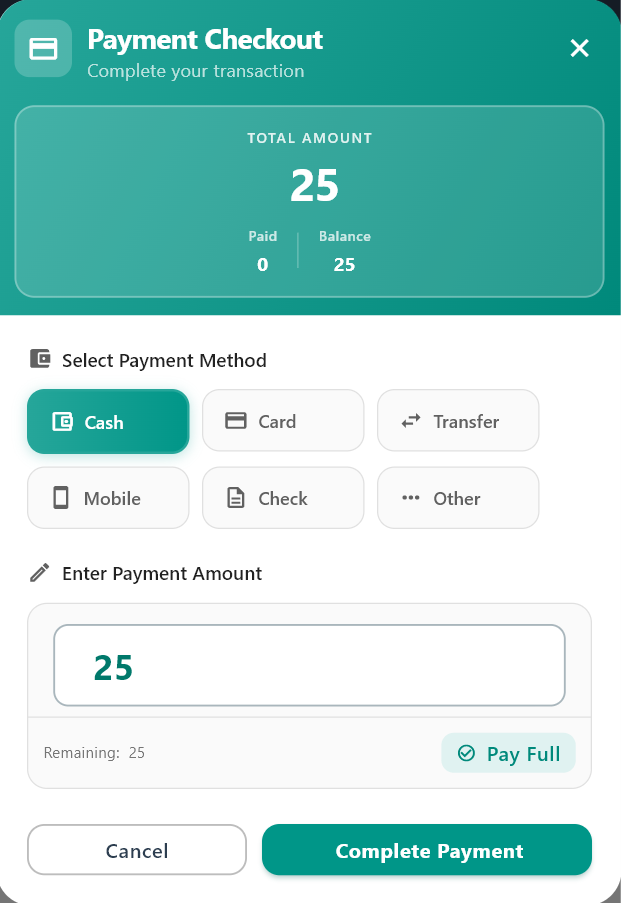 If the customer agrees, you can proceed to payment directly from the proforma.
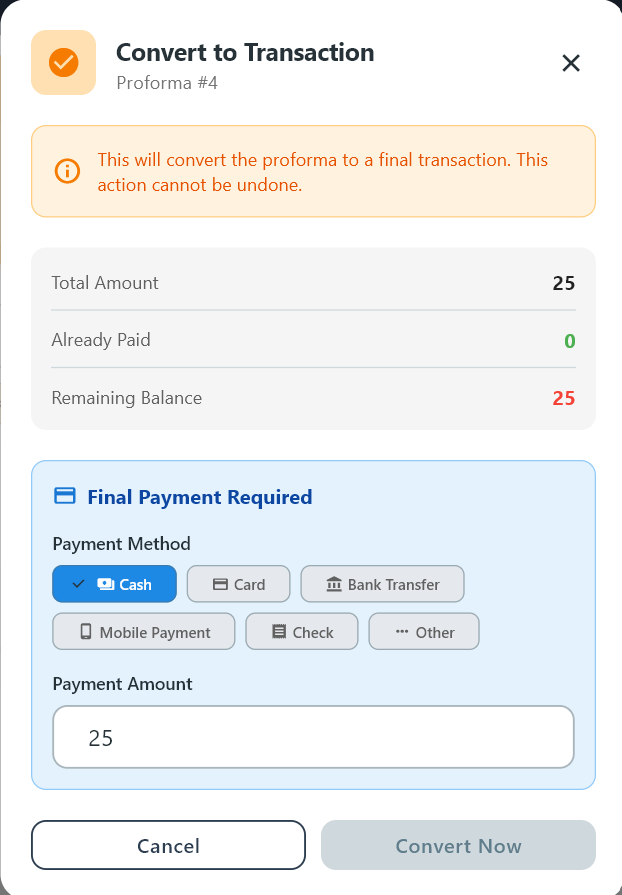 Converting the proforma finalizes the bill and records it as a completed transaction.
2.5 Exportation
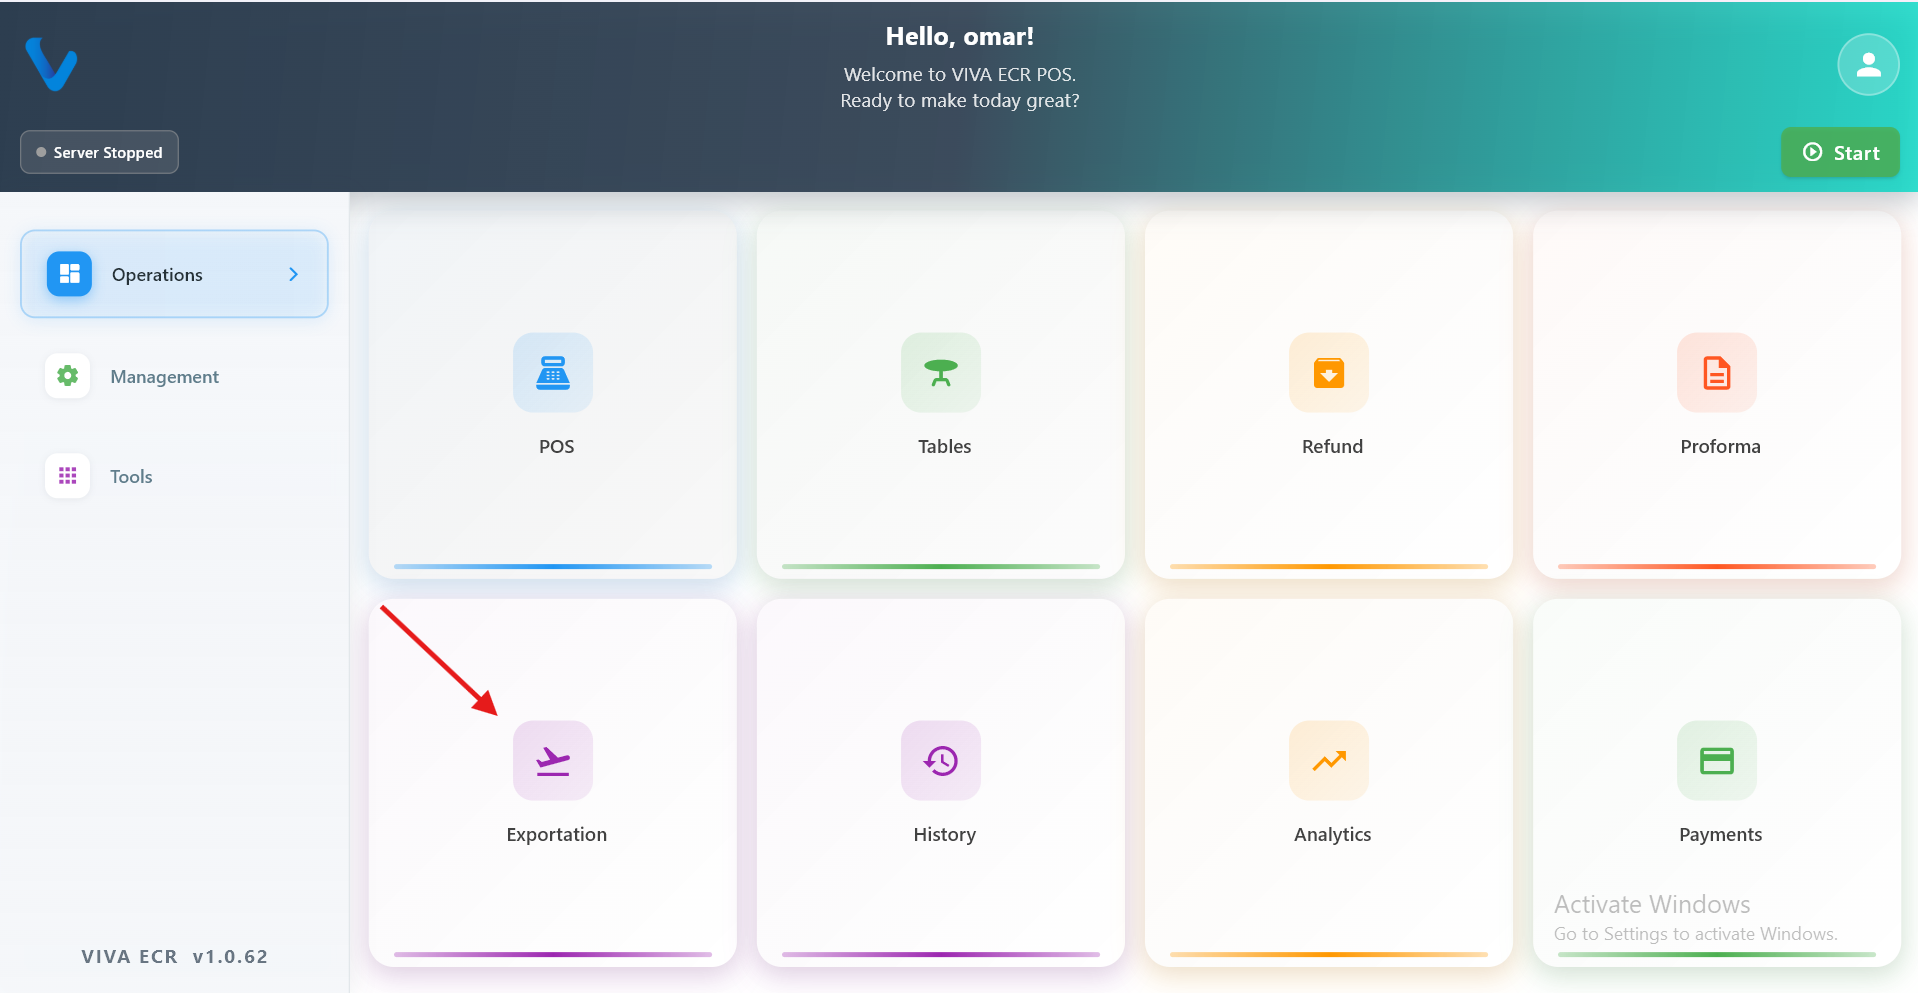
Exportation is used to send selected business data out of the app for review, sharing, or record keeping.
Use it when:
- You need a copy of data for reporting
- You want to review records outside the app
- You need to export a specific period or dataset
Typical flow:
- Open Exportation.
- Choose the data type or date range.
- Start the export.
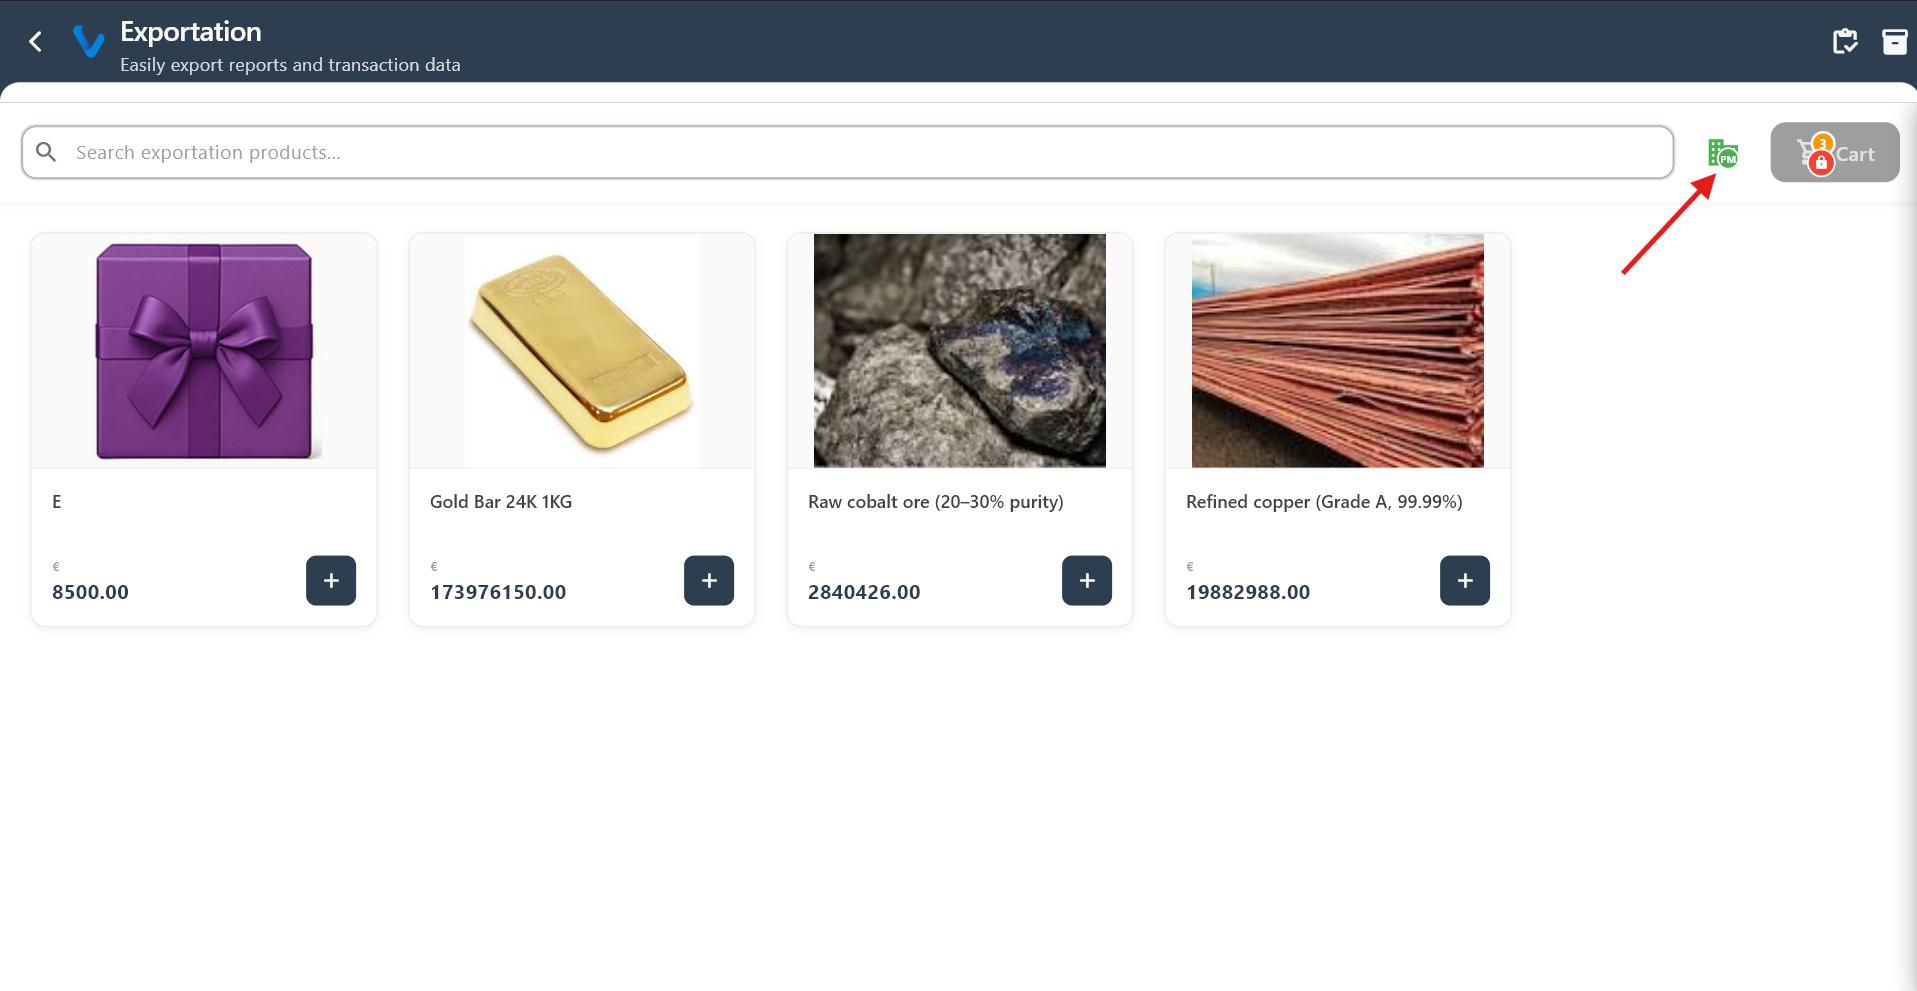
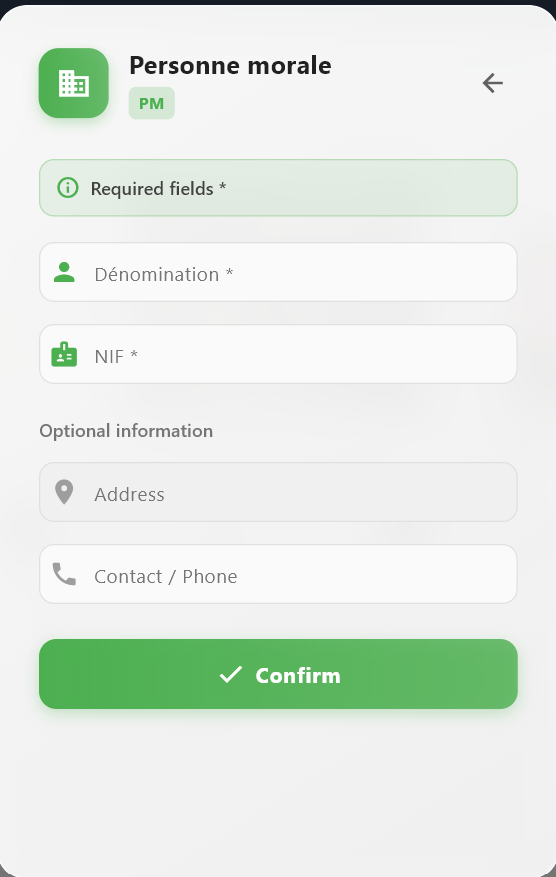
The main exportation screen where you select the type of data to export.
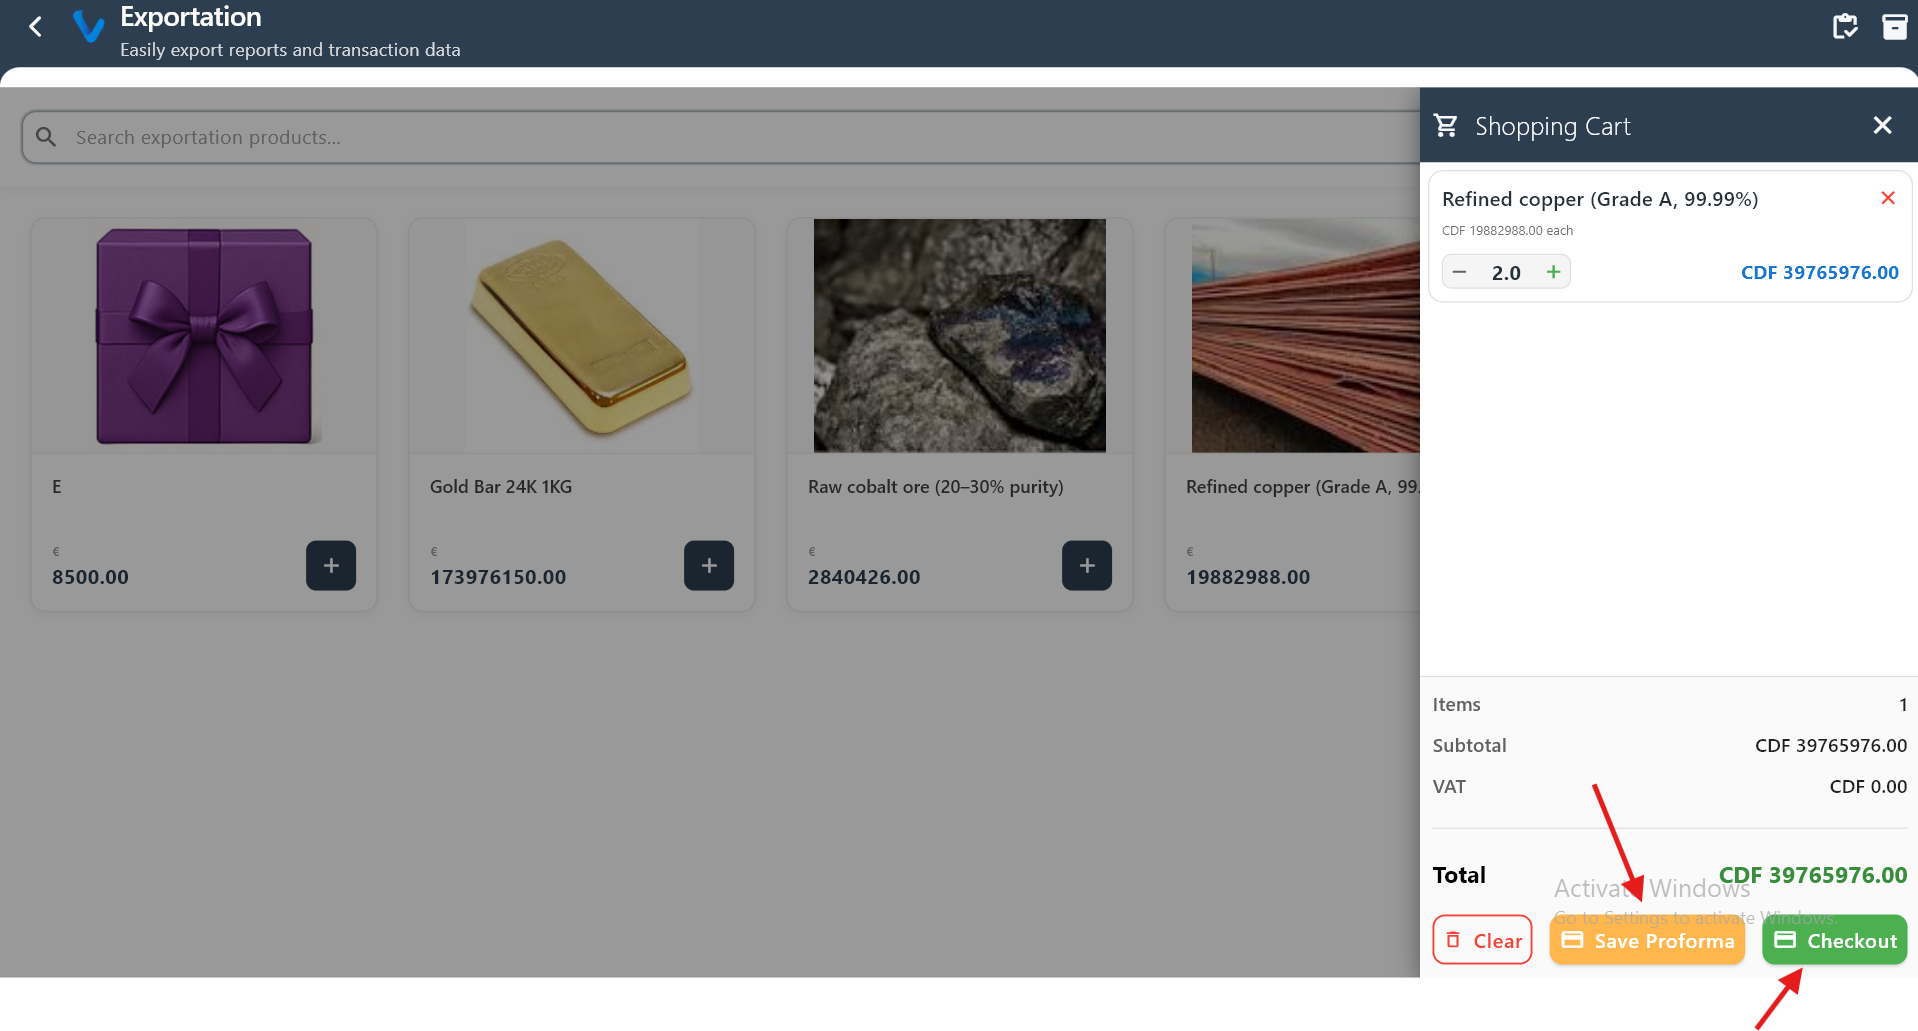
Clicking “Save Proforma” creates a proforma exportation, while “Checkout” completes the sale and generates a refund-type exportation.
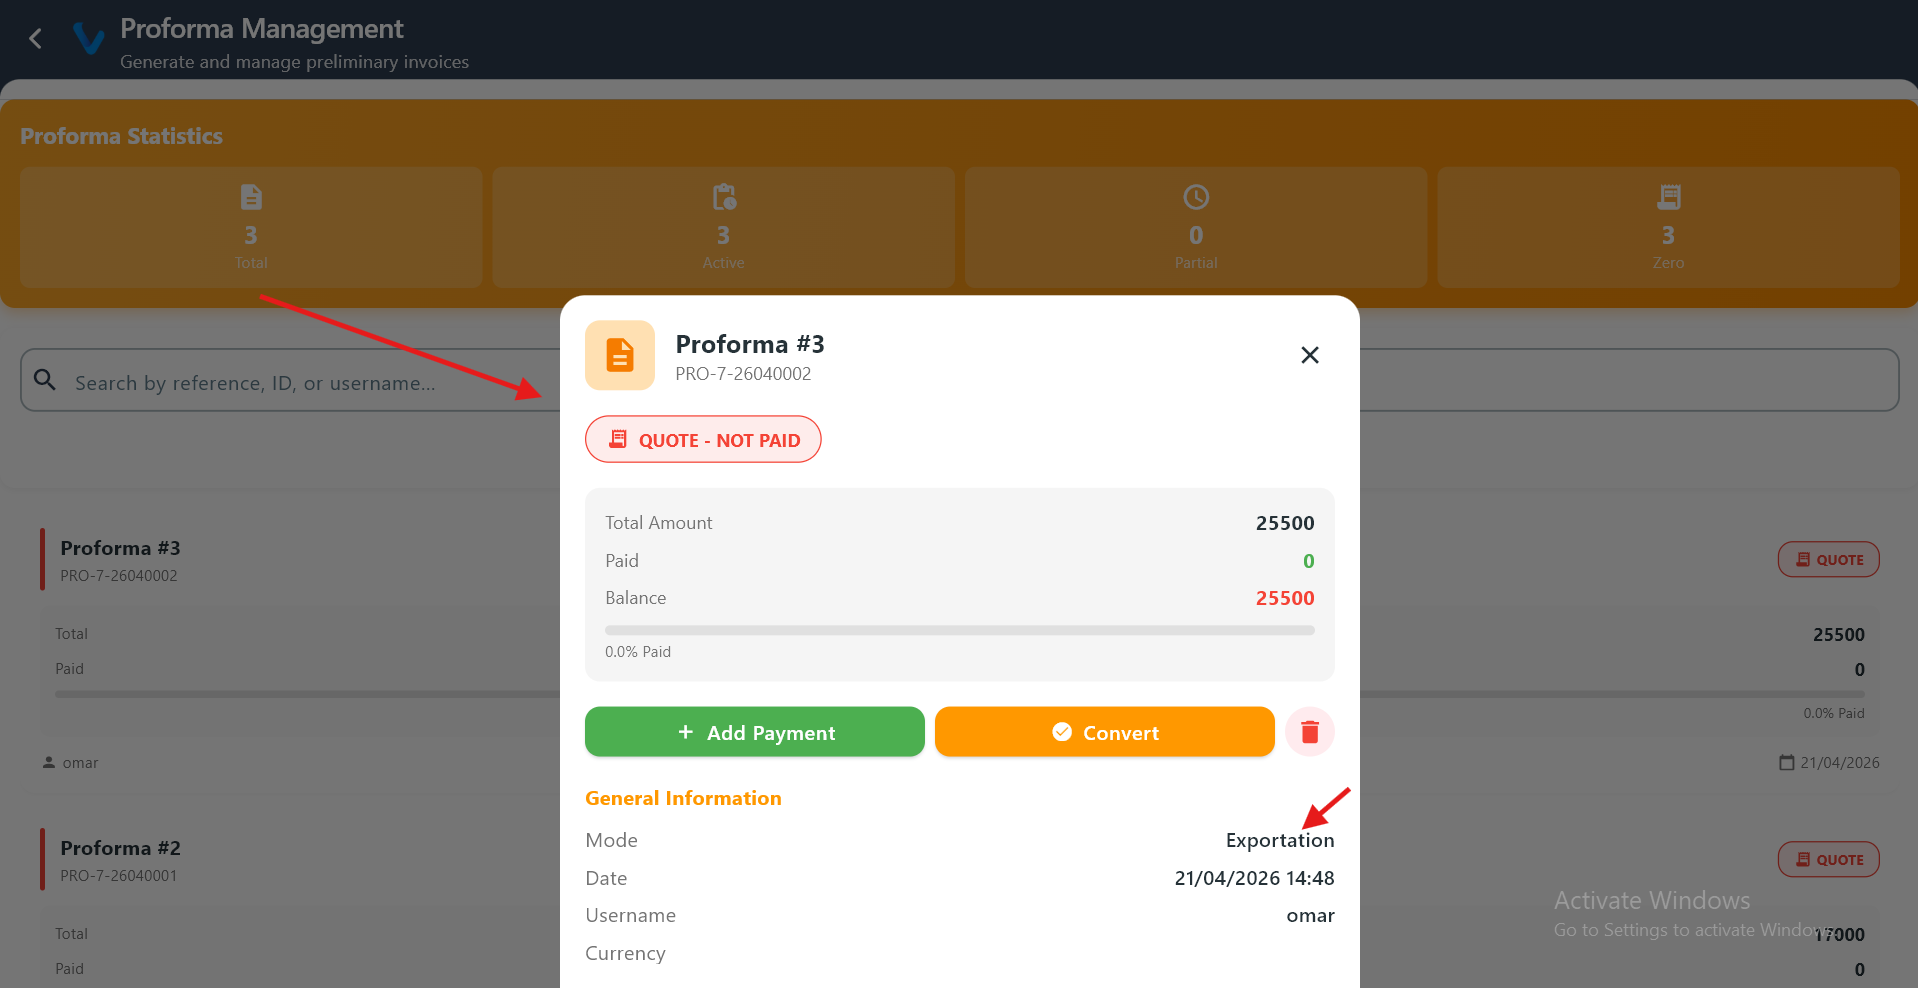
Opening a proforma shows its details and confirms it was created as an exportation-type proforma.
The app prepares and packages the selected data for export.
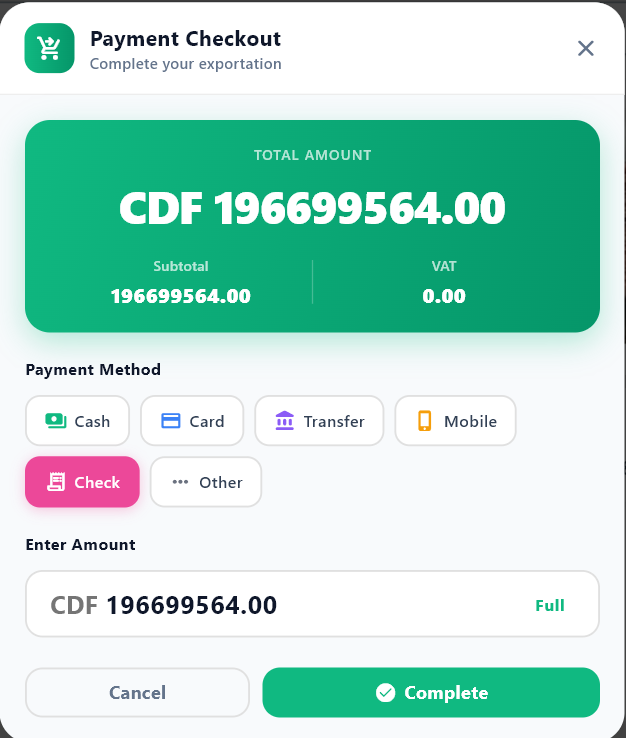
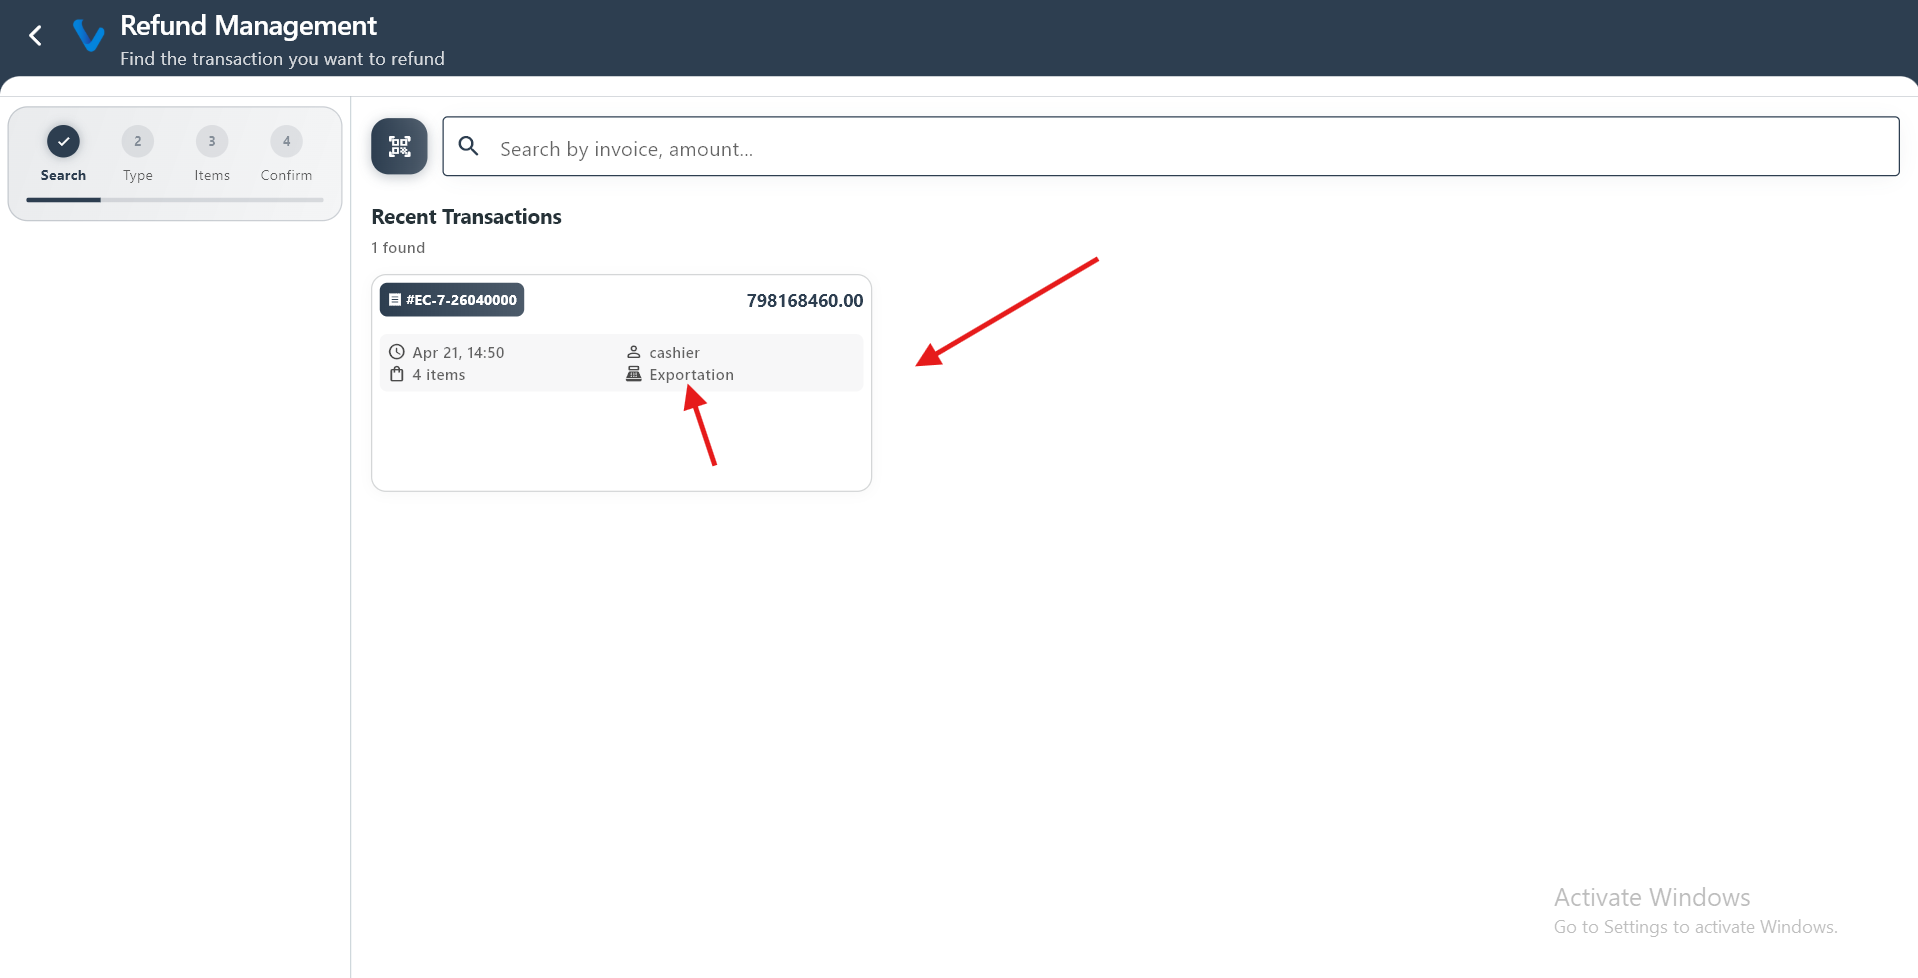
The refund screen displays transactions generated from exportation operations after completing checkout.
The app prepares and packages the selected data for export.
2.6 History
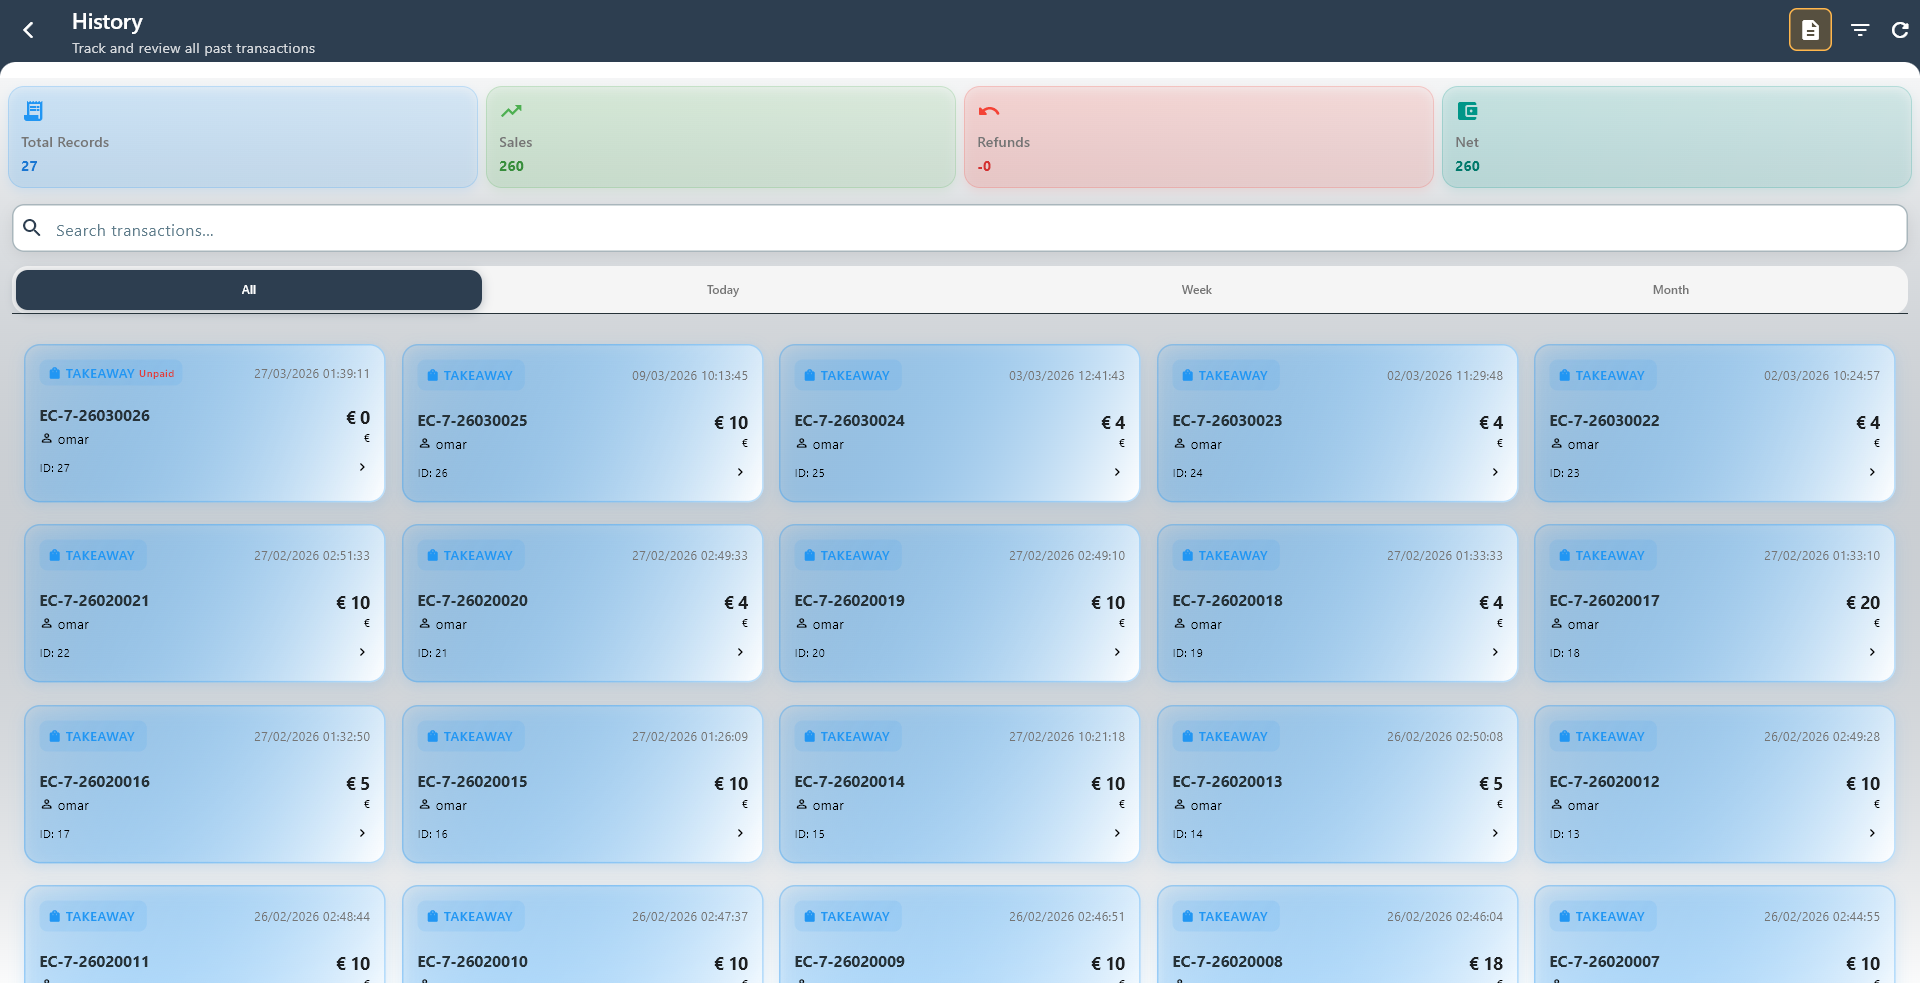
History lets you review previous transactions and quickly find what happened on a past sale.
What you can do:
- Search transactions by reference or record details
- Filter by date or time period
- Open a transaction for more information
2.7 Analytics
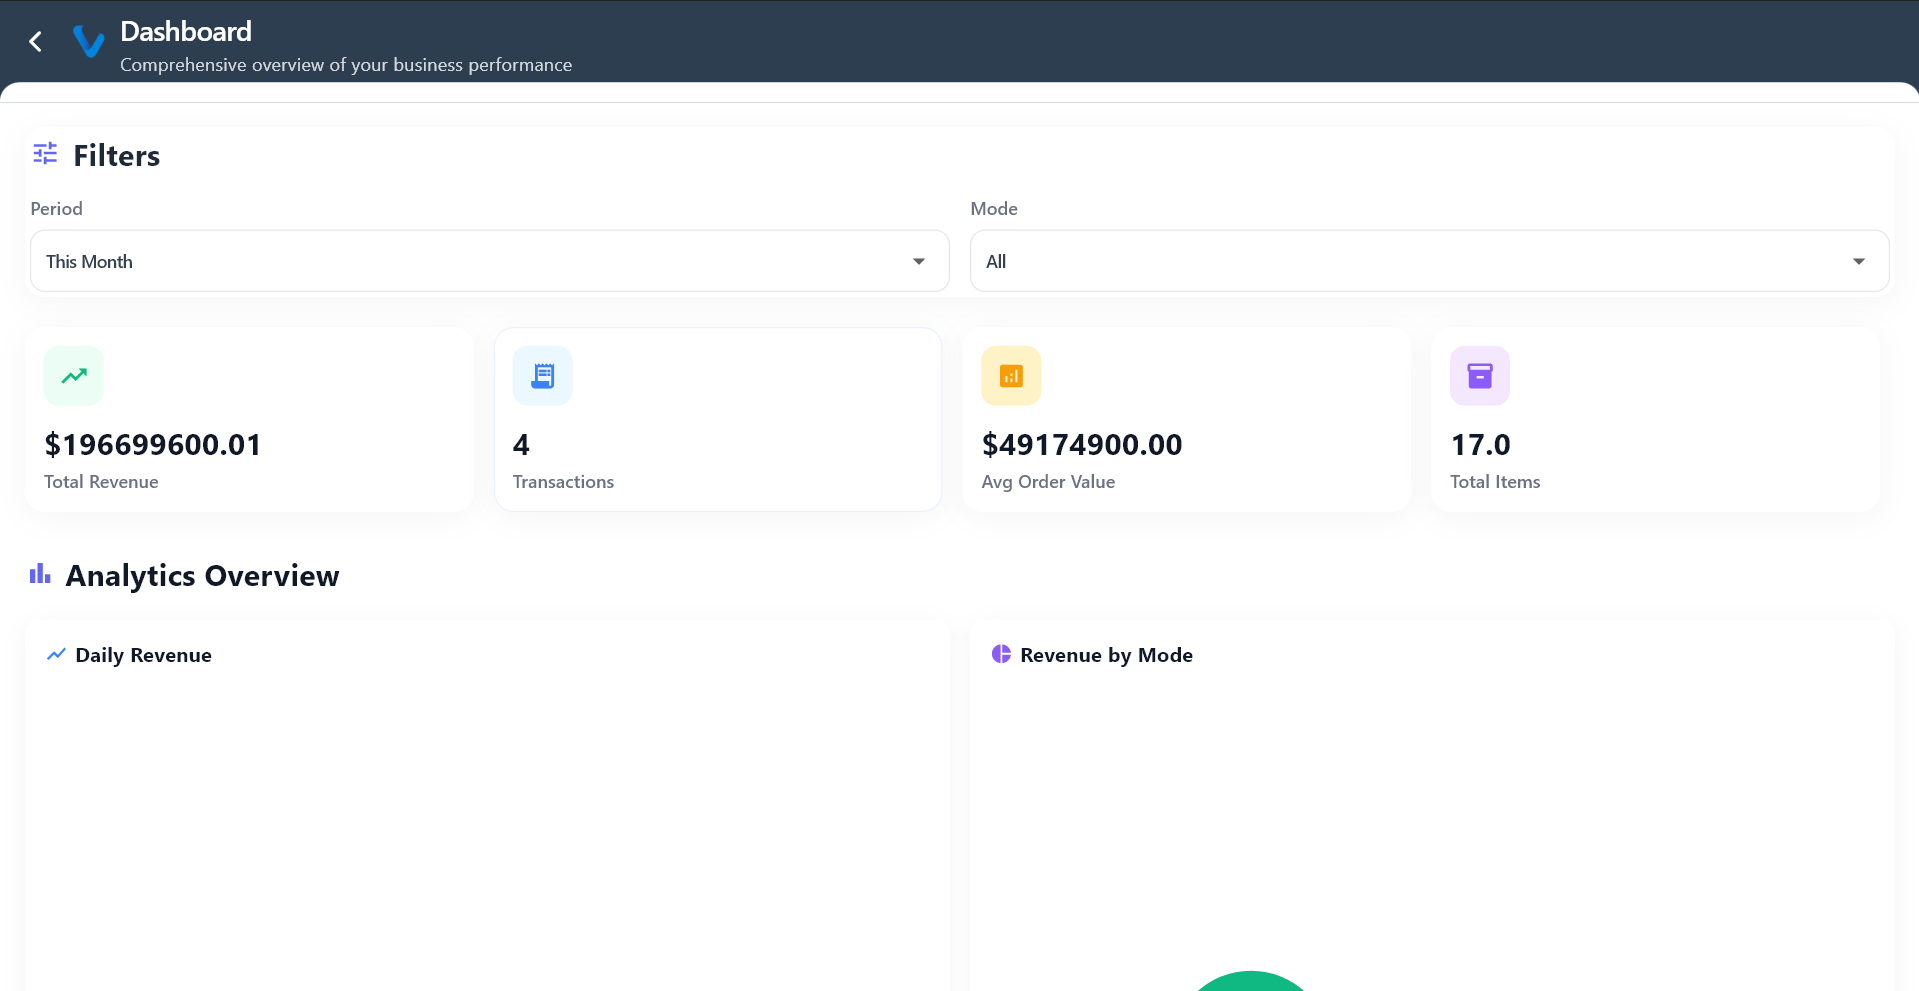
Analytics gives a quick view of how sales are performing over time.
What it helps with:
- Seeing sales movement
- Checking trends and totals
- Understanding the day’s overall activity at a glance
2.8 Payments
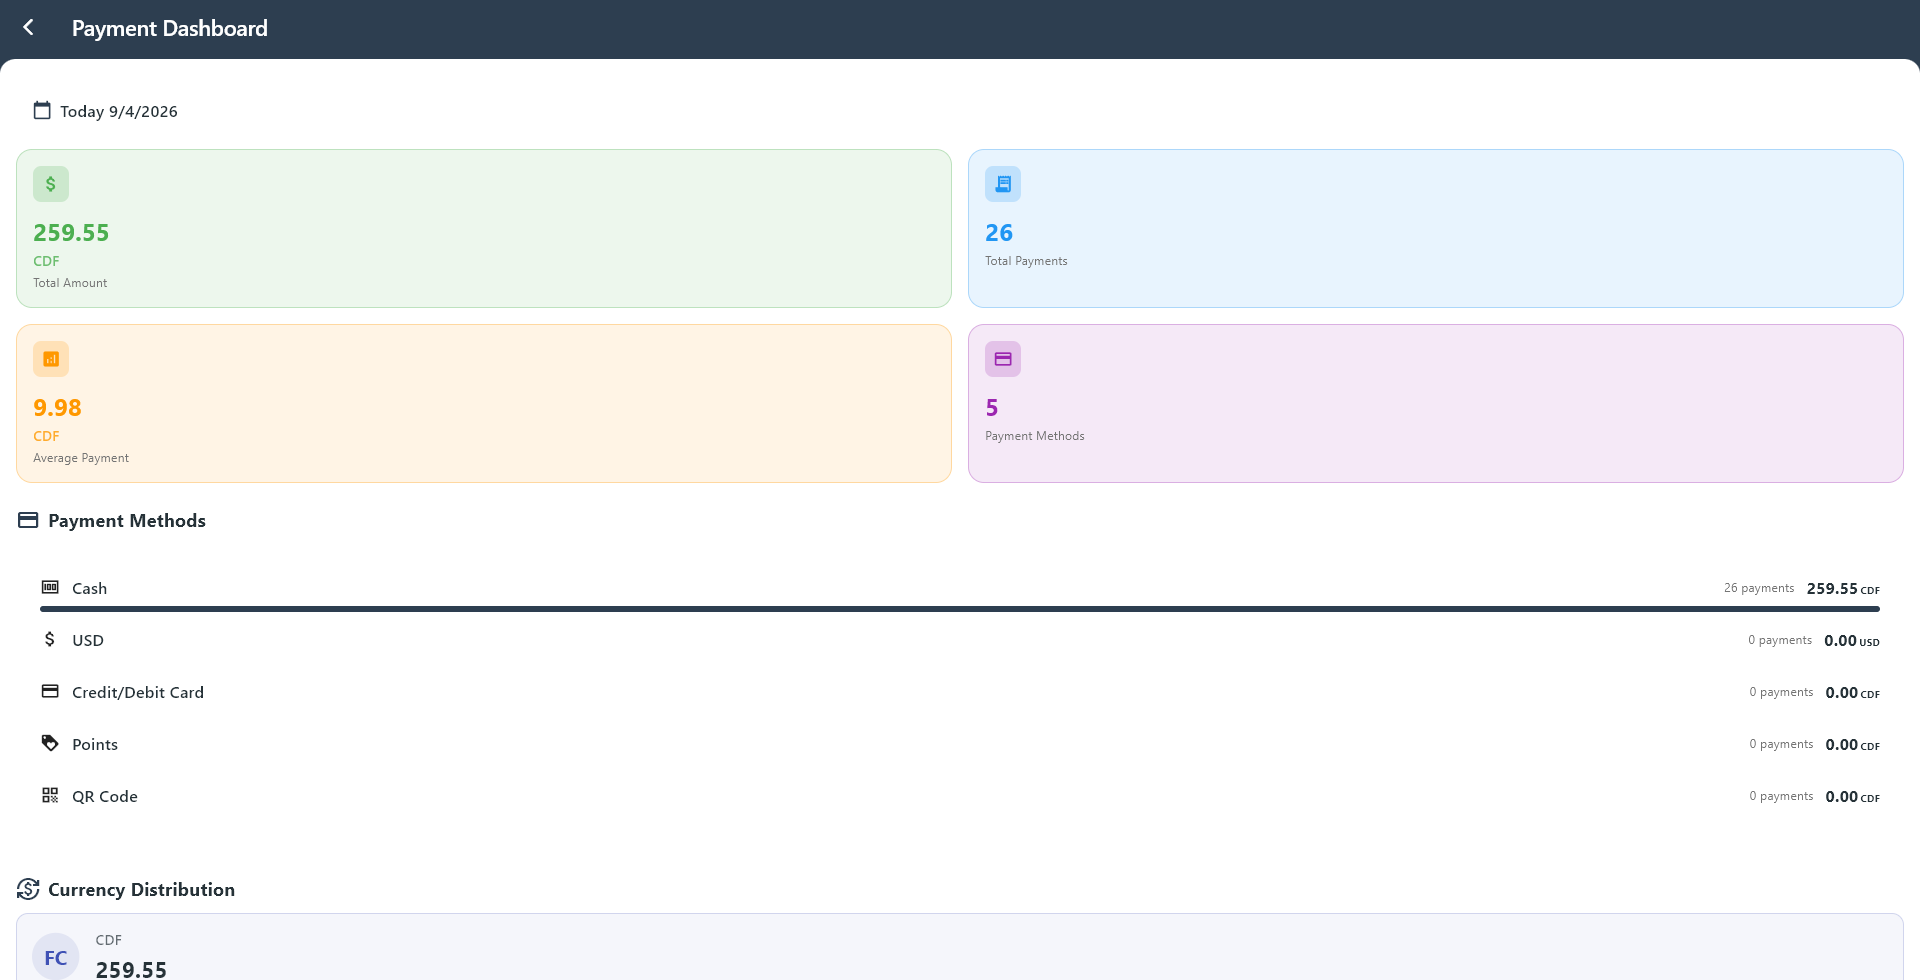
Payments shows payment activity and how sales were paid.
What you can do:
- Review payment totals
- See which payment methods were used
- Check the distribution of currencies